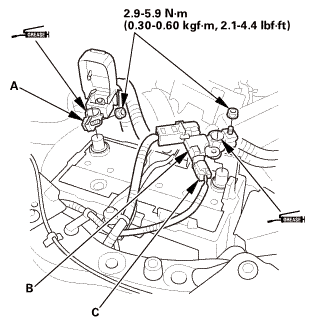
Make sure the ignition switch is in LOCK (0), or the vehicle ignition in the OFF mode.
2.
Disconnect and isolate the negative cable with the battery sensor (A) from the battery.
NOTE:
Always disconnect the negative side first.
To protect the battery sensor connector (B) from damage, do not hold it when removing the negative terminal.
Do not disconnect the battery sensor from the negative terminal (C).
3.
Disconnect the positive cable (D) from the battery.
Vehicle Lift
1.
Raise the vehicle on a lift, and make sure it is securely supported.
Drive Belt
vnm
1.
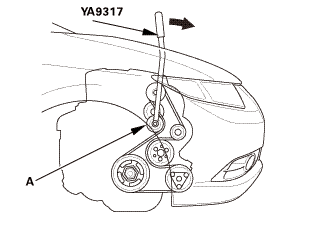
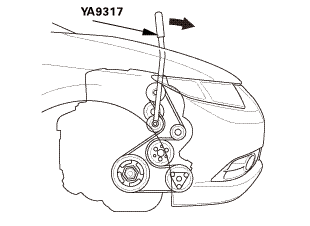
Move the auto-tensioner (A) using the belt tension release tool in the direction of the arrow to relieve tension from the drive belt, then remove the drive belt.
Idler Pulley Base Assembly
1.
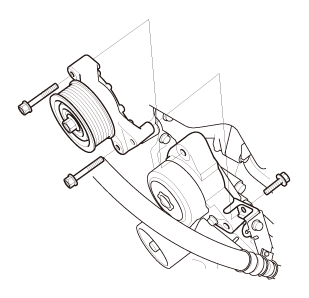
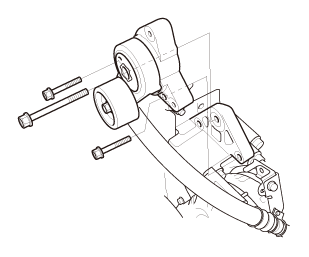
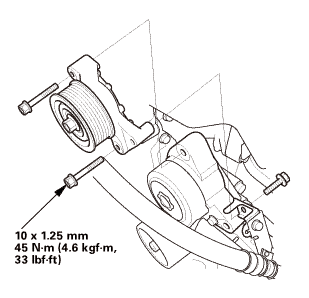
Remove the idler pulley base.
Auto-Tensioner Assembly
1.
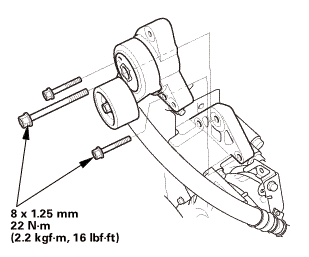
Remove the auto-tensioner.
Front Grille Cover
1.
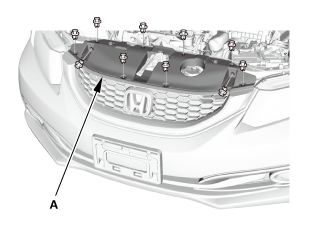
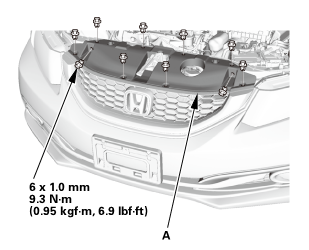
Remove the front grille cover (A).
2.
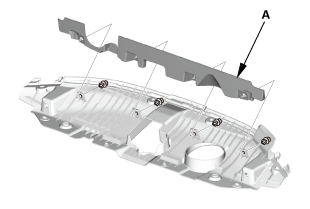
If necessary, remove the front bumper upper duct (A).
Bulkhead - Removal
1.
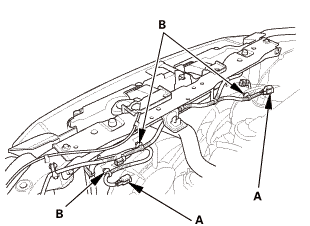
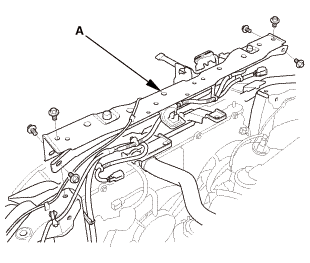
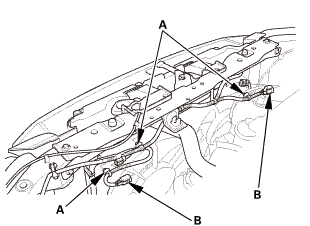
Disconnect the connectors (A).
2.
Remove the harness clamps (B).
3.
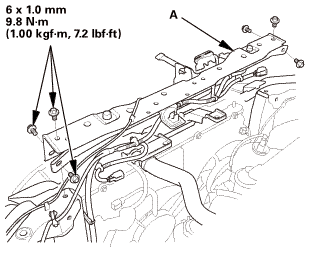
Remove the bulkhead (A).
A/C Condenser Fan Shroud Assembly
1.
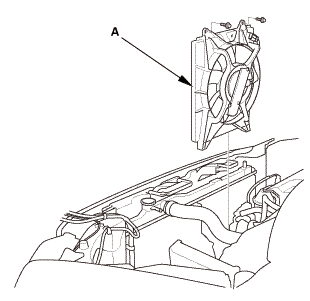
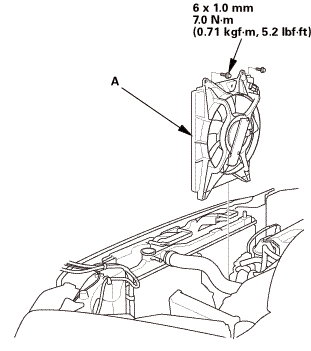
Remove the A/C condenser fan shroud assembly (A).
Alternator
1.
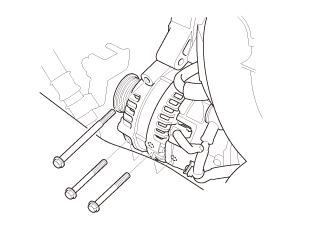
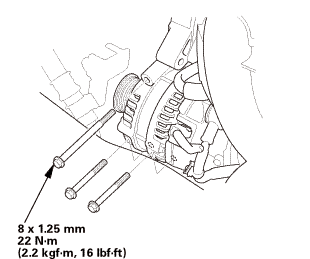
Remove the three bolts securing the alternator.
2.
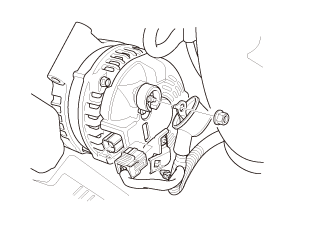
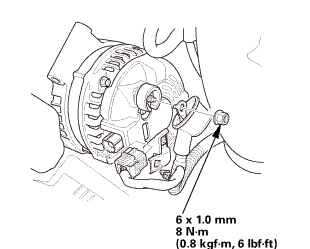
Disconnect the connector and the cable.
3.
Remove the alternator.
Alternator
1.
Connect the connector and the cable.
2.
Install the alternator.
A/C Condenser Fan Shroud Assembly
1.
Install the A/C condenser fan shroud assembly (A).
Bulkhead - Installation
1.
Install the bulkhead (A).
2.
Install the harness clamps (A).
3.
Connect the connectors (B).
Front Grille Cover
1.
Install the front bumper upper duct (A).
2.
Install the front grille cover (A).
Auto-Tensioner Assembly
1.
Install the auto-tensioner.
Idler Pulley Base Assembly
1.
Install the idler pulley base.
Drive Belt
vnm
1.
Install the drive belt.
Battery Terminal - Reconnection
NOTE: If the battery performs abnormally, test the battery.
1.
Clean the battery terminals.
2.
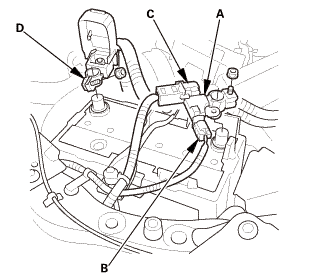
Connect the positive cable (A) to the battery.
NOTE: Always connect the positive side first.
3.
Connect the negative cable and the battery sensor (B) to the battery.
NOTE: To protect the battery sensor connector (C) from damage, do not hold it when installing the negative terminal.
4.
Apply multipurpose grease to the terminals to prevent corrosion.
?
Test yourself
A quick Honda Civic quiz: every answer comes with an explanation and a link to the manual page.


 vnm

 vnm