Electrical
Alternator Overhaul (K24Z7)
Tightening torque found on this page
 View
- Alternator Exploded View
Exploded View
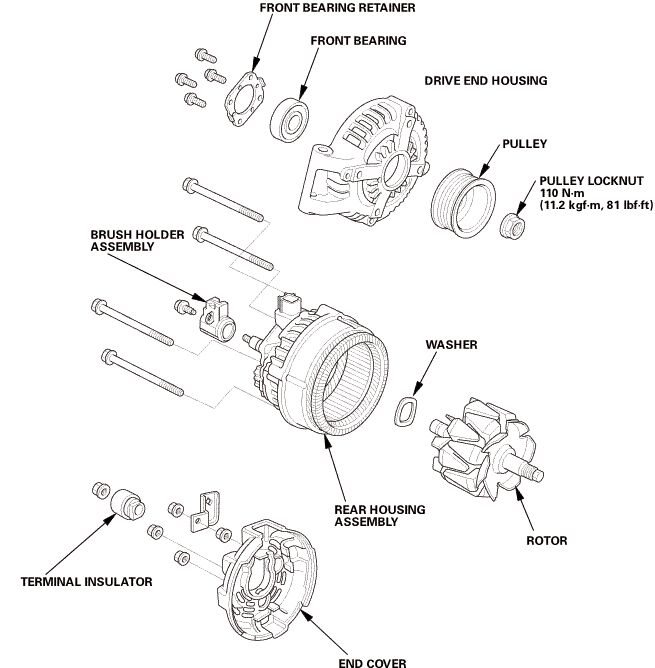 frontsunhousinglocknuy.-nummholderassemblvrotorsun
 Disassembly
NOTE: Refer to the Exploded View if needed during this procedure.
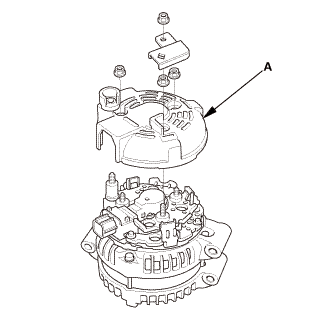
- Alternator End Cover
 |
|
1. |
Remove the end cover (A). |
|
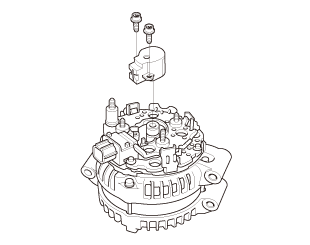
- Alternator Brush Holder
 |
|
1. |
Remove the brush holder assembly. |
|
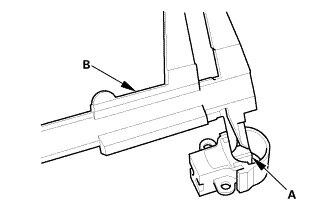
- Alternator Brush - Inspection
|
1. |
Measure the length of both brushes (A) with a vernier caliper (B). |
|
If either brush is shorter than the service limit, replace the brush holder assembly. |
|
Alternator Brush Length |
Standard (New): |
10.5 mm (0.41 in) |
Service Limit: |
1.5 mm (0.06 in) |
|
|
- Alternator Rear Housing Assembly
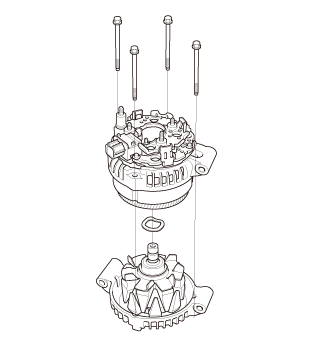 |
|
1. |
Remove the rear housing assembly. |
|
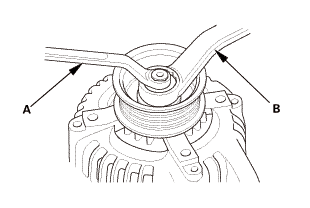
- Alternator Pulley
 |
|
1. |
If the front bearing needs replacing, remove the pulley locknut with a 10 mm wrench (A) and a 22 mm wrench (B). If necessary, use an impact wrench. |
|
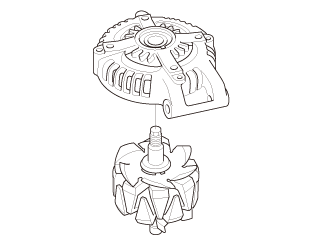
- Alternator Rotor
 |
|
1. |
Remove the drive-end housing. |
|
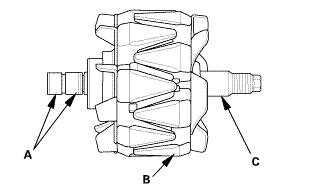
- Alternator Rotor Slip Ring - Test
 |
|
1. |
Measure the resistance between the slip rings (A). |
|
If the resistance is not within the standard, replace the rotor assembly. |
|
Coil (rotor) resistance |
Standard: |
3.4-3.8 Ω at 68 °F (20 °C) |
|
|
|
2. |
Check for continuity between each slip ring (A) and the rotor (B) and the rotor shaft (C). |
|
If there is continuity, replace the rotor assembly. |
|
- Front Alternator Bearing
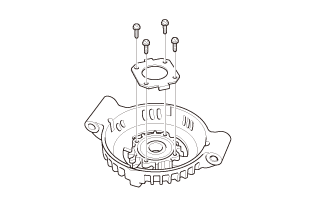 |
|
1. |
Remove the front bearing retainer. |
|
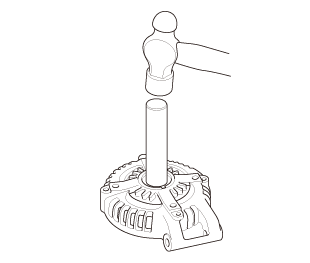 |
|
2. |
Remove the front bearing. |
|
 Reassembly
NOTE: Refer to the Exploded View if needed during this procedure.
- Front Alternator Bearing
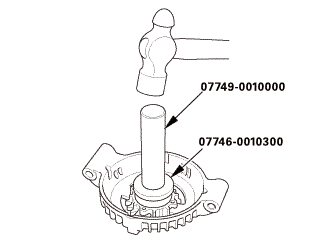 o7nnnmo3on
|
|
1. |
Install a new front bearing in the driver-end housing with a hammer, the driver handle, 15 x 135L, and the bearing driver attachment, 42 x 47 mm. |
|
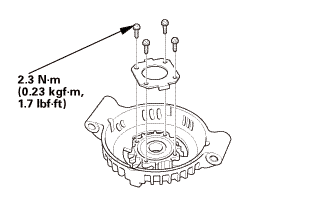 |
|
2. |
Install the front bearing retainer. |
|
- Alternator Rotor
|
|
1. |
Install the drive-end housing. |
|
- Alternator Pulley
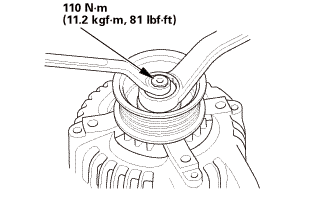 non-m(u.2lhf!
|
|
1. |
Install the pulley on the rotor and install the locknut, then torque the locknut to 110 N·m. |
|
- Alternator Rear Housing Assembly
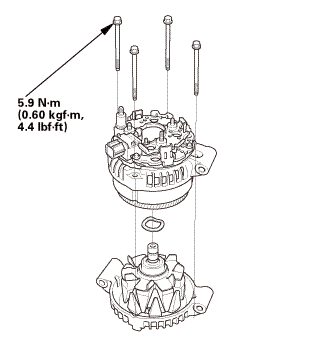 |
|
1. |
Install the rear housing assembly. |
|
- Alternator Brush Holder
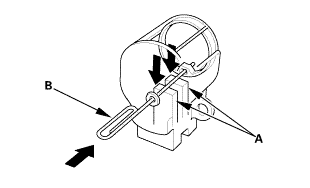 |
|
1. |
Push the brushes (A) in, then insert a pin or drill bit (B) (about 1.6 mm (1/16 in) diameter) to hold them in place. |
|
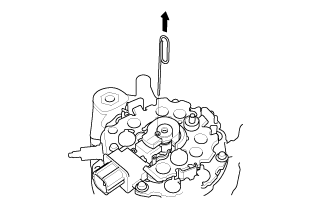 |
|
2. |
Install the brush holder, and pull out the pin. |
|
- Alternator End Cover
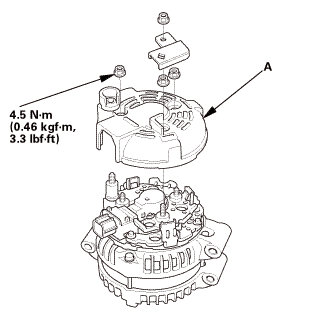 |
|
1. |
Install the end cover (A). |
|
- Alternator After Install - Check
|
|
1. |
After assembling the alternator, turn the pulley by hand to make sure the rotor turns smoothly and without noise. |
|
?
Test yourself
A quick Honda Civic quiz: every answer comes with an explanation and a link to the manual page.
Was this page helpful?