NOTE: Refer to the Exploded View as needed during the following procedures.
Vehicle Lift
1.
Raise the vehicle on a lift, and make sure it is securely supported.
Rear Wheel
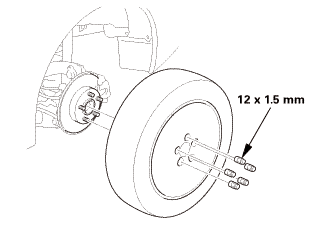
1.
Remove the rear wheel.
Rear Brake Caliper - Detach
1.
Release the parking brake lever fully.
2.
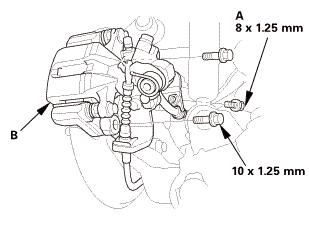
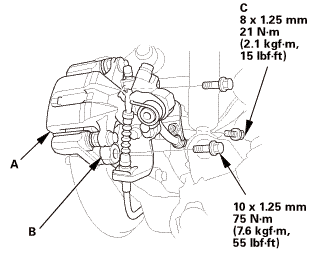
Remove the brake hose mounting bolt (A).
3.
Remove the caliper assembly (B).
NOTE:
To prevent damage to the caliper assembly or brake hose, use a short piece of wire to hang the caliper assembly from the undercarriage.
Do not twist the brake hose and the parking brake cable excessively.
Rear Brake Disc
1.
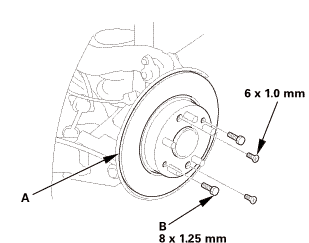
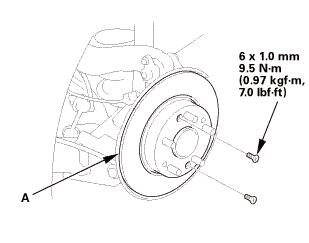
Remove the brake disc (A).
NOTE: If the brake disc is stuck to the hub bearing unit, thread two 8 x 1.25 mm bolts (B) into the brake disc to push it away from the hub bearing unit. Turn each bolt 90 degrees at a time to prevent the brake disc from binding.
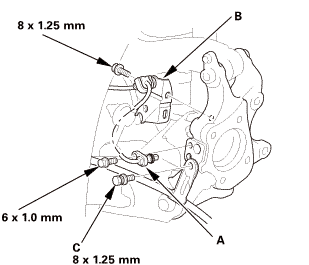
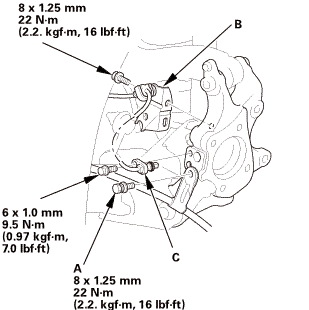
Install the parking brake cable mounting bolt (A).
2.
Install the brake hose mounting bracket (B).
3.
Install the wheel speed sensor (C).
Rear Splash Guard
1.
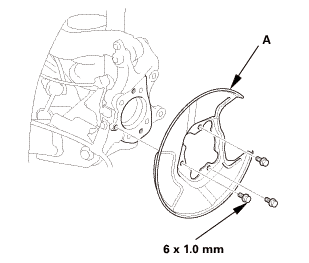
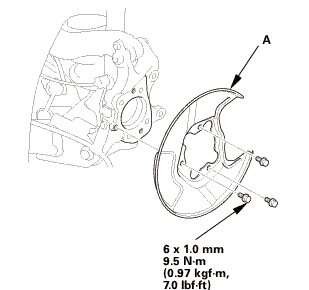
Install the splash guard (A).
Rear Hub Bearing Unit
1.
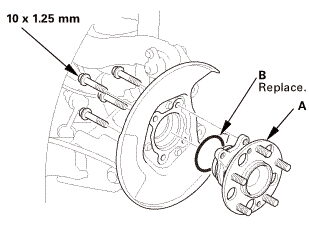
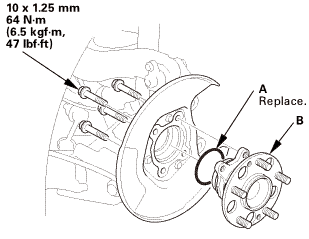
For some models: Install the new O-ring (A).
2.
Install the hub bearing unit (B).
Rear Brake Disc
1.
Install the brake disc (A).
NOTE: Before installing the brake disc, clean the mating surfaces between the hub bearing unit and the inside of the brake disc.
Rear Brake Caliper - Reattach
1.
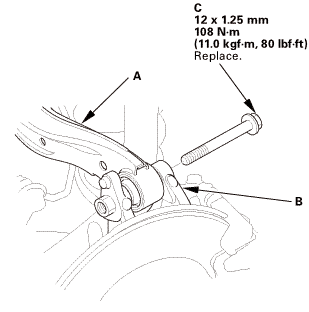
Install the caliper assembly (A).
NOTE: Make sure the washers (B) are in position.
2.
Install the brake hose mounting bolt (C).
Rear Wheel
15mmumum
1.
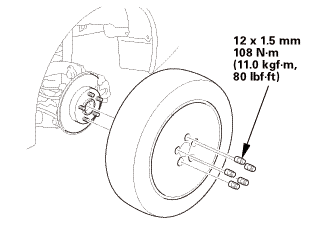
Install the rear wheel.
NOTE: Before installing the wheel, clean the mating surfaces between the brake disc or the brake drum and the inside of the wheel.
Pre-Alignment Checks
For proper inspection and adjustment of the wheel alignment, do these checks:
1.
Release the parking brake to avoid an incorrect measurement.
2.
Make sure the suspension is not modified.
3.
Make sure the fuel tank is full, and that the tire repair kit, the spare tire, the jack, and the tools are in place on the vehicle.
4.
Check the tire size and tire pressure according to tire information.
Camber - Inspection
Use commercially available computerized four wheel alignment equipment to measure wheel alignment (caster, camber, toe, and turning angle). Follow the equipment manufacturer's instructions.
1.
Check the camber angle.
USA and Canada models
Camber angle:
Except Si:
Front:
0 ° 00 ’±30 ’
Rear:
-0 ° 45 ’±45 ’
Si (Without 18 inch wheel):
Front:
-0 ° 04 ’±30 ’
Rear:
-0 ° 52 ’±45 ’
Si (With 18 inch wheel):
Front:
-0 ° 18 ’±30 ’
Rear:
-0 ° 45 ’±45 ’
(Maximum difference between the front right and left side: 0 ° 45 ’)
Mexico models
Camber angle:
Front:
0 ° 20 ’±30 ’
Rear:
-0 ° 22 ’±45 ’
(Maximum difference between the front right and left side: 0 ° 45 ’)
If the measurement is within specification, measure the toe-in.
If the measurement for the front camber is not within the specification, go to front camber adjustment.
If the measurement for the rear camber is not within the specification, check for bent or damaged suspension components.
Rear Toe - Inspection
Use commercially available computerized four wheel alignment equipment to measure wheel alignment (caster, camber, toe, and turning angle). Follow the equipment manufacturer's instructions.
1.
Release the parking brake to avoid an incorrect measurement.
2.
Check the toe.
Rear toe-in: 2+2-1 mm (0.08+0.08-0.04 in)
If adjustment is required, go to the rear toe adjustment.
If no adjustment is required, go to front toe inspection.
?
Test yourself
A quick Honda Civic quiz: every answer comes with an explanation and a link to the manual page.

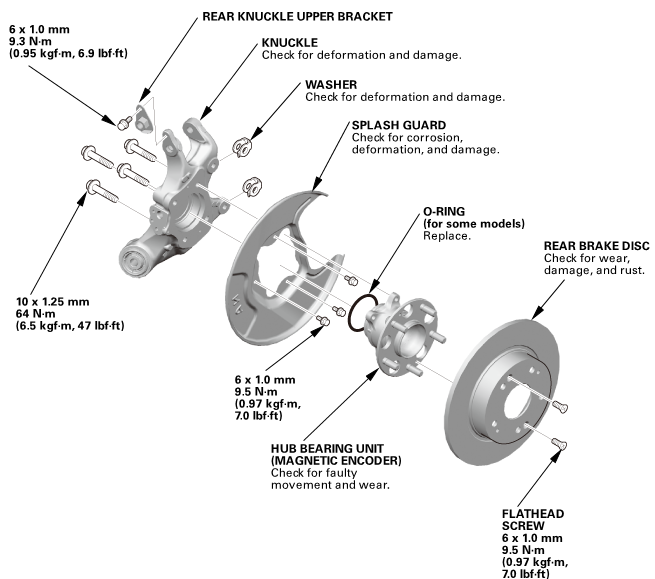 knucklemmu....lassmuandsrusuforandlarumrmconauandscnzwmm(0m.mum


 i2xi2inln
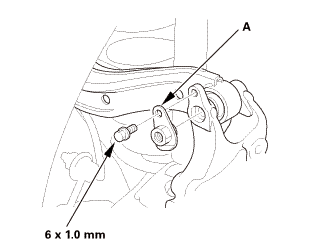
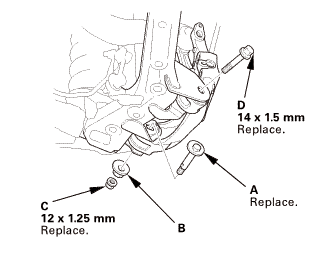

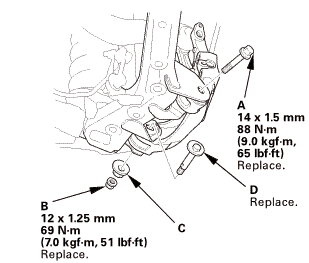 ....n-m65....5n.m(m
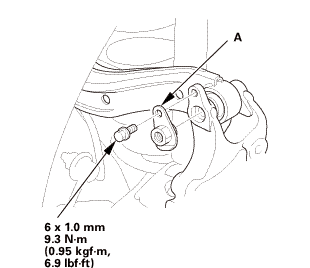
 125mmumngvum
 mmam...2:mm15
 15mmumum