Body (Interior and Exterior)
Front Seat Back Repair Procedures
In this manual: Body (Interior and Exterior)
12steps
~77min
4/5difficulty
1special tools
Done 0 of 12
Replacement
|
|
- Remove the front seat assembly. (Refer to Front Seat - "Front Seat Assembly")
- Remove the front seat outer shield cover. (Refer to Front Seat - Front Seat Outer Shield Cover)
- Remove the front seat inner shield cover. (Refer to Front Seat - Front Seat Inner Shield Cover)
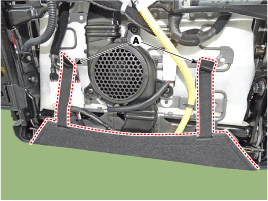
- Remove the front seat lower shield (A).
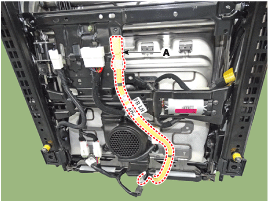
- Loosen the mounting screws and remove the airbag wiring (A).
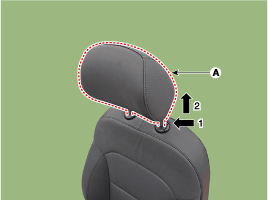
- Press the stopper pin and remove the front seat headrest (A).
- Remove the front seat back board (A).
- Separate the upper rear cover by pressing the stopper pin in the direction of the arrow.
- Remove the front seat back trim by lifting it in the direction shown.
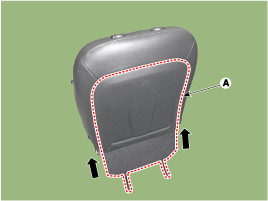
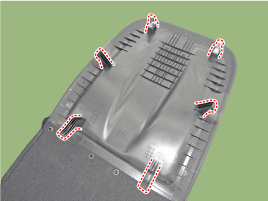
- Turn the front seat back board inside out. Then pull out the headrest guides (A) by pinching both sides of the lower part and remove them.
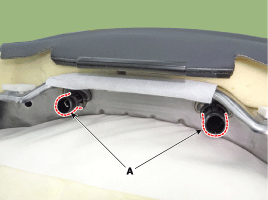
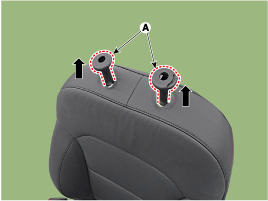
- Disconnect the front ventilation duct (A). [Upper]

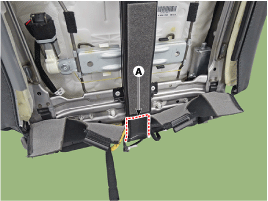
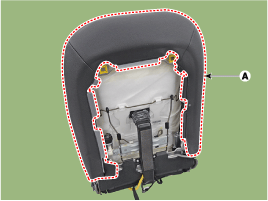
- Remove the cover (A) from the front seat back frame assembly.
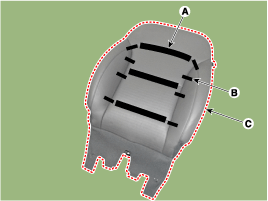
- After removing the hook-and-loop fastener (A) and ring clips (B) from the inside of the front seat back trim, remove the seat back trim (C).

- Make sure the foam wire does not come off its position.
- To install, reverse the removal procedure.

- Make sure the connectors are fully connected.
- Replace any damaged clips (or pin-type retainers).
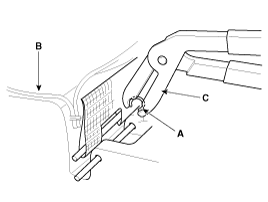
- To prevent wrinkles, make sure the cover (B) is stretched evenly before connecting the clips (A).
- Replace the ring clips with new ones using the special service tool (C) (09880-4F000).
Test yourself
A quick Hyundai Elantra AD quiz: every answer comes with an explanation and a link to the manual page.
Was this page helpful?