Body (Interior and Exterior)
Repair Procedures
In this manual: Body (Interior and Exterior)
13steps
~78min
3/5difficulty
Done 0 of 13
Replacement
[Removal]- Remove the rear pillar garnish. (Refer to Interior Trim - "Rear Pillar Trim")
- Loosen the quarter fixed glass mounting nuts.
Tightening torque: 3.9 ~ 4.4 N·m
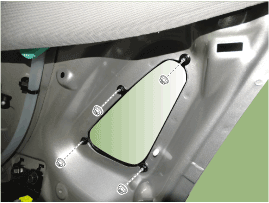
- Using a utility knife, cut out the quarter fixed glass sealant.
- Remove the side fixed glass (A).
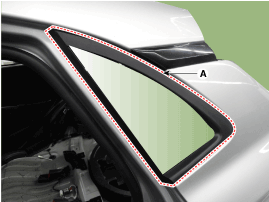
- Using a scraper, scrape off the old adhesive to a thickness of about 2 mm (0.08 in) on the bonding surface along the entire quarter fixed glass flange.
- Clean the bonding surface of the body with a sponge soaked in alcohol. After cleaning, keep the surface away from oil, grease and water.
- Using a sponge, apply a thin coat of glass primer to the edge of the quarter fixed glass, then lightly wipe it with gauze or cheesecloth.
- Using a sponge, apply a thin coat of body primer to the original adhesive remaining around the flange. Allow the body primer to dry for at least 10 minutes.
- Load the adhesive into the cartridge without air pockets to ensure continuous delivery. Place the cartridge in the sealant gun and apply a bead of sealant around the edge of the quarter fixed glass (A), as shown. Apply the adhesive within 30 minutes after loading.
Tightening torque: 3.9 ~ 4.4 N·m
- Install the quarter fixed glass.
- Allow the adhesive to set for at least one hour, then spray water on the quarter fixed glass to check for leaks. Mark any leak locations, allow the quarter fixed glass to dry, then seal with sealant. Let the vehicle stand for at least four hours after sealing.
- Install all remaining removed parts.
- Install the rear pillar garnish. (Refer to Interior Trim - "Rear Pillar Garnish")
Test yourself
A quick Hyundai Kona quiz: every answer comes with an explanation and a link to the manual page.
Was this page helpful?