Heating, Ventilation, and Air Conditioning
Heater and A/C Control Unit (Rear)
In this manual: Heating, Ventilation, and Air Conditioning
5steps
~30min
2/5difficulty
Done 0 of 5
Components and Component Location
Component

Connector Terminal Function
| Connector | PIN No. | Pin Function | Connector | PIN No. | Pin Function |
| A | 1 | Battery | A | 17 | IGN2 |
| 2 | ISG B+ | 18 | IGN1 | ||
| 3 | ILL+ (TAIL) | 19 | Blower Motor (+) | ||
| 4 | REF Sensor Ground (+5 V) | 20 | - | ||
| 5 | Mode Control Actuator Feedback | 21 | MOSFET (Drain L/R) | ||
| 6 | Temperature Sensor Feedback | 22 | MOSFET (Gate) | ||
| 7 | Mode Control Actuator (Vent) | 23 | Heater Switch _ LH | ||
| 8 | Mode Control Actuator (Defrost) | 24 | Indicator (HIGH) _ LH | ||
| 9 | Temperature Control Actuator (Cool) | 25 | Indicator (MID) _ LH | ||
| 10 | Temperature Control Actuator (Warm) | 26 | Indicator (LOW) _ LH | ||
| 11 | Latch Out (-) | 27 | Heater Switch _ RH | ||
| 12 | K-Line | 28 | Indicator (HIGH) _ RH | ||
| 13 | LIN LH | 29 | Indicator (MID) _ RH | ||
| 14 | LIN RH | 30 | Indicator (LOW) _ RH | ||
| 15 | - | 31 | Sensor Ground | ||
| 16 | ILL - (REO) | 32 | Ground |
Repair Procedures
Replacement
|

|

- Disconnect the negative (-) battery terminal.
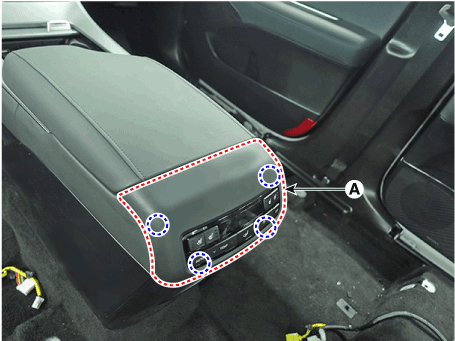
- Using a flat-tip screwdriver or a remover, remove the rear console upper cover (A).
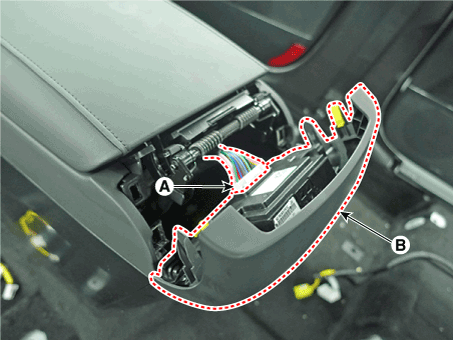
- Press the stopper pin, disconnect the rear console connector (A) and remove the rear console upper cover (B).
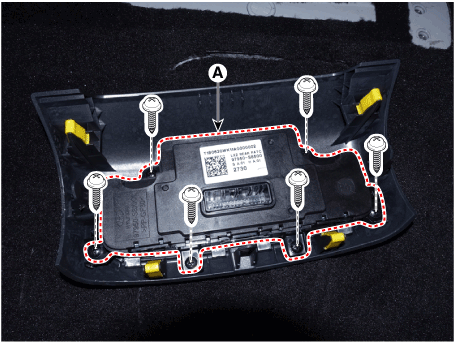
- Loosen the mounting screws and remove the rear heater and A/C control unit (A).
- To install, reverse the removal procedure.

- Replace any damaged clips (or pin-type retainers).
- Make sure the connector is properly connected.
Test yourself
A quick Hyundai Palisade quiz: every answer comes with an explanation and a link to the manual page.
Was this page helpful?