Drive Shaft and Axle
TJ Joint
In this manual: Drive Shaft and Axle
20steps
~130min
5/5difficulty
2special tools
Done 0 of 20
Components and Component Location
Components
[LH]
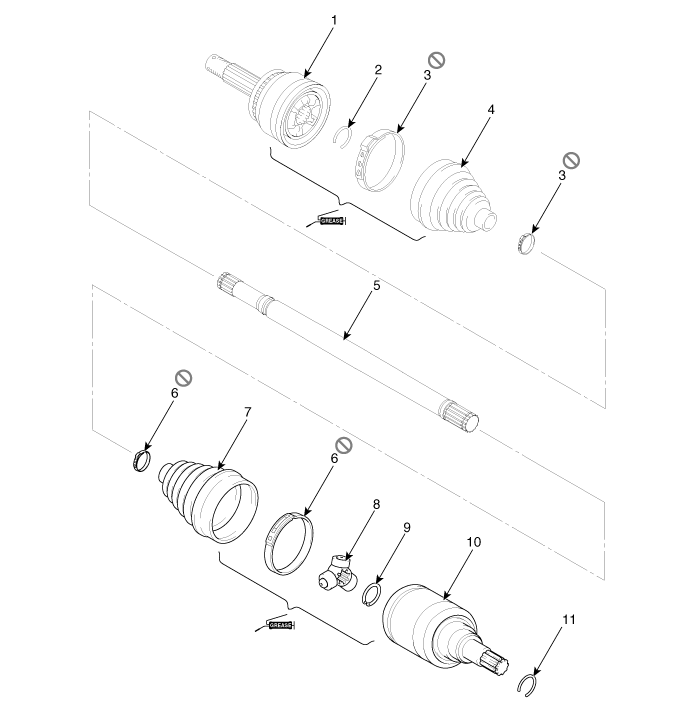
| 1. BJ Assembly 2. BJ Snap Ring 3. BJ Boot Band 4. BJ Boot |
5. Shaft 6. TJ Boot Band 7. TJ Boot 8. Spider Assembly |
9. Snap ring 10. TJ housing 11. Housing snap ring |
[RH]
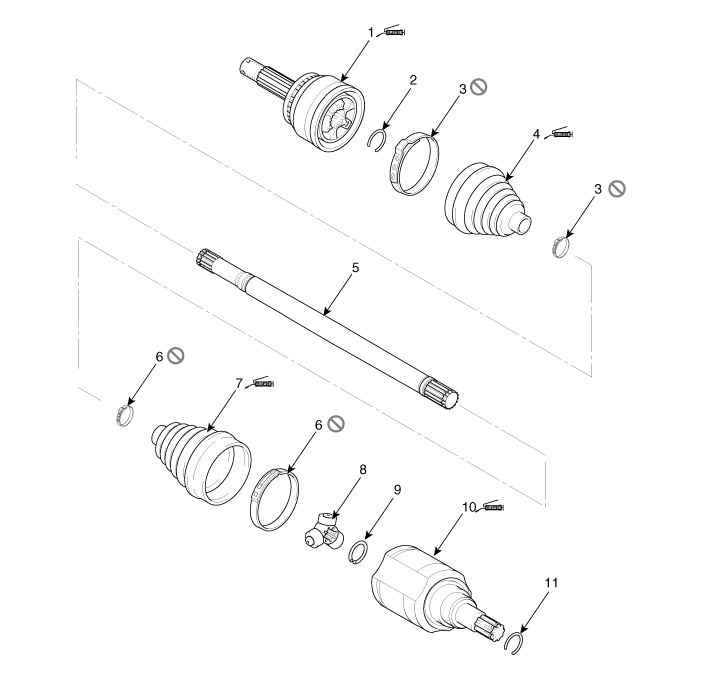
| 1. BJ Assembly 2. BJ Snap Ring 3. BJ Boot Band 4. BJ Boot |
5. Shaft 6. TJ Boot Band 7. TJ Boot 8. Spider Assembly |
9. Clip 10. TJ case 11. Clamp 12. Housing snap ring |
Repair Procedures
Removal
|

- Remove the front drive shaft. (Refer to Drive Shaft Assembly - "Front Drive Shaft")
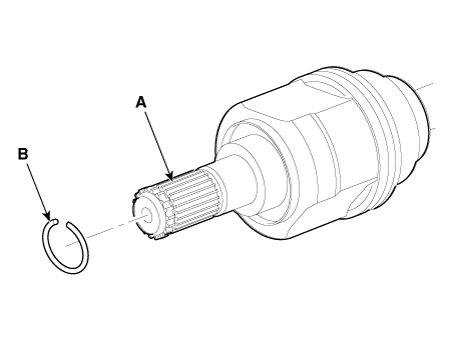
- Remove the joint case snap ring (B) from the drive shaft spline (A).
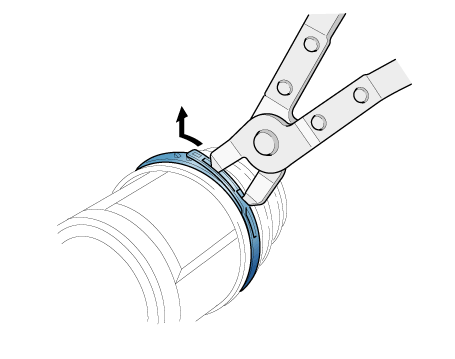
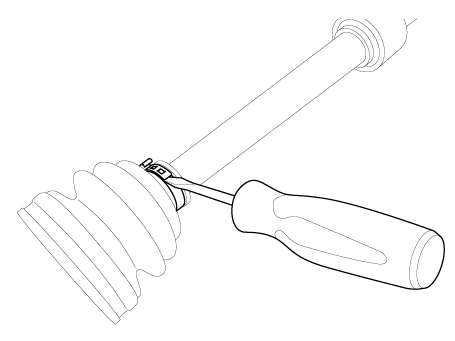
- Remove both clamps from the TJ case.
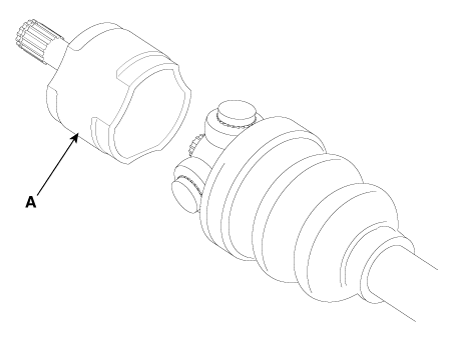
- Remove the TJ case (A).

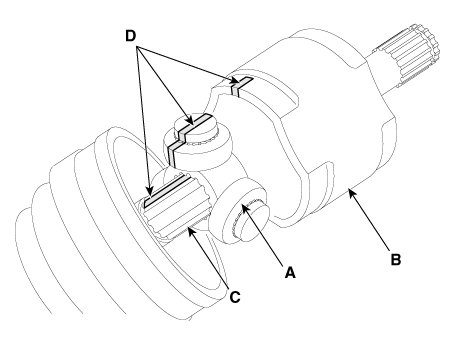
- Make alignment marks on the spider assembly (A), joint housing (B), and shaft splines (C) to ensure proper reassembly.
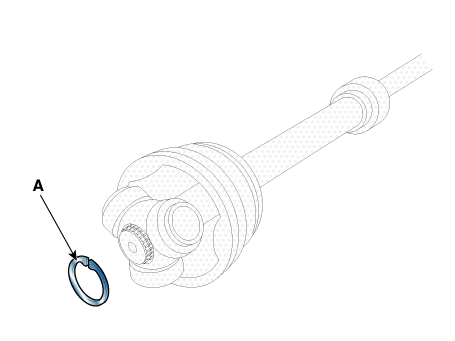
- Remove the snap ring (A) from the shaft.
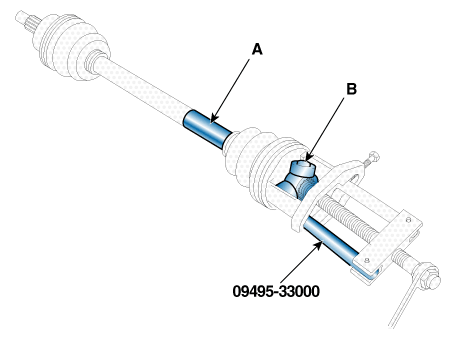
- Remove the spider assembly (B) from the driveshaft (A) using the special service tool (09495-33000).
- Clean the spider assembly.
- Remove the TJ boot (A).

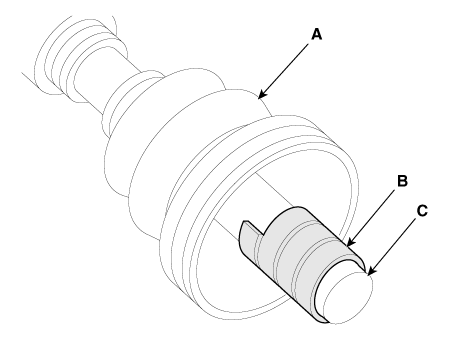
- To reuse the boot (A), wrap tape (B) around the driveshaft splines (C) to protect the boot (A).
Inspection
- Inspect the spider assembly for roller rotation, wear, or corrosion.
- Inspect the groove inside the joint case for wear or corrosion.
- Inspect the TJ boot for damage and wear.
Installation
- Wrap tape around the TJ driveshaft splines to prevent damage to the boot.
- Install the TJ boot band, then the TJ boot.
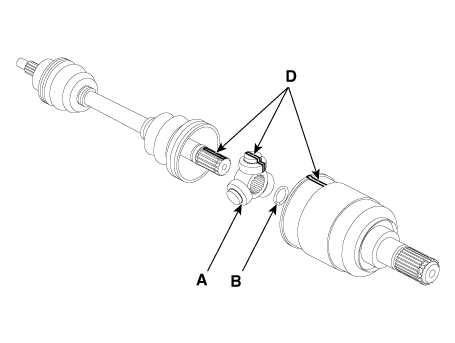
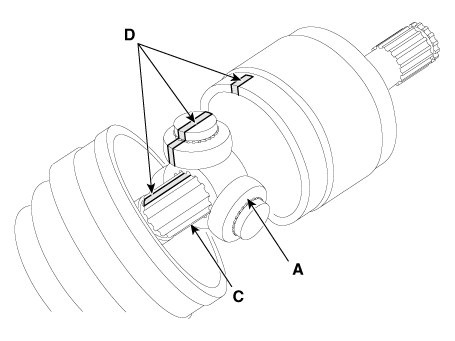
- Using the alignment marks (D) made during disassembly, install the spider assembly (A) and snap ring (B) onto the driveshaft splines (C).
- Add the specified grease to the joint boot in the amount that was wiped off during inspection.
- Install both boot bands.
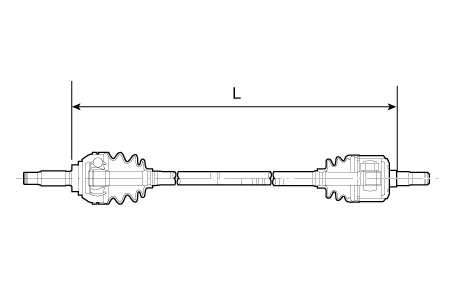
- To control the air in the TJ boot, observe the specified distance between the boot bands when they are tightened.
Engine Distance (L) mm (in.) Left side Right Side Lambda 3.5 MPI / 3.8 GDI 566,4 (22,2992) 578,0 (22,7559) R 2.2 CRDi 577,3 (22,7283) 573,4 (22,5748)
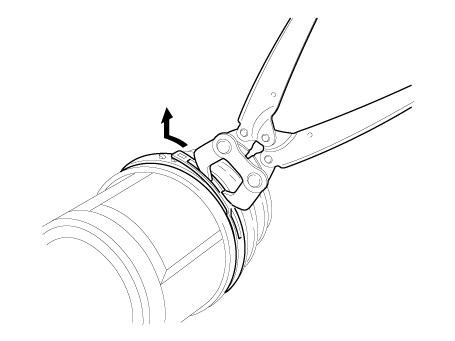
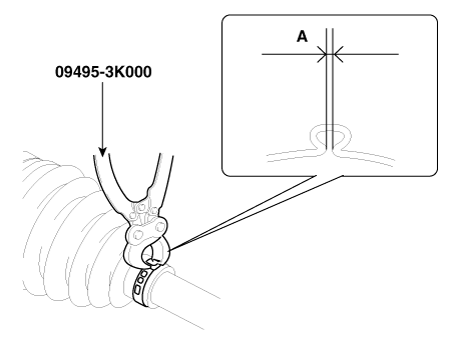
- Using the SST (09495-3K000), secure the TJ boot clamps.
Clearance (A): 2.0 mm (0.0787 in.) or less
- Install the front propeller shaft. (Refer to Drive Shaft Assembly - "Front Drive Shaft")
- Check the front alignment. (Refer to Suspension System - "Front Wheel Alignment")
Test yourself
A quick Hyundai Palisade quiz: every answer comes with an explanation and a link to the manual page.
Was this page helpful?