Body Electrical System
Front Wiper Motor Repair Procedures
In this manual: Body Electrical System
21steps
~126min
4/5difficulty
Done 0 of 21
Removal
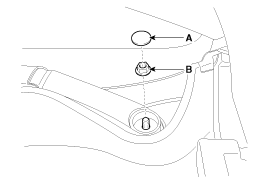
- Remove the wiper arm and blade after removing the nut (B) and the wiper cap (A).
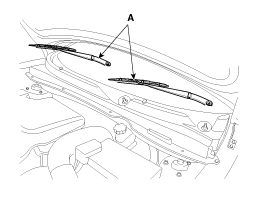
- Remove the wiper arm and blade (A) after loosening the nut.
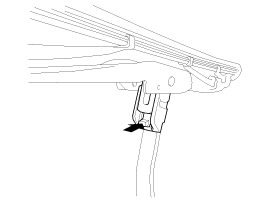
- If necessary, release the wiper blade lock by pulling up, and remove the blade from the inner radius of the wiper arm.
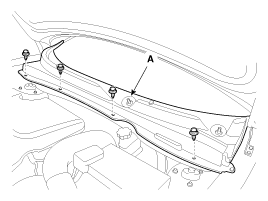
- Remove the seal strip and the upper cowl cover (A) after removing the clips.
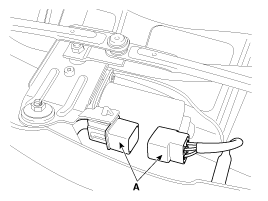
- Disconnect the wiper motor connector (A) from the wiper motor and linkage assembly.
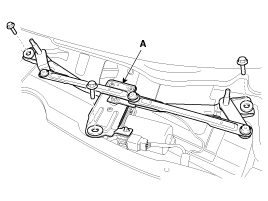
- Remove the windshield wiper motor and linkage assembly (A) by removing the 3 bolts.
- While holding the wiper motor crank, remove the upper link (A) from the wiper motor crank.
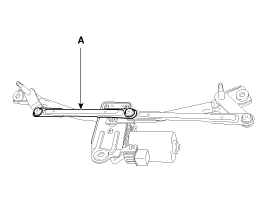
Before removing the wiper motor and linkage, make sure the linkage has stopped at the automatic stop position. To accurately install the wiper motor crank, make sure the linkage is aligned with the crank in a straight line and the angle of each link is correct. Make alignment marks on the wiper motor and linkage assembly. Be careful not to bend the connection.
- Remove the lower link (A) from the wiper motor crank.
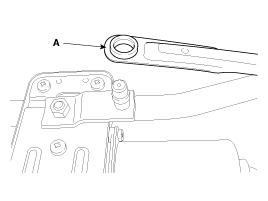
To accurately install the wiper motor crank, make sure the linkage is aligned with the crank in a straight line and the angle of each link is correct. Be careful not to bend the connection. - Remove the crank (A) after loosening the nut (B).
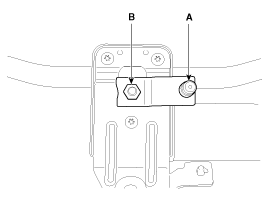
- Remove the wiper motor by loosening the 3 bolts.
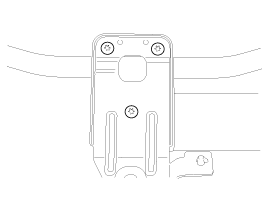
Installation
|
- Install the wiper motor.
- Install the crank.
Torque: 12.7–17.6 N·m
To install the wiper motor crank, make sure the linkage aligns with the crank in a straight line and set the angle of each link accurately using the alignment mark. - Install the lower and upper links to the wiper motor crank.
To install the wiper motor crank, make sure the linkage aligns with the crank in a straight line and set the angle of each link accurately. Be careful not to bend the connection. - Install the wiper motor and linkage assembly, then connect the wiper motor connector.
Torque: 7–11 N·m
- Install the hood upper cover.
- Install the windshield wiper arm and blade.
Torque: 22.5~26 N·m

- Turn the wiper motor to make sure it is in the park position. If necessary, adjust the wiper arm and blade.
- Install the wiper arm and blade to the specified position (A).
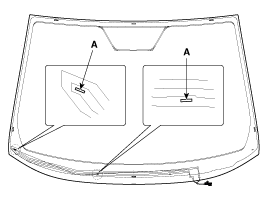
- Install the upper cowl cover to the specified spray position.
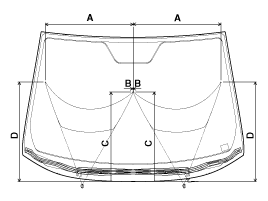
Specified
PositionDistance (b) Distance (mm) A 18.2 577 B 0,9 2 C 23,5 588,5 D 23,4 654
Inspection
Speed operation check- Disconnect the connector (A) from the wiper motor.
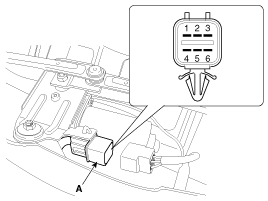
No Description No Description 1 Low 4 GROUND 2 High 5 P (Park) 3 Battery (+) 6 - - Connect the battery positive (+) cable to terminal 3 and the negative (-) cable to terminal 4.
- Make sure the motor operates at low or high speed as shown in the table below.
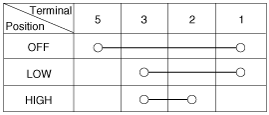
Common sources of contamination are insects, tree sap, and hot wax treatment used by some commercial car washes. If the blades do not wipe properly, clean both the window and the blades with a good glass cleaner or mild detergent and rinse thoroughly with clean water.
Test yourself
A quick Hyundai Tucson LM quiz: every answer comes with an explanation and a link to the manual page.
Was this page helpful?