Heating, Ventilation, and Air Conditioning
Intake Actuator Repair Procedures
In this manual: Heating, Ventilation, and Air Conditioning
16steps
~96min
4/5difficulty
Done 0 of 16
Inspection
- Ignition switch OFF
- Disconnect the intake actuator connector.
- Check that the actuator moves to the recirculation position when 12 V is applied to terminal 3 and terminal 4 is grounded.
- Check that the intake actuator operates to the fresh air position when the polarity is reversed.
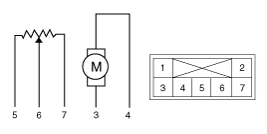
1. -
2. -
3. Fresh
4. Recirculation5. 5 V (DC)
6. Feedback Signal
7. Sensor Ground - Check the voltage between terminals 6 and 7.
Door Position Voltage (6-7) Fault Detection Recirculation 9.4 ± 0.15 V Low voltage: 0.1 V or less Fresh 4.6 ± 0.15 V High voltage: 4.9 V or more - If the intake actuator does not operate properly, replace it with a known good intake actuator and check for proper operation.
- If the problem is resolved, replace the intake actuator.
Replacement
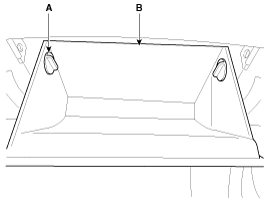
- Disconnect the damper (A) from the glove box (B).
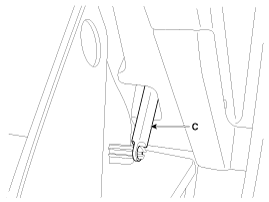
- Remove the glove box lift (C).
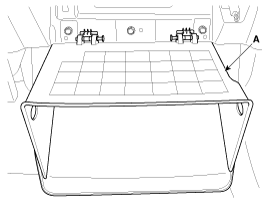
- Disconnect the connector, then remove the glove box (A).
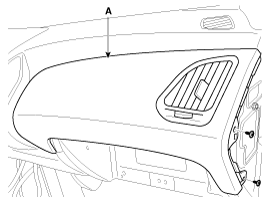
- Remove the passenger airbag panel (A).
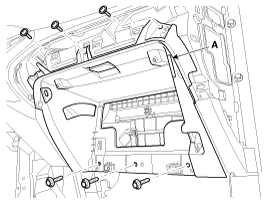
- Remove the glove box housing (A).
- Remove the shower duct (A).
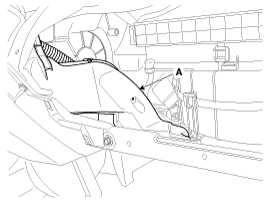
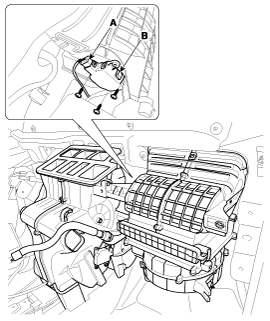
- Disconnect the intake actuator connector (A).
- Loosen the mounting screw and remove the intake actuator (B).
- Install in the reverse order of removal.
Test yourself
A quick Hyundai Tucson LM quiz: every answer comes with an explanation and a link to the manual page.
Was this page helpful?