Drive Shaft and Axle
TJ Joint Repair Procedures
In this manual: Drive Shaft and Axle
18steps
~118min
5/5difficulty
2special tools
Done 0 of 18
Removal
- Remove the front drive shaft. (Refer to Drive Shaft Assembly - "Front Drive Shaft")
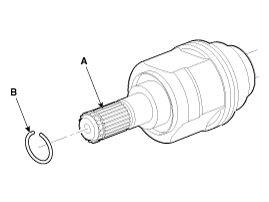
- Remove the joint case snap ring (B) from the drive shaft spline (A).
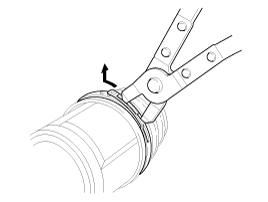
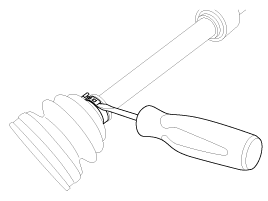
- Remove both clamps from the TJ case.
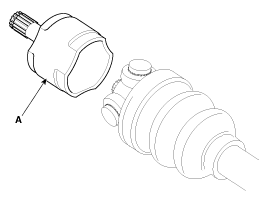
- Remove the TJ case (A).
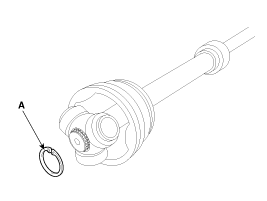
- Remove the snap ring (A) from the shaft.
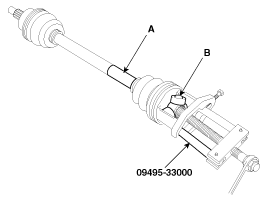
- Remove the spider assembly (B) from the drive shaft (A) using special service tool (09495-33000).
- Clean the spider assembly.
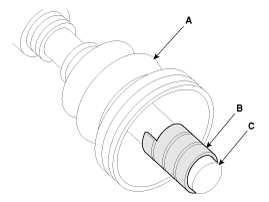
- Remove the TJ boot (A).
Inspection
- Inspect the spider assembly for roller rotation, wear, or corrosion.
- Inspect the groove inside the joint case for wear or corrosion.
- Inspect the TJ boot for damage and wear.
Installation
- Wrap tape around the drive shaft (TJ) spline to prevent damage to the boot.
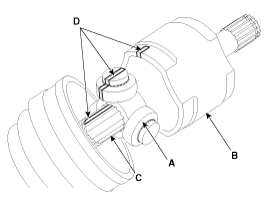
- Using the alignment marks (D) made during disassembly as a guide, install the spider assembly (A) and snap ring (B) onto the splines of the drive shaft (C).
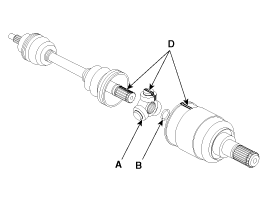
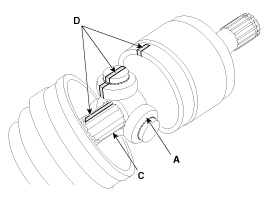
- Add the specified grease to the joint boot in the amount that was wiped off during inspection.
- Install both boot bands.
- Using the SST (09495-3K000), secure the TJ boot clamps.
Clearance (A): 2.0 mm (0.0787 in) or less
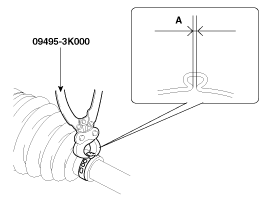
- Install the front propeller shaft. (Refer to Drive Shaft Assembly - "Front Drive Shaft")
- Check the front alignment. (Refer to Suspension System - "Front Wheel Alignment")
Test yourself
A quick Hyundai Tucson LM quiz: every answer comes with an explanation and a link to the manual page.
Was this page helpful?