Maintenance and adjustment
Coolant Filling
In this manual: Maintenance and adjustment
~1min read
- Remove the bolts and quick rivets.
- Detach the tabs and remove the right fairing and cover.
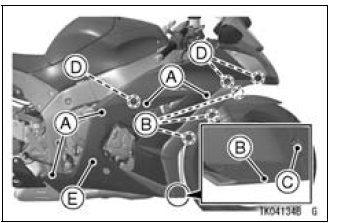
A. Bolts
B. Quick Rivet
C. Large Quick Rivet
D. Tabs
E. Right Fairing and Cover
NOTE
- The right fairing and cover uses the quick rivets and large quick rivet.
- The large quick rivet can be removed by pulling the center pin with a screw driver. When installing it, insert the large quick rivet into the hole on the fairing and push the center pin to secure them.
- The quick rivets can be removed by pushing the center pin into the quick rivets, and when installing them, pull the center pin fully up first, and then push into the center pin after inserting them.
Quick Rivet Removal
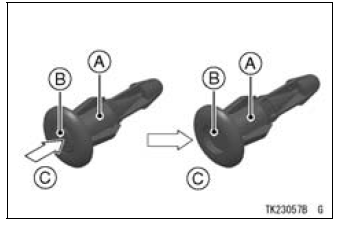
A. Quick Rivet
B. Center Pin
C. Push in.
Quick Rivet Installation
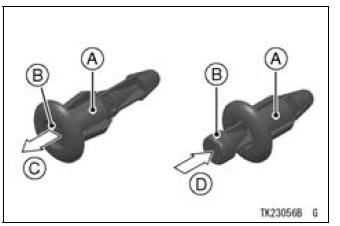
A. Quick Rivet
B. Center Pin
C. Pull up fully.
D. Push in.
- Remove the cap from the reserve tank and add coolant through the filler opening to the “F” (Full) level line.
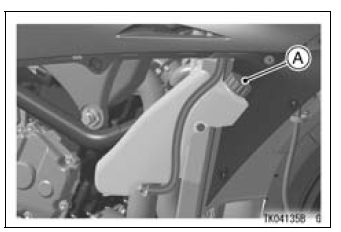
A. Reserve Tank Cap
NOTE
- In an emergency you can add water alone to the coolant reserve tank, however, it must be returned to the correct mixture ratio by the addition of antifreeze concentrate as soon as possible.
NOTICE
If coolant must be added often, or the reserve tank completely runs dry, there is probably leakage in the system. Have the cooling system inspected by your authorized Kawasaki dealer.
Coolant Change
Have the coolant changed by an authorized Kawasaki dealer.
Test yourself
A quick Kawasaki Ninja ZX-10R quiz: every answer comes with an explanation and a link to the manual page.
Was this page helpful?