Suspension
Swingarm Installation
In this manual: Suspension
~1min read
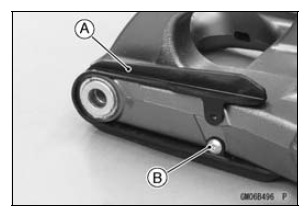
- Visually inspect the chain guide [A].
Replace the chain guide if it shows any signs of abnormal wear or damage.
Apply a non-permanent locking agent to the threads of the chain guide bolt [B].
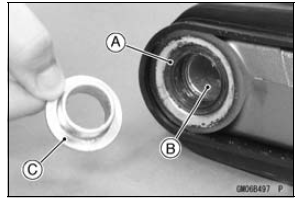
- Apply plenty of grease to the lip of the oil seals [A].
- Be sure to install the oil seals and sleeve [B] to the swingarm.
- Fit the collar [C] on the oil seal of the left side.
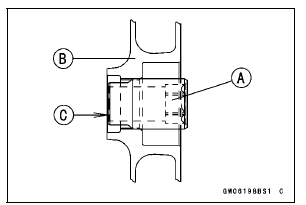
- Screw the adjusting collar [A] into the frame [B] so that the collar does not project the swingarm mating surface [C].
- Insert the swingarm pivot shaft [A] into the adjusting collar [B] from the right side, and tighten the pivot shaft.
NOTE
Tighten the swingarm pivot shaft until the clearance [C] between the ball bearing [D] and collar come to 0 mm (0 in.).
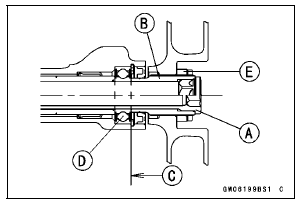
Torque - Swingarm Pivot Shaft: 20 NВ·m (2.0 kgfВ·m, 15 ftВ·lb)
- Using the swingarm pivot nut wrench, tighten the swingarm pivot adjusting collar locknut [E].
Special Tool - Swingarm Pivot Nut Wrench: 57001-1597
Torque - Swingarm Pivot Adjusting Collar Locknut: 98 NВ·m (10.0 kgfВ·m, 72 ftВ·lb)
- Tighten the swingarm pivot shaft nut.
Torque - Swingarm Pivot Shaft Nut: 108 NВ·m (11.0 kgfВ·m, 80 ftВ·lb)
- Install the removed parts (see appropriate chapters).
Test yourself
A quick Kawasaki Ninja ZX-10R quiz: every answer comes with an explanation and a link to the manual page.
Was this page helpful?