Body Electrical System
Audio Unit Repair Procedures
In this manual: Body Electrical System
30steps
~180min
4/5difficulty
Done 0 of 30
Removal
Audio head unit- Disconnect the negative (-) battery terminal.
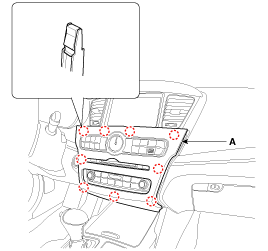
- Using a flat-tip screwdriver or a trim removal tool, remove the lower center panel (A).
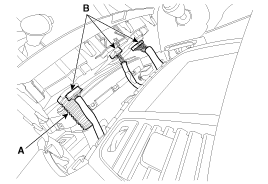
- Disconnect the connectors (A) from the center panel.
- Remove the head unit (A) after loosening the mounting screws.

- Disconnect the connectors and cables from the head unit.
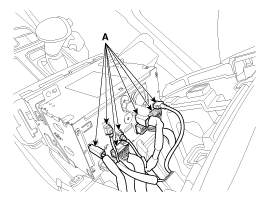
- Remove the center airbag trim panel. (Refer to Group BE - "Audio System")
- Using a flat-tip screwdriver or a trim removal tool, remove the lower center panel (A).
- Disconnect the connector (B) and the antenna hose (A).
- Using a flat-tip screwdriver or a trim removal tool, remove the [RH] trim (A).
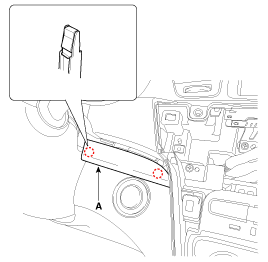
- Using a flat-tip screwdriver or a trim removal tool, remove the center trim (A).

- Using a flat-tip screwdriver or a trim removal tool, remove the left side cover (A).

- Remove the [LH] trim (A) after loosening the mounting screw.
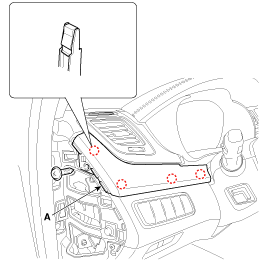
- Remove the cluster fascia (A) after loosening the mounting screws.

- Remove the upper center panel (A) after loosening the mounting screws.

- Remove the monitor (A) after loosening the mounting screws.
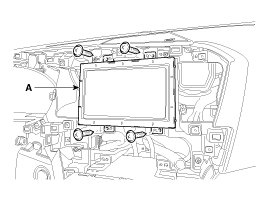
- Disconnect the monitor connectors (A).

Installation
Audio head unit- Connect the audio unit connectors and cables.
- Install the audio unit.
- Install the lower center panel.
- Connect the negative (-) battery terminal.
- Install the monitor.
- Install the cluster fascia, [LH] trim, airbag side cover, center airbag panel trim and [RH] airbag panel trim.
- Install the lower center panel.
- Connect the negative (-) battery terminal.
Disassembly
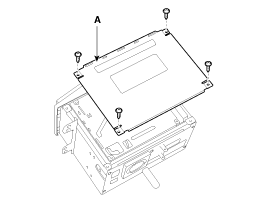
- Remove the top cover (A) from the head unit after loosening the mounting screws (4 pcs).
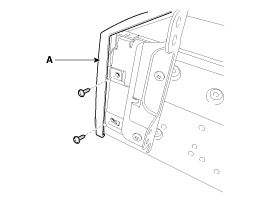
- Remove the front cover (A) after loosening the screws.
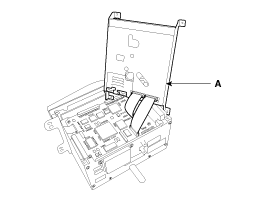
- Disconnect the film connector (A) between the unit and the drive.
Installation
- Connect the film connector between the drive and the head unit.
- Install the front cover.
- Install the upper cover.
Test yourself
A quick Kia Cadenza VG Owner's Manual quiz: every answer comes with an explanation and a link to the manual page.
Was this page helpful?