Body (Interior and Exterior)
Body Side Moulding Repair Procedures
Done 0 of 23
Replacement
Roof Molding Replacement
- Using a flat-tip screwdriver, wrap protective tape around the tip and apply protective tape around the relevant parts to prevent damage.
- Wear gloves to protect your hands.
- Be careful not to scratch the body surface.
|
Using a screwdriver or remover, remove the roof moulding (A).
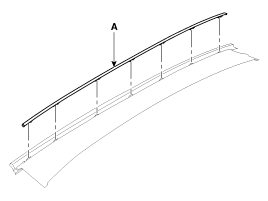
Installation is the reverse of removal.
- Replace any damaged clips.
|
Fender Garnish Replacement
- Using a flat-tip screwdriver, wrap protective tape around the tip and apply protective tape around the relevant parts to prevent damage.
- Wear gloves to protect your hands.
- Be careful not to scratch the body surface.
|
Using a screwdriver or remover, remove the fender garnish (A).
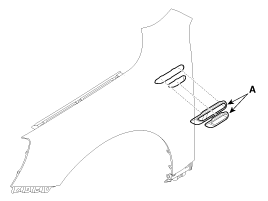
Installation is the reverse of removal.
- Replace any damaged clips.
|
Trunk Garnish Replacement
- Using a flat-tip screwdriver, wrap protective tape around the tip and apply protective tape around the relevant parts to prevent damage.
- Wear gloves to protect your hands.
- Be careful not to scratch the body surface.
|
Remove the trunk lid trim. (Refer to Group BD - "Trunk Lid")
After loosening the mounting nuts, disconnect the rear combination lamp connector (B).
Remove the rear combination lamp (A).
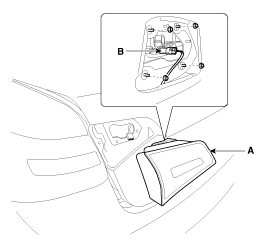
Loosen the trunk lid rear panel mounting nuts (A).
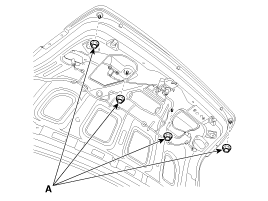
Using a screwdriver or a trim remover, remove the rear panel of the trunk lid (A).

Using a screwdriver or a trim remover, remove the trunk lid garnish (A).
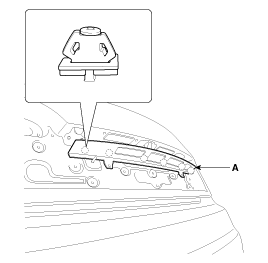
Installation is the reverse of removal.
- Replace any damaged clips.
- Make sure the trunk lid locks/unlocks and opens/closes properly.
|
Front Wheel Guard and Fender Liner Replacement
- Using a flat-blade screwdriver, wrap it with protective tape and apply protective tape around the adjacent parts to prevent damage.
- Wear gloves to protect your hands.
- Be careful not to scratch the body surface.
|
Remove the front wheel.
Loosen the retaining clips and screws, then remove the front fender liner (A) and the splash shield (B).
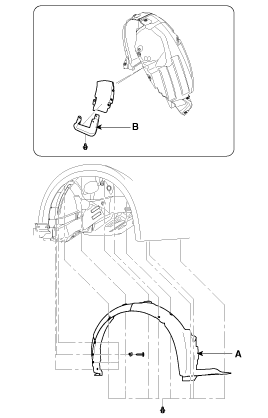
Installation is the reverse of removal.
- Replace any damaged clips.
|
Rear Wheel Guard and Fender Liner Replacement
- Using a flat-blade screwdriver, wrap it with protective tape and apply protective tape around the adjacent parts to prevent damage.
- Wear gloves to protect your hands.
- Be careful not to scratch the body surface.
|
Remove the rear wheel.
Loosen the clamps and nut, then remove the rear protector (A) and splash guard (B).
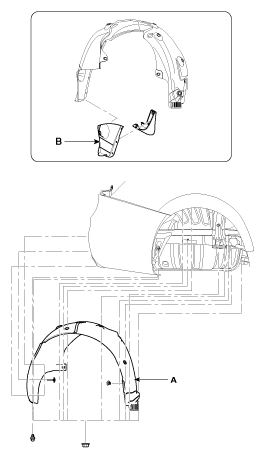
Installation is the reverse of removal.
- Replace any damaged clips.
|
Door Garnish Replacement
- Using a flat-tip screwdriver, wrap protective tape around the tip and apply protective tape around the relevant parts to prevent damage.
- Wear gloves to protect your hands.
- Be careful not to scratch the body surface.
|
Using a screwdriver or a pry tool, remove the front door garnish (A).
Using a screwdriver or a pry tool, remove the rear door garnish (B).
Installation is the reverse of removal.
- Replace any damaged clips.
|
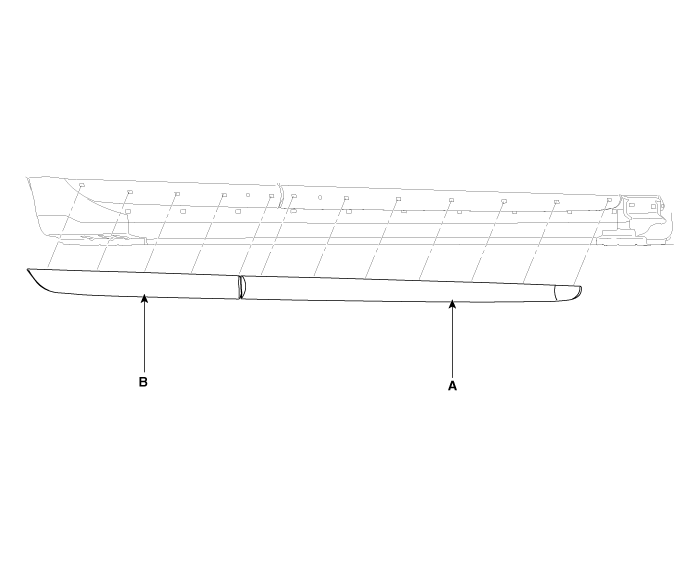
Side Sill Replacement
- Using a flat-tip screwdriver, wrap protective tape around the tip and apply protective tape around the relevant parts to prevent damage.
- Wear gloves to protect your hands.
- Be careful not to scratch the body surface.
|
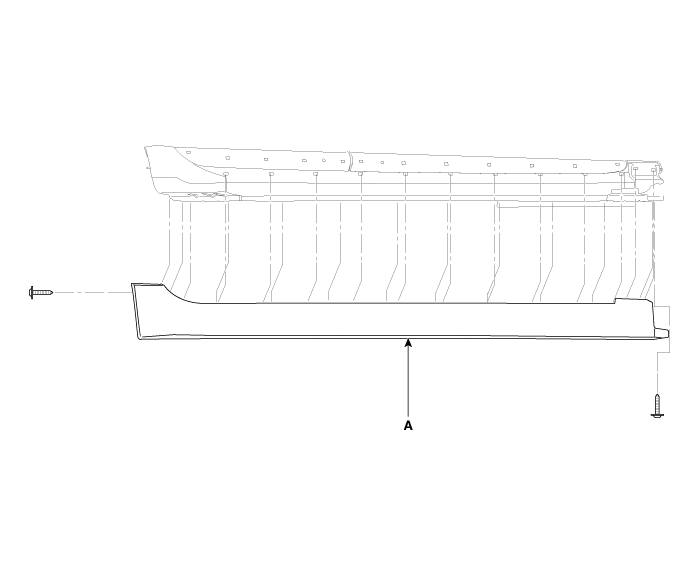
Loosen the retaining screws.
Using a screwdriver or a pry tool, remove the side sill garnish (A).
Installation is the reverse of removal.
- Replace any damaged clips.
|
?
Test yourself
A quick Kia Cadenza VG Owner's Manual quiz: every answer comes with an explanation and a link to the manual page.
Was this page helpful?
