Engine Mounting Repair procedures
Removal and Installation
Engine Mounting Bracket
Remove the engine room under cover.
(Refer to Engine and Transaxle Assembly - "Engine Room Under Cover")
Install the jack to the edge of upper oil pan to support the engine.

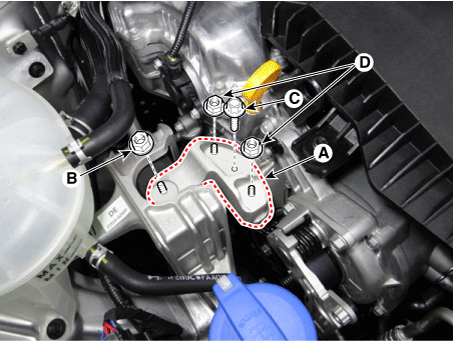
Remove the engine mounting support bracket (A).
Tightening torque
Nut (B) :
88.3 - 108 N·m
Bolt (C) and nuts (D) :
58.8 - 74 N·m
Remove the reservoir tank.
(Refer to Cooling System - "Reservoir Tank")
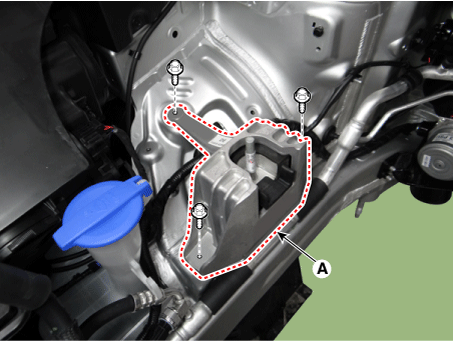
Remove the engine mounting bracket (A).
Tightening torque : 49.0 - 64 N·m
Install in the reverse order of removal.
Roll Rod Bracket
Remove the engine room under cover.
(Refer to Engine and Transaxle Assembly - "Engine Room Under Cover")
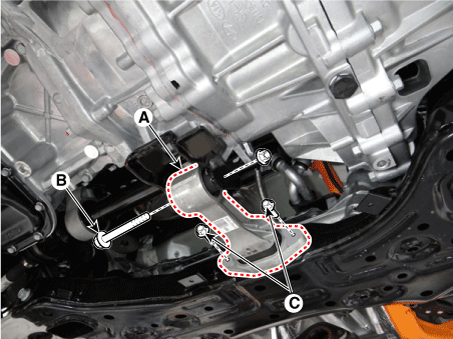
Remove the roll rod bracket (A).
Tightening torque :
Bolt (B) :
107.9 - 128 N·m
Bolts (C) :
49.0 - 64 N·m
Install in the reverse order of removal.
Transaxle Mounting Bracket
Shut off the high voltage circuit.
(Refer to Engine Mechanical System - “High Voltage Shut off Procedure”)
Remove the engine room under cover.
(Refer to Engine and Transaxle Assembly - "Engine Room Under Cover")
Drain the inverter coolant.
(Refer to Hybrid Motor System - "Coolant")
Remove the air cleaner assembly.
(Refer to Intake and Exhaust System - "Air Cleaner")
Remove the hybrid power control unit (HPCU) and tray.
(Refer to Hybrid Control System - "Hybrid Power Control Unit (HPCU)")
Remove the Engine Control Module (ECM).
(Refer to Engine Control/Fuel System - "Engine Control Module (ECM)")
Install the jack to the edge of transaxle.
Remove the transaxle mounting side panel packing (A).

Remove the transaxle mounting bolt (A).
Tightening torque : 88.3 - 108 N·m
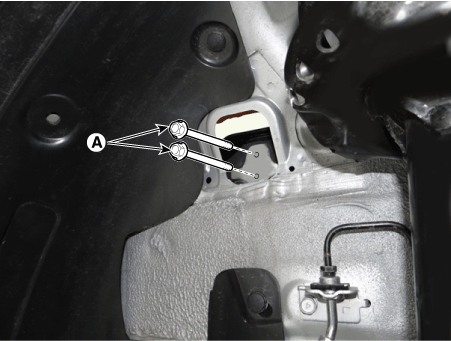
Remove the transaxle mounting bracket (B).
Tightening torque : 49.0 - 64 N·m
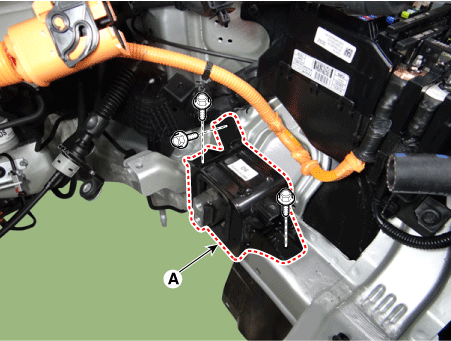
Install in the reverse order of removal.