Use a plastic panel removal tool to remove the interior trim parts so as not to damage the surface.
Be careful not to bend or scratch the trim and panels.
Using a screwdriver or removal tool, remove the front door garnish (A). [Front]
Remove the rear seat cushion. (Refer to Group BD - "Rear Seat")
Loosen the mounting screw, then remove the rear door sill trim (A). [Rear]
Installation is the reverse of removal.
Replace all damaged clips.
Front Pillar Trim Replacement
Wear gloves to protect your hands.
Use a plastic panel removal tool to remove the interior trim parts so as not to damage the surface.
Be careful not to bend or scratch the trim and panels.
Remove the front pillar trim.
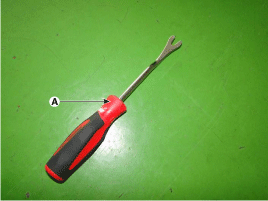
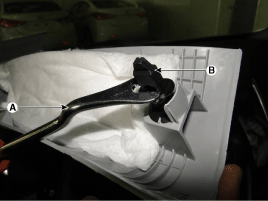
To remove the front pillar trim, use the special tool (A) shown below.
Slightly spread the front pillar trim and place the tool (A) on the mounting clip (B), as shown in the figure below. After placing the tool (A) on the mounting clip (B), slide it forward.
After removing the front pillar trim, replace the clips with new ones.
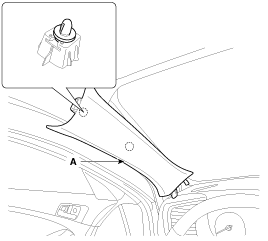
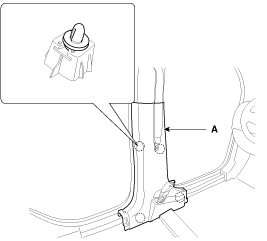
Remove the front pillar trim (A).
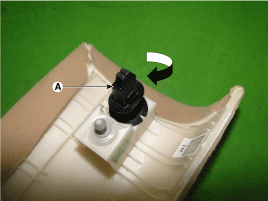
Remove the mounting clip (A) by turning it clockwise.
Installation is the reverse of removal.
Side Hood Trim Replacement
Wear gloves to protect your hands.
Use a plastic panel removal tool to remove the interior trim parts so as not to damage the surface.
Be careful not to bend or scratch the trim and panels.
Remove the front door sill trim.
Remove the hood latch release handle. (Refer to Group BD - "Hood")
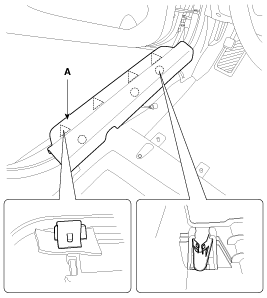
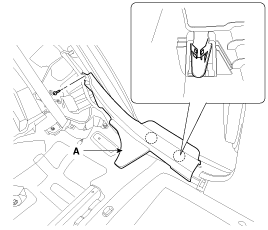
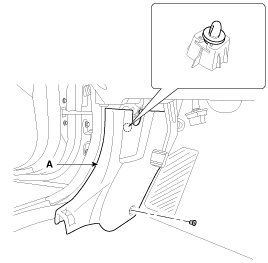
Disconnect the clips, then remove the hood side trim (A).
Installation is the reverse of removal.
Replace all damaged clips.
Center Pillar Garnish Replacement
Wear gloves to protect your hands.
Use a plastic panel removal tool to remove the interior trim parts so as not to damage the surface.
Be careful not to bend or scratch the trim and panels.
Remove the front door sill trim and the rear door sill trim.
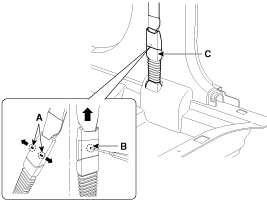
To remove the seat belt pretensioner anchor (C), continue pressing the locking pins (A) in the direction indicated by the arrow. Then remove the seat belt by pressing the locking pin (B).
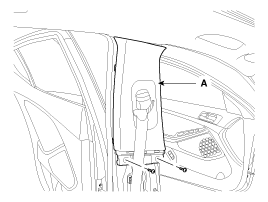
Remove the center pillar lower garnish (A).
Loosen the mounting screws, then remove the upper center pillar trim (A).
Installation is the reverse of removal.
Replace all damaged clips.
Rear Pillar Trim Replacement
Wear gloves to protect your hands.
Use a plastic panel removal tool to remove the interior trim parts so as not to damage the surface.
Be careful not to bend or scratch the trim and panels.
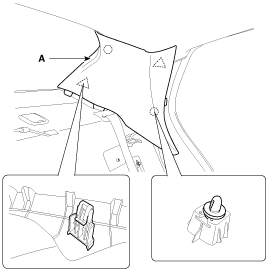
Using a flat-tip screwdriver or trim removal tool, remove the rear pillar trim (A).
Installation is the reverse of removal.
Replace all damaged clips.
Package Tray Trim Replacement
Wear gloves to protect your hands.
Use a plastic panel removal tool to remove the interior trim parts so as not to damage the surface.
Be careful not to bend or scratch the trim and panels.
Remove the rear seat assembly. (Refer to Group BD - "Rear Seat")
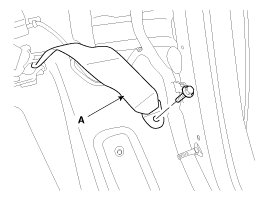
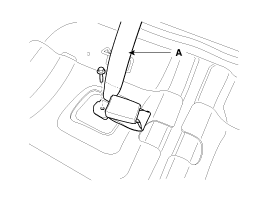
After loosening the mounting bolt, remove the lower mounting of the rear seat belt (A). [LH, RH]
Tightening torque: 39.2 ~ 54 N·m
[Center]
Tightening torque: 39.2 ~ 54 N·m
Using a flat-tip screwdriver or trim removal tool, remove the rear pillar trim (A).
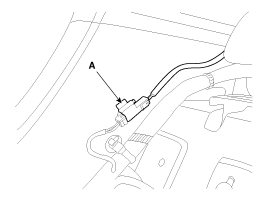
Disconnect the connector (A).
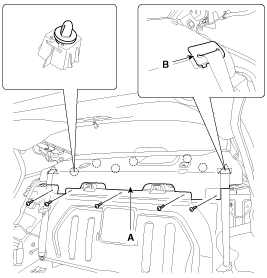
Using a flat-tip screwdriver or trim removal tool, remove the rear seat belt cover (B).
Loosen the mounting screws, then remove the package tray garnish (A).
Installation is the reverse of removal.
Replace all damaged clips.
Make sure the connector is properly connected.
?
Test yourself
A quick Kia Optima Hybrid Owner's Manual quiz: every answer comes with an explanation and a link to the manual page.