Body (Interior and Exterior)
Trunk Lid Repair Procedure
In this manual: Body (Interior and Exterior)
20steps
~120min
4/5difficulty
Done 0 of 20
Replacement
Trunk Lid Assembly Replacement
|
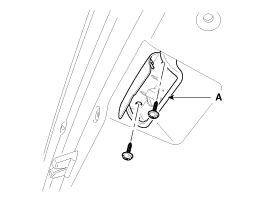
- Loosen the mounting screws of the luggage compartment inner handle (A).
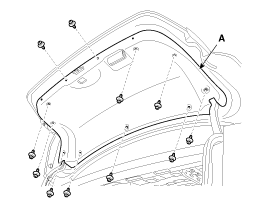
- Disconnect the clips, then remove the trunk lid trim (A).
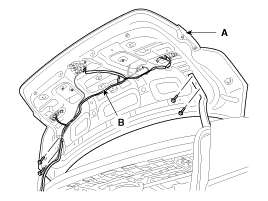
- Disconnect the wiring (B) and connectors.
- After loosening the mounting bolts, remove the trunk lid (A).
Tightening torque: 6.9~8.8 N·m
- Installation is the reverse of removal.

- Replace all damaged clips.
- Remove the trunk lid weatherstrip (A).

- Do not apply sealant to the body.
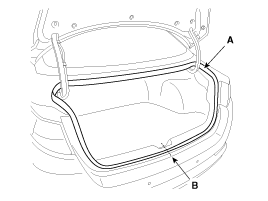
- Installation is the reverse of removal.
- Install the seal, aligning it with the gallop line (B).
- Remove the trunk lid trim.
- Disconnect the trunk lid lock connector (A).
- Disconnect the cable (B), then loosen the latch assembly mounting bolts (C) and remove it.
Tightening torque: 6.9~10.8 N·m
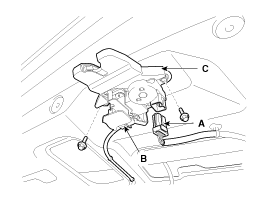
- Installation is the reverse of removal.
- Make sure the trunk lid locks/unlocks and opens/closes properly.
|
- Remove the trunk lid trim.
- After loosening the mounting nuts, disconnect the rear combination lamp connector (B).
- Remove the rear combination lamp (A).
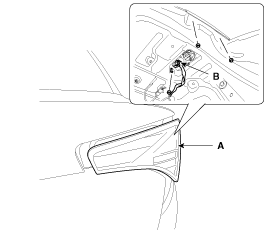
- Loosen the rear panel mounting nuts (A) of the luggage compartment lid.
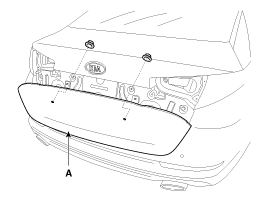
- Using a screwdriver or a trim remover, remove the rear panel of the trunk lid (A).
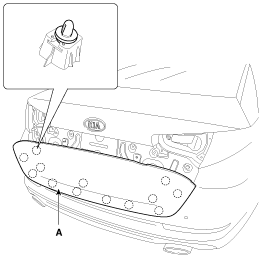
- Installation is the reverse of removal.
- Replace all damaged clips.
Adjustment
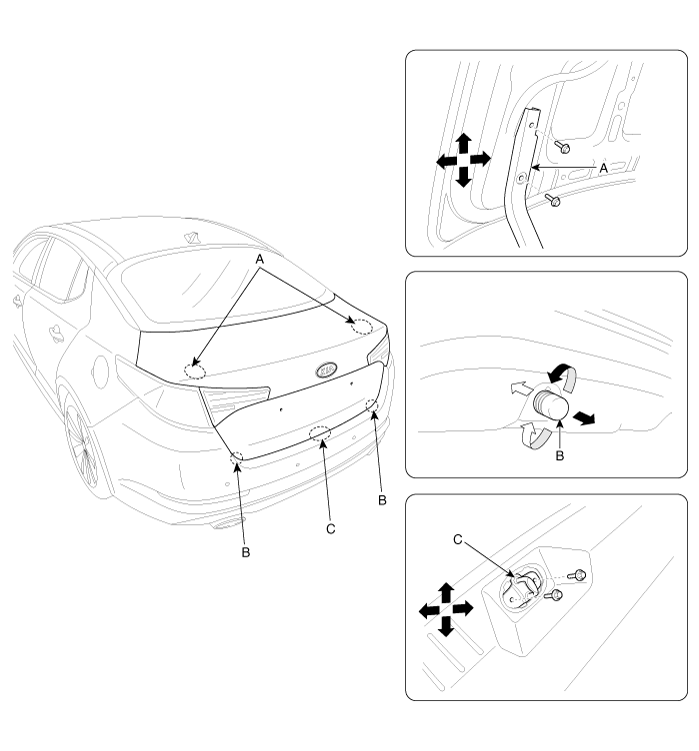
- Loosen the trunk lid hinge mounting bolt (A), then adjust the trunk lid by moving it up or down, right or left.
- Adjust the trunk lid height by turning the trunk lid struts (B).
- After loosening the luggage compartment lid lock mounting bolts (C), adjust the luggage compartment lid lock by moving it up or down, right or left.
Test yourself
A quick Kia Optima Hybrid Owner's Manual quiz: every answer comes with an explanation and a link to the manual page.
Was this page helpful?