Body (Interior and Exterior)
Repair Procedures
In this manual: Body (Interior and Exterior)
12steps
~72min
3/5difficulty
Done 0 of 12
Adjustment
Window Adjustment
|

- Remove the front door trim. (Refer to Front Door - "Front Door Trim")
- Remove the front door glass mounting hole plug (A).
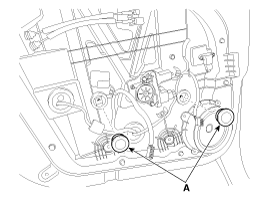
- Loosen the mounting bolts, then carefully slide the front door glass (A) left and right to adjust the clearance until the glass mounting bolts are visible.
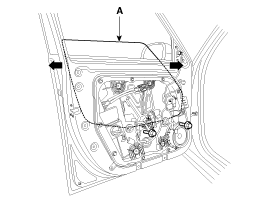
- Make sure the glass moves smoothly.
|
- Loosen the screws (B) just enough to allow the latch to move.
Tightening Torque: (B): 16.7 ~ 22 N·m
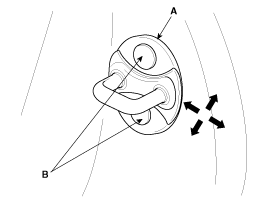
- Tap the striker with a plastic hammer to adjust it. The striker will not move much, but will allow some adjustment.
- While holding the outside handle, press the door against the body to make sure the striker allows flush seating. If the door latches correctly, tighten the screws and recheck.
|
- Make sure the door and body edges are parallel.
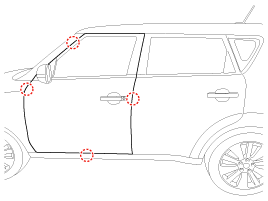
- When adjusting the doors, place the vehicle on a hard, level surface.
- Adjust at the hinges (A):
- Slightly loosen the door mounting bolts and move the door inward or outward until it is flush with the body.
- Slightly loosen the hinge mounting bolts and move the door forward or backward, up or down, to align the gaps.
- Place a shop towel on the jack to avoid damaging the door during adjustment.
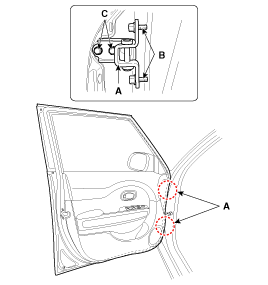
- Lubricate the moving parts of the specified hinges.
- Check for water leaks.
Test yourself
A quick Kia Soul EV Owner's Manual quiz: every answer comes with an explanation and a link to the manual page.
Was this page helpful?