Body (Interior and Exterior)
Headliner Assembly Repair Procedures
In this manual: Body (Interior and Exterior)
24steps
~144min
4/5difficulty
Done 0 of 24
Replacement
|

|
- Remove the rear seat assembly. (Refer to Rear Seat - "Rear Seat Assembly")
- Remove both sides of the front pillar garnish. (Refer to Body Trim - "Front Pillar Trim")
- Remove both sides of the upper front pillar garnish. (Refer to Interior Trim - "Center Pillar Garnish")
- Remove both sides of the rear pillar garnish. (Refer to Interior Trim - "Rear Pillar Garnish")
- Remove both sides of the sun visor and the holder. (Refer to Headliner - "Sun Visor")
- Remove both sides of the assist grip. (Refer to Headliner - "Assist Grip")
- Remove the overhead console lamp. (Refer to Body Electrical System - "Overhead Console Lamp")
- Remove the room lamp. (Refer to Body Electrical System - "Room Lamp")
- Tilt the front seat rearward as far as possible.
- Remove the ECM mirror cover (A).
- Disconnect the ECM mirror connector (B).
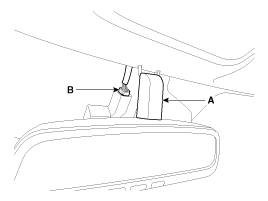
- Remove the LDWS cover (A).
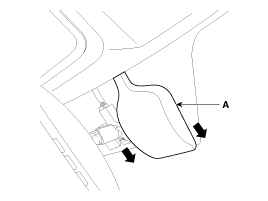
- Disconnect the LDWS unit connector (A).
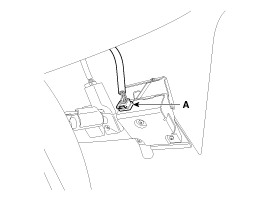
- Disconnect the headliner main connector (A) and the mounting clips (B) on the front pillar. [Driver]
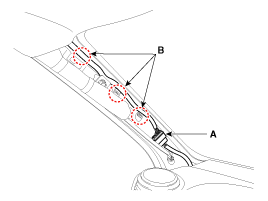
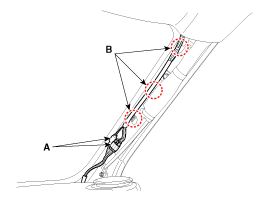
- Using a clip remover, disconnect the mounting clips of the headliner assembly (A).
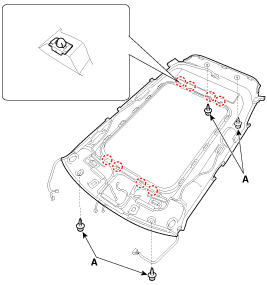
- Slightly remove the rear door weatherstrip.
- Lower the rear part of the headliner slightly.
- To remove the headliner, press the stopper pin (A) in the direction of the arrow.
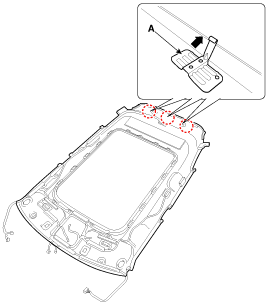
- Before removing the headliner, slightly lower the headliner and disconnect the roof antenna connectors (A).
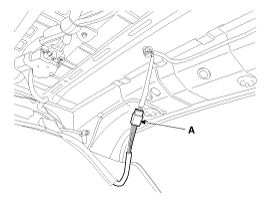
- Remove the headliner assembly (A) from the vehicle through the rear door.
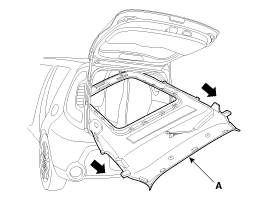
- Remove the vanity lamp. (Refer to Body Electrical System - "Vanity Lamp")
- Remove the hands-free microphone. (Refer to Body Electrical System - "Hands-Free Microphone")
- Remove the headliner wire harness (A) from the headliner assembly (B).

- Be careful not to damage the headliner wiring harness (A) during removal.
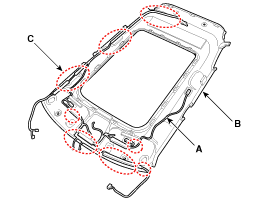

- When installing the headliner, continuously apply hot melt adhesive to the headliner wire harness (A) on the headliner (B) using a glue gun.
- Attach the noise insulation pad (C) to the headliner (B) to reduce noise.
- Install in the reverse order of removal.
- Make sure the connector is properly connected.
- Replace all damaged clips.
Test yourself
A quick Kia Soul EV Owner's Manual quiz: every answer comes with an explanation and a link to the manual page.
Was this page helpful?