Manual Transmission
Control Cable Repair Procedures
In this manual: Manual Transmission
24steps
~144min
4/5difficulty
Done 0 of 24
Removal
- Move the shift lever to 4th gear.
- Remove the air duct and air cleaner assembly. (Refer to Engine Mechanical System - "Air Cleaner")
- Remove the battery and battery tray. (Refer to Engine Electrical System - "Battery")
- Remove the control cable.
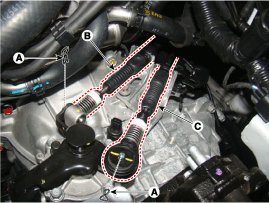
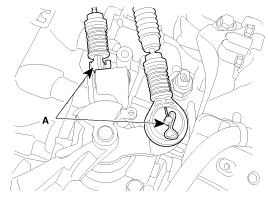
- Remove the control cable from the control shaft after removing the stopper pins (A).
- Remove the control cable (B) from the bracket (C).
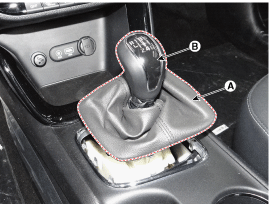
- Remove the shift boot (A), then remove the shift lever knob (B) by turning it counterclockwise.
- Remove the floor console assembly. (Refer to Body - Floor Console)
- Remove the select cable (A) from the shift lever after removing the snap pin.
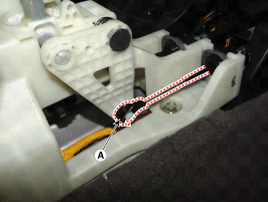
- Remove the shift cable (B) after removing the clip (A).
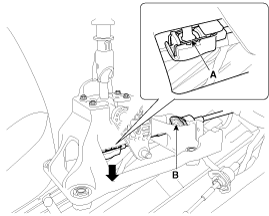
- Remove the cable connectors (A) from the shift lever.
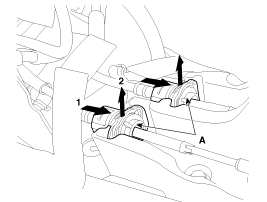
- Remove the hood protector and hood crossmember. (Refer to Body - "Hood Assembly Crossmember")
- Remove the heater unit. (Refer to "Heating, Ventilation, and Air Conditioning" - "Heater")
- Remove the clip (A) after loosening the nut (B).
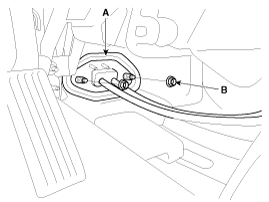
- Move the control cable toward the passenger compartment.
Installation
- Install the cable clip (A).
Tightening torque: 8.8 ~ 13.7 N·m
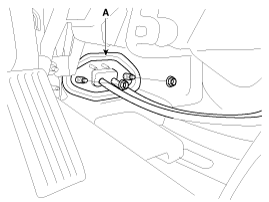
- Install the heater unit. (Refer to "Heating, Ventilation, and Air Conditioning" - "Heater")
- Install the hood protector and hood crossmember. (Refer to Body - "Hood Assembly Crossmember")
- Install the control cable connector (A).
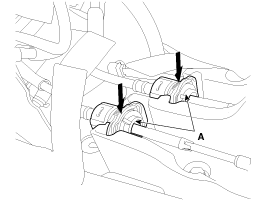
- Install the shift cable (B) to the shift lever after installing the stopper pin (A).
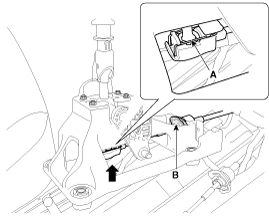
- Insert the stopper pin after installing the select cable (A) to the shift lever.
- Install the console assembly. (Refer to Body - "Console")
- Install the covers (A) to the console after installing the knob (B) by turning it clockwise.
- Install the control cable.
- Make sure that the shift lever and control shaft are in the "4th" position.
- Install the control cable to the cable bracket.
- Pull the holder (A) in the "R" direction, then pull the lock (B) in the "F" direction.
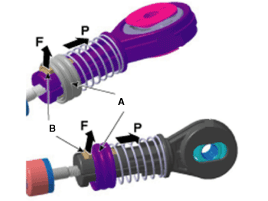
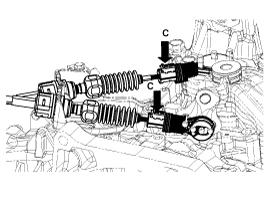
- Press the lock (C) after installing the control cable to the control shaft.
- Insert the stopper pin (A).
- Install the battery and battery tray. (Refer to Engine Electrical System - "Battery".)
- Install the air cleaner assembly. (Refer to Engine Mechanical System - "Air Cleaner")
Test yourself
A quick Kia Cee'd quiz: every answer comes with an explanation and a link to the manual page.
Was this page helpful?