Manual Transmission
Manual Transaxle Repair Procedures
In this manual: Manual Transmission
21steps
~131min
5/5difficulty
1special tools
Done 0 of 21
Removal
- Remove the air cleaner assembly. (Refer to Engine Mechanical System - "Air Cleaner")
- Remove the battery and battery tray. (Refer to Engine Electrical System - "Battery")
- Disconnect the backup light switch (A).
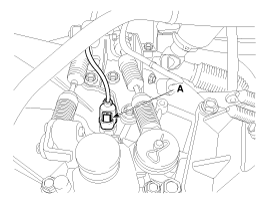
- Disconnect the neutral switch connector (A).
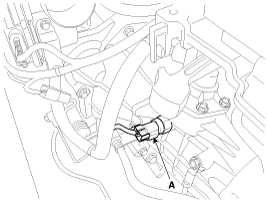
- Disconnect the ground (A).
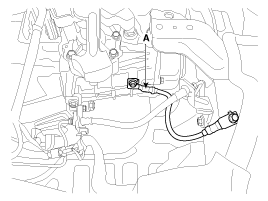
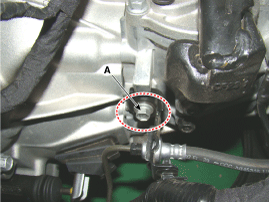
- Remove the clutch tube bracket bolt (A).
Tightening torque: 14.7 ~ 22 N·m
- Remove the control cable.
- Remove the control cable from the control shaft after removing the pins (A).
- Loosen the control cable bracket bolts (B).
Tightening torque: 14.7 ~ 22 N·m
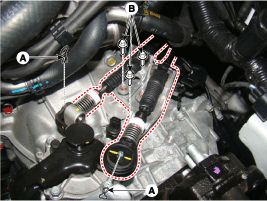
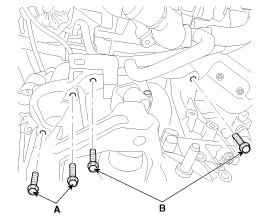
- Remove the transaxle upper mounting bolts (B) and starter mounting bolts (A). Tightening torque: (A): 49.0 ~ 64 N·m (B): 42.2 ~ 54 N·m
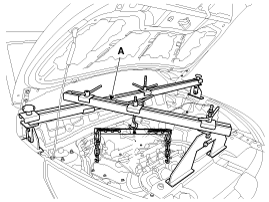
- Remove the upper hood cover. (Refer to Body - "Upper Cover Panel")
- Install the engine mounting bracket (A). (Refer to Special Service Tools - Engine Mounting Bracket Assembly Drawing)
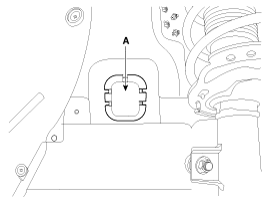
- Remove the cover (A).
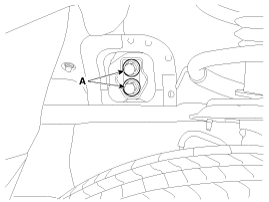
- Remove the transaxle bracket mounting bolts (A).
Tightening torque: 88.3 ~ 108 N·m
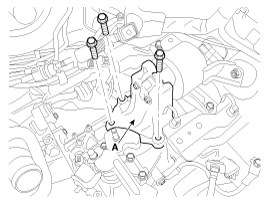
- Remove the transmission support bracket (A).
Tightening torque: 58.9 ~ 78 N·m
- Remove the under cover. (Refer to Engine Mechanical System - "Engine Room Under Cover")
- Remove the drive shaft assembly. (Refer to Drive Shaft and Axle - "Front Drive Shaft")
- Remove the bracket (A).
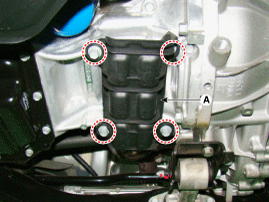
- Remove the driveshaft heat shield (A).
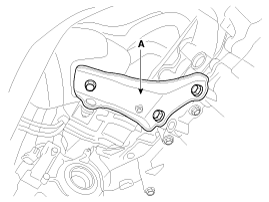
- Remove the clutch release cylinder assembly (B) after loosening the bolts (A).
Tightening torque: 14.7 ~ 22 N·m
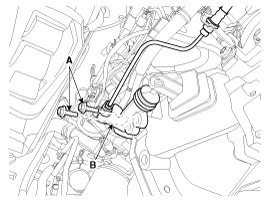
- Remove the roller rod bracket (C) after removing the bolts (A, B). Tightening torque: (A): 49.0 ~ 64 N·m (B): 107.9 ~ 128 N·m
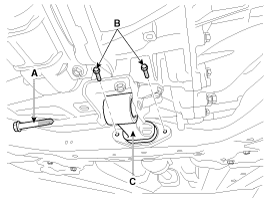
- Remove the mounting bolts (A, B) while supporting the transaxle with a jack. Tightening torque: (A): 42.2 ~ 48 N·m (B): 42.2 ~ 54 N·m
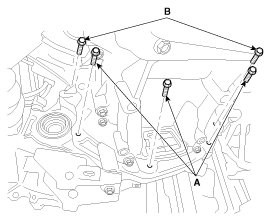
- Remove the transaxle by slowly lowering the jack.
Installation
- Install in the reverse order of removal.
Test yourself
A quick Kia Cee'd quiz: every answer comes with an explanation and a link to the manual page.
Was this page helpful?