Remove the headliner. (Refer to Headliner - "Headliner Assembly")
Remove the roof antenna.
Remove the sliding glass. (Refer to Panoramic Roof - Sliding Glass)
Remove the panoramic roof wind deflector. (Refer to Panoramic Roof - Panoramic Roof Wind Deflector)
Remove the roof trim. (Refer to Body Side Mouldings - Roof Trim)
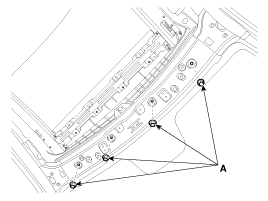
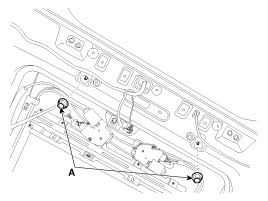
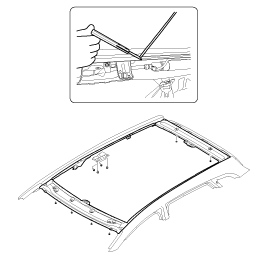
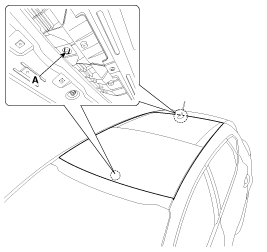
Loosen the sunroof mounting nuts (A).
Tightening torque: 6.9 ~ 10.8 N·m
[Front][Rear]
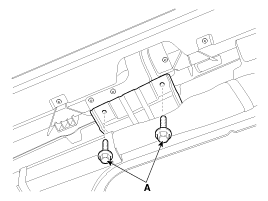
Loosen the panoramic roof side mounting bolts (A).
Tightening torque: 10.8 ~ 13.7 N·m
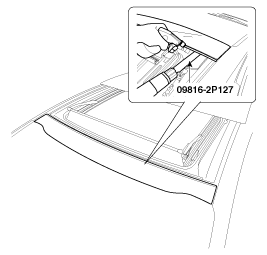
Open the gap between the body and the windshield with a flat-tip screwdriver, then cut the sealant at the rear and side using tool (09816-2P127).
Remove the windshield (A).
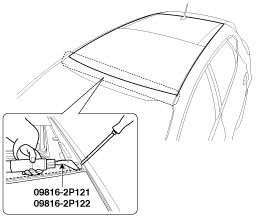
Open the gap between the body and the roof with a flat-tip screwdriver, then cut the front seal using tool (09816-2P121, 09816-2P122).
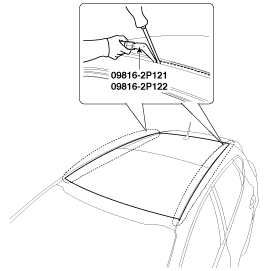
Open the gap between the body and the roof with a flat-tip screwdriver, then cut the sealant at the side using tool (09816-2P121, 09816-2P122).
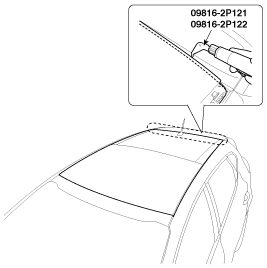
Open the gap between the body and the roof with a flat-tip screwdriver, then cut the rear seal using tool (09816-2P121, 09816-2P122).
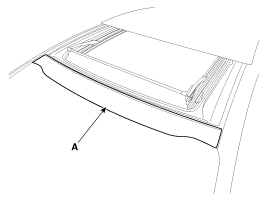
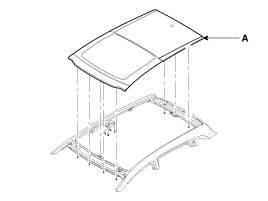
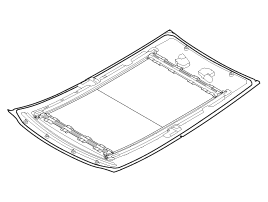
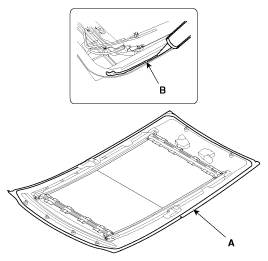
Cut the sealant between the panoramic roof and the body. Remove the panoramic roof (A).
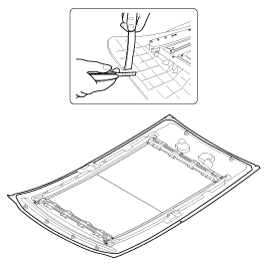
Using a knife, scrape off the old adhesive to a thickness of approximately 2 mm (0.08 in) on the adhesive surface around the entire panoramic roof opening flange.
Clean the body bonding surface with a cloth dampened with alcohol. After cleaning, do not allow oil, grease, or water to contact the cleaned surface.
Using a sponge, apply a thin coat of body primer to the original adhesive around the windshield opening flange. Allow the body primer to dry for at least 10 minutes.
Apply a thin layer of glass primer to the outer side of the fasteners.
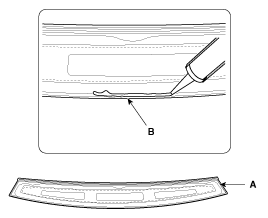
Pack the adhesive into a cartridge without air pockets to ensure continuous delivery. Place the cartridge in a sealant gun and apply a bead of sealant (B) along the edge of the panoramic roof (A), as shown in the illustration. Apply the adhesive within 30 minutes after applying the glass primer. Make the bead slightly thicker at each corner. Sealant bead dimensions: Height: 12 mm (0.4724 in) Width: 8 mm (0.3150 in)
Attach the panoramic roof to the body center pass (A). Carefully install the panoramic roof onto the body frame.
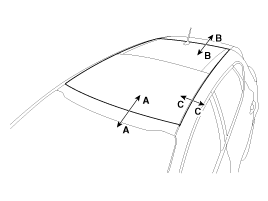
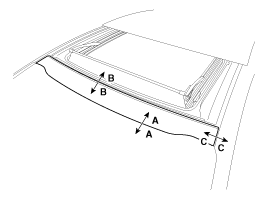
After installing the panoramic roof, check the gap and flush on each side.
Section
Sale
Gap
Front Edge
A-A
0.7 ± 1 mm
5.9 ± 1.5 mm
(0.0276 ± 0.0394 in.)
(0.2323 ± 0.0591 in)
Rear Edge
B-B
1.5 ± 1 mm
5.0 ± 1.5 mm
(0.0591 ± 0.0394 in)
(0.1969 ± 0.0591 in)
Side edge
C-C
-
3.8 ± 1 mm
-
(0.1496 ± 0.0394 in)
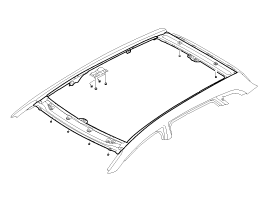
Install the nuts (A) on the panoramic roof.
Tightening torque: 6.9 ~ 10.8 N·m
[Front][Rear]
Install the bolts (A).
Tightening torque: 10.8 ~ 13.7 N·m
Install the sliding glass.
Fully open the sliding glass.
Pack the adhesive into a cartridge without air pockets to ensure continuous delivery. Place the cartridge in a sealant gun and apply a bead of sealant (B) around the edge of the windshield (A), as shown in the illustration. Apply the adhesive within 30 minutes after applying the glass primer. Make the bead slightly thicker at each corner.
Install the front glass (A).
Install the roof trim.
Install the panoramic roof deflector.
Fully close the sliding glass.
Check the gap and clearance on each side after installing the windshield (A).
Section
Sale
Gap
Front Edge
A-A
0.7 ± 1 mm
5 ± 1.5 mm
(0.0276 ± 0.0394 in.)
(0.1969 ± 0.0591 in)
Rear Edge
B-B
1.5 ± 1 mm
4 ± 1.5 mm
(0.0591 ± 0.0394 in)
(0.1575 ± 0.0591 in)
Side edge
C-C
-
3.8 ± 1 mm
-
(0.1496 ± 0.0394 in)
Install the roof antenna.
Scrape or wipe off excess adhesive with a spatula or cloth. To remove adhesive from painted surfaces or the windshield, wipe with a soft cloth soaked in alcohol.
Allow the adhesive to cure for at least one hour, then spray water onto the roof and check for leaks. If a leak occurs, allow it to dry, then repair the sealant:
Allow the vehicle to stand for at least four hours after installation. If the vehicle must be driven within 4 hours, drive it slowly.
Keep the windshield dry for the first hour after installation.
Install all remaining removed parts. Install the rearview mirror after the adhesive has fully cured. Advise the customer not to do the following for two to three days:
Close doors gently and raise all windows.
Excessively twist the body (for example, when entering and exiting angled driveways or driving on uneven, rough roads).
Install the headliner.
[Installation]
?
Test yourself
A quick Kia Cee'd quiz: every answer comes with an explanation and a link to the manual page.