Drive Shaft and Axle
Repair Procedures
In this manual: Drive Shaft and Axle
17steps
~112min
5/5difficulty
2special tools
Done 0 of 17
Replacement
- Loosen the wheel nuts slightly. Raise the vehicle and make sure it is securely supported.
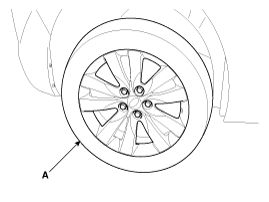
- Remove the front wheel and tire (A) from the front hub.
Tightening torque: 88.2 - 108 N·m
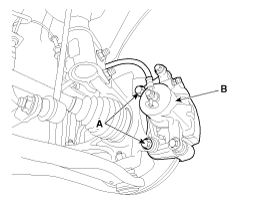
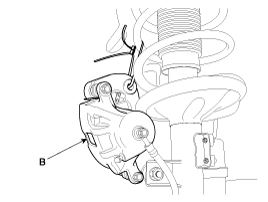
- Remove the brake caliper mounting bolts (A) and position the brake caliper assembly (B) aside with wire.
Tightening torque: 78.4 ~ 98 N·m
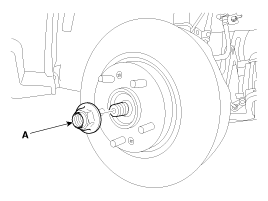
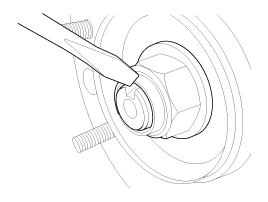
- Loosen the drive shaft nut (A) from the front hub while applying the brake.
Tightening torque: 274.4 ~ 294 N·m N·m (28.0 ~ 30.0 kgf·m, 202.4 ~ 217.0 lbf·ft)
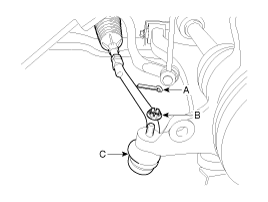
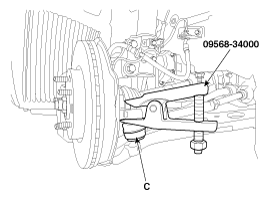
- Using SST (09568-34000), disconnect the tie rod end ball joint (C) from the steering knuckle.
- Remove the cotter pin (A).
- Remove the castellated nut (B).
- Use SST (09568-34000).
Tightening torque: 23.5 ~ 33 N·m
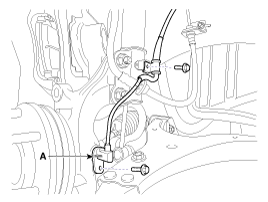
- Remove the wheel speed sensor (A).
Tightening torque: 6.8 - 10.7 N·m
- Remove the lower arm (A) from the steering knuckle.
Tightening torque: 98.0 ~ 118 N·m
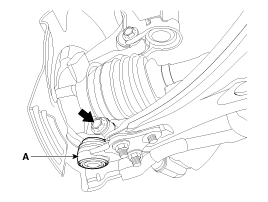
- Disconnect the drive shaft (A) from the front hub assembly.
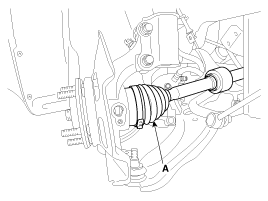
- Loosen the upper steering knuckle mounting bolts and remove the steering knuckle assembly (A).
Tightening torque: 137.3 ~ 157 N·m (14.0 ~ 16.0 kgf·m, 101.3 ~ 115.7 lbf·ft)
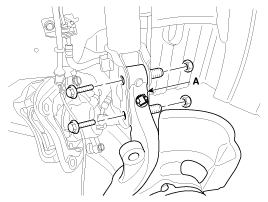
Disassembly
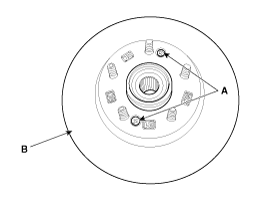
- Loosen the set screws (A, 2 pcs) and remove the brake disc (B) from the hub.
Tightening torque: 4.9 - 5.9 N·m
- Loosen the bolts (A, 4 pcs) and remove the steering knuckle (B) from the hub (C).
Tightening torque: 78.5 - 98 N·m
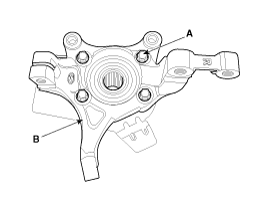
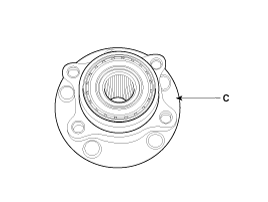
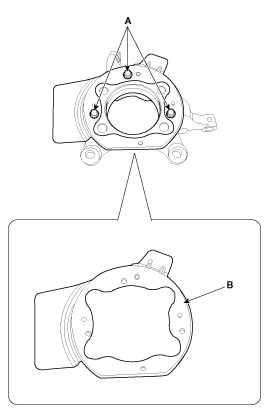
- Loosen the bolts (A, 3 pcs) and remove the dust cover (B) from the knuckle.
Tightening torque: 6.8 - 10.7 N·m
- Installation is in the reverse order of removal.
Inspection
- Check the hub for cracks and worn splines.
- Check the joint for cracks.
- Check the bearing for cracks or damage.
- The brake pad surface and the brake disc sliding surface must be free of grease, oil, rust and other foreign substances.
Installation
- Install in the reverse order of removal.
Test yourself
A quick Kia Cee'd quiz: every answer comes with an explanation and a link to the manual page.
Was this page helpful?