Joint Shaft Assembly [Skyactiv G 2.0]
1. Assemble in the order indicated in the table.
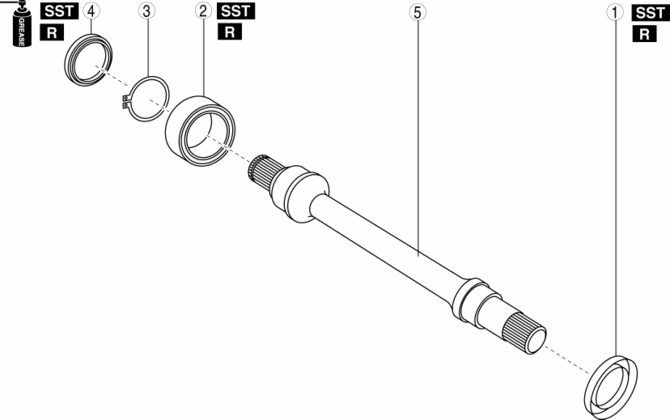
Dust cover
.
Bearing
.
Snap ring
Dust seal
.
Joint shaft
Dust Cover Assembly Note
1. Mark the position at the distance indicated in the figure from the end of the joint shaft.
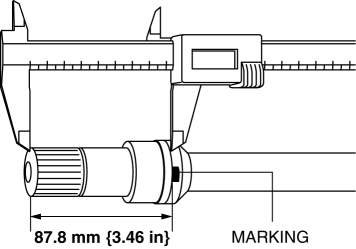
2. Using the SST
, install a new dust cover aligned to the marked position.
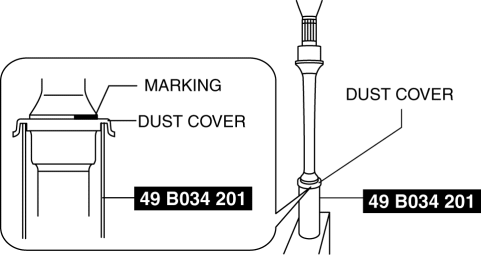
CAUTION:
- Use the SST
with the notched surface facing down.
3. After installing, verify that the dust cover is installed within the specification.
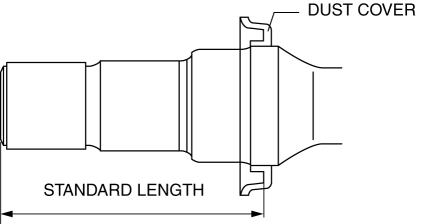
- Standard length
87.0—88.0 mm {3.43—3.46 in}
.
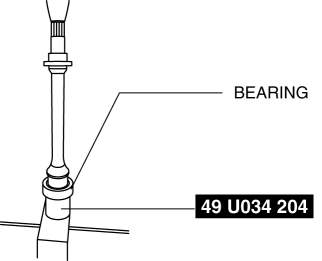
CAUTION:
Use the SST with the flat surface facing up.
1. Apply grease to a new dust seal lip.
2. Mark the position at the distance indicated in the figure from the end of the joint shaft.
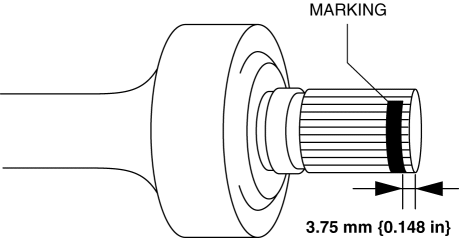
3. Set a new dust seal to the SST
, and press the dust seal into the joint shaft.
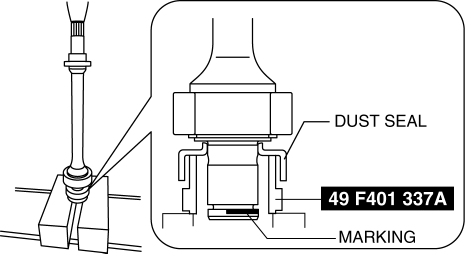
4. Press the dust seal with the mark on the joint shaft aligned.
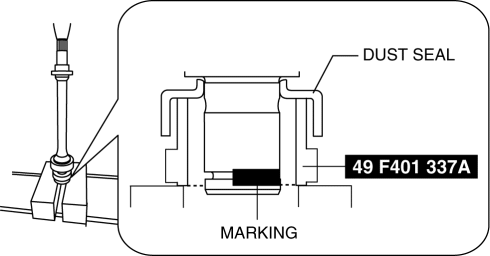
5. After installing, verify that the dust seal is installed within the specification.
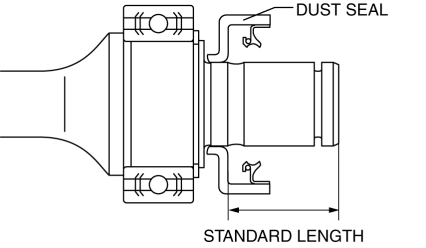
- Standard length
38.75—39.55 mm {1.526—1.557 in}
Test yourself
A quick Mazda 3 quiz: every answer comes with an explanation and a link to the manual page.