Manual Transaxle Removal/Installation [C66 M R]
1. Remove the battery cover..
2. Disconnect the negative battery cable..
3. Remove the aerodynamic under cover No.2 and the splash shield as a single unit..
4. Drain the manual transaxle oil..
5. Disconnect and/or remove the following parts in the engine compartment.
a. Remove the battery component. (ex: battery, battery tray and PCM component).
b. Remove the air cleaner component. (ex: air cleaner, air hose).
c. Disconnect the control cable from MTX..
d. Disconnect the connectors and GND wiring harness from the MTX.
e. Remove the brackets from MTX.
6. Disconnect and/or remove the following parts related to the suspension and axle.
a. Remove the front tires..
b. Disconnect the clip securing the brake hose from the shock absorber..
c. Disconnect the ABS wheel-speed sensors from the steering knuckles..
d. Disconnect the tie-rod end ball joints from the steering knuckles..
e. Disconnect the stabilizer control links (upper side) from the shock absorbers..
f. Disconnect the front lower arms from the steering knuckles..
g. Disconnect the drive shaft (LH) from the MTX..
h. Disconnect the drive shaft (RH) from the joint shaft..
i. Remove the joint shaft..
7. Disconnect and/or remove the following parts from the underside of the vehicle.
a. Remove the hanger rubber from the exhaust manifold.
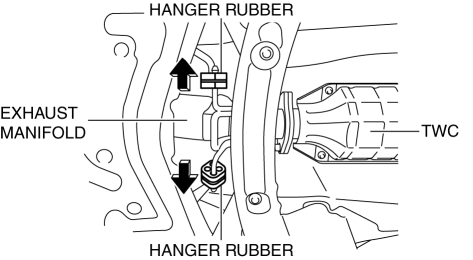
b. Disconnect the clutch release cylinder from MTX..
c. Remove the starter..
8. Install the SSTusing the following procedure.
CAUTION:Refer to the SST instruction manual for the basic handing procedure.
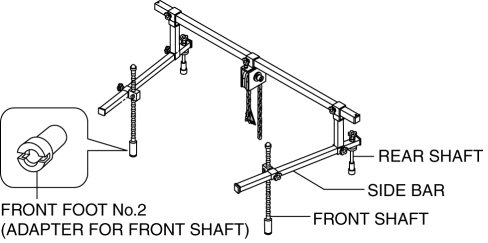
a. Remove the windshield wiper arm and blade..
b. Remove the front fender molding..
c. Remove the cowl grille..
d. Remove the cowl panel..
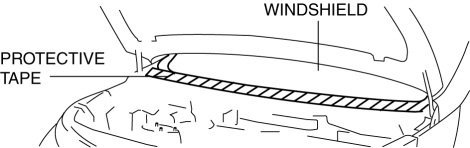
e. Protect the windshield using tape.
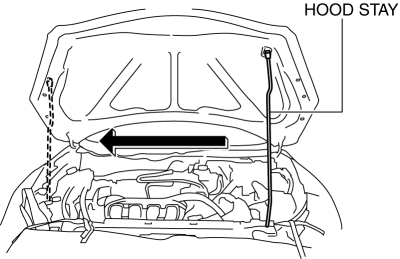
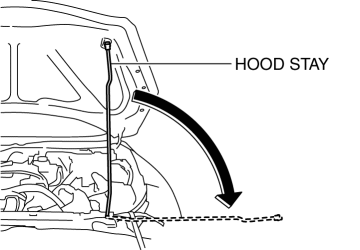
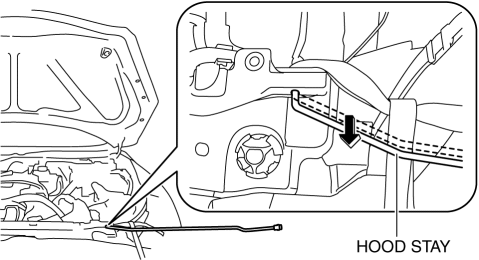
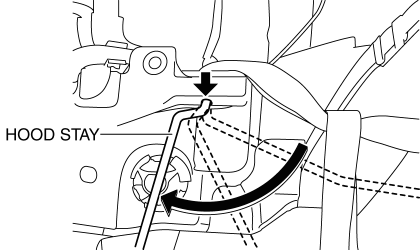
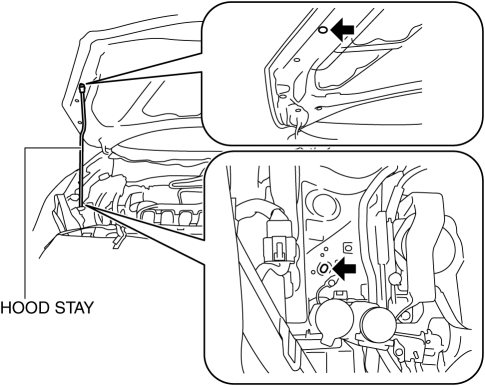
f. Replace the hood stay to the position shown in the figure.
NOTE:
- The hood opening angle is increased by placing the hood stay to the position shown in the figure. A space for installing the SST
can be secured by increasing the hood opening angle.
i. Disconnect the washer tank and set it aside.
ii. Tilt the hood stay in the direction of the arrow shown in the figure.
iii. Pull out the hood stay in the direction of the arrow shown in the figure.
iv. Rotate the hood stay at the pivot fulcrum shown in the figure.
v. Remove the hood stay.
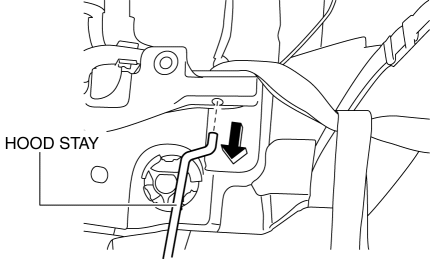
vi. Install the hood stay as shown in the figure.
CAUTION:
If the hood stay is not hooked to the hood hole, the hood may fall down. Lightly shake the hood to verify that the hood stay is hooked securely.
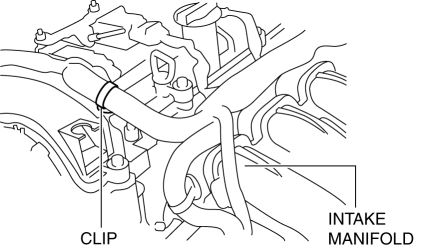
, disconnect the clip shown in the figure and set the wiring harness aside.
h. Install the SST using part number 99794 1025 or an M10×1.25, length 25 mm {0.98 in}
bolt as shown in the figure.
Engine front side
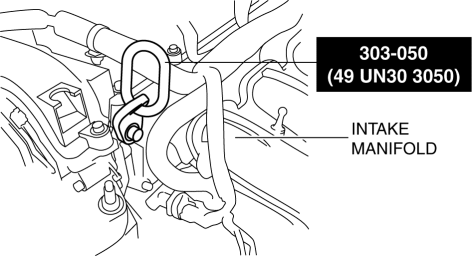
- Tightening torque
38—51 N·m {3.9—5.2 kgf·m, 29—37 ft·lbf}
Engine rear side
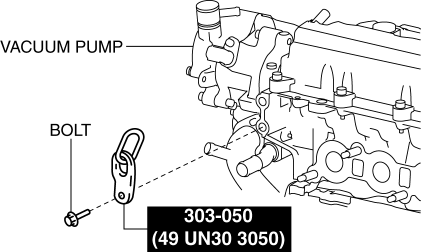
- Tightening torque
38—51 N·m {3.9—5.2 kgf·m, 29—37 ft·lbf}
.
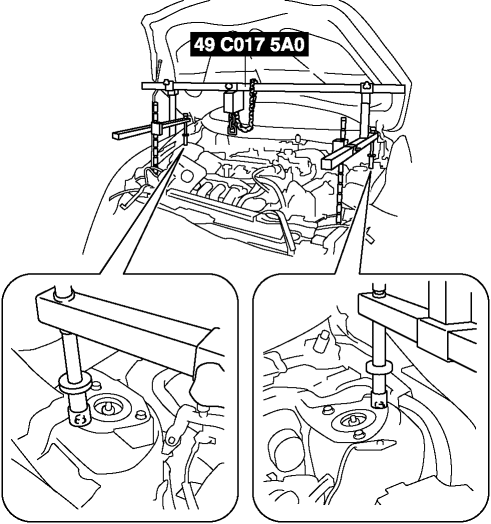
j. Align the bolt of the shock absorber (LH) shown in the figure with the rear shaft hole for the left side of the SST
.
k. Install one front foot No.2 to each of the left and right front shafts of the SST, and then align the holes of the SSTfront shafts with the bolt on the left and right side of each front side frame.
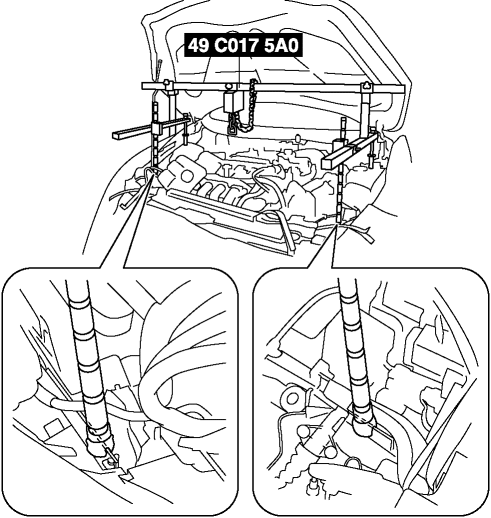
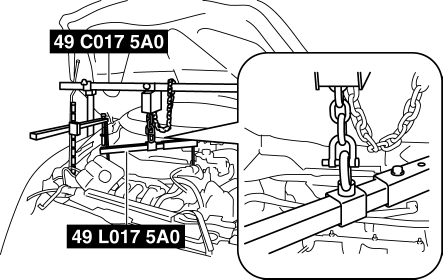
l. Install the SST (49 L017 5A0) to the SST (49 C017 5A0)
as shown in the figure.
m. Install the SST (49 L017 5A0) to the SST (49 UN30 3050) with the hook of the SST (49 L017 5A0)
facing outward.
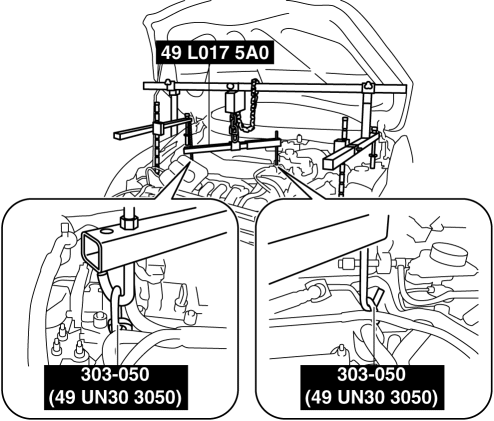
CAUTION:
Install the SST (49 L017 5A0) so that it does not interfere with parts such as the fuel pipe. If the SST (49 L017 5A0) interferes, parts such as the fuel pipe could be damaged.
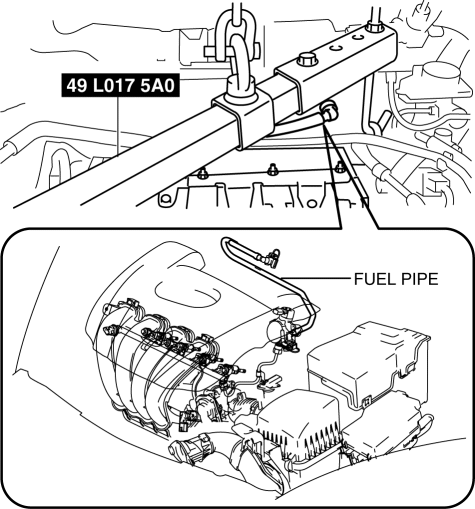
.
o. Apply tension to the chain to secure the engine.
9. Remove in the order indicated in the table.
10. Install in the reverse order of removal.
11. Add the specified amount of specified transaxle oil..
12. If the manual transaxle is overhauled, perform the “INSPECTION AFTER MANUAL TRANSAXLE OVERHAUL”..
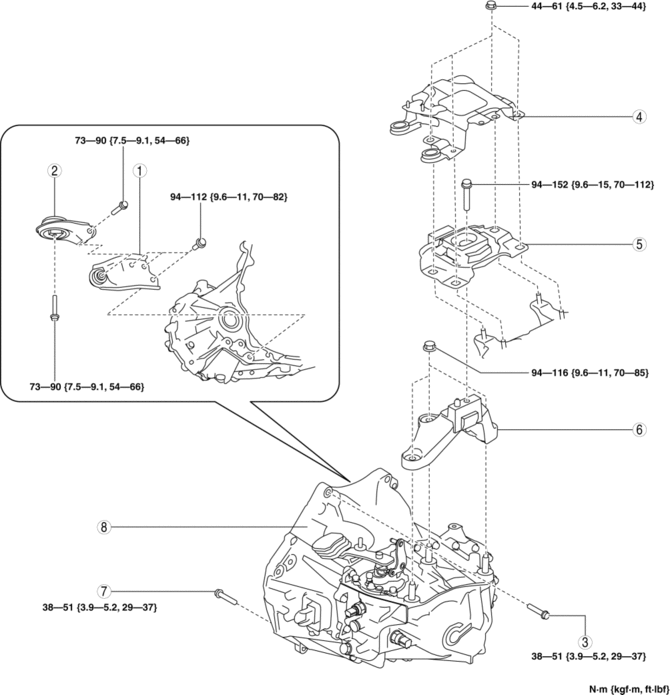
No.1 engine mount bracket
(See No.1 Engine Mount and No.4 Engine Mount Installation Note.)
No.1 engine mount rubber
(See No.1 Engine Mount and No.4 Engine Mount Installation Note.)
Transaxle mounting bolt (upper side)
Battery tray bracket
No.4 engine mount rubber
(See No.1 Engine Mount and No.4 Engine Mount Installation Note.)
No.4 engine mount bracket
(See No.1 Engine Mount and No.4 Engine Mount Installation Note.)
Transaxle mounting bolt (lower side)
Manual transaxle
(See Manual Transaxle Installation Note.)
Manual Transaxle Installation Note WARNING:
Install the transaxle carefully, holding it steady. If the transaxle falls it could be damaged or cause injury.
1. Set the transaxle on a jack and lift into place.
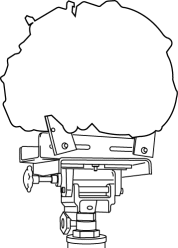
2. Install the transaxle mounting bolts.
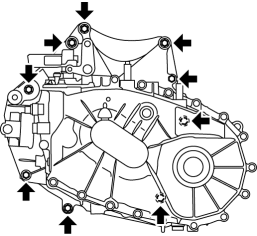
- Tightening torque
38—51 N·m {3.9—5.2 kgf·m, 29—37 ft·lbf}
(49 C017 5A0) so that the engine is located at the specified position.
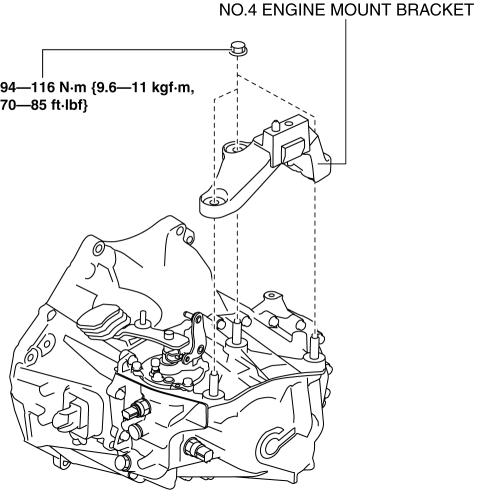
No.1 Engine Mount and No.4 Engine Mount Installation Note1. Install the No.4 engine mount bracket to the transaxle case.
2. Install the No.1 engine mount bracket to the transaxle case.
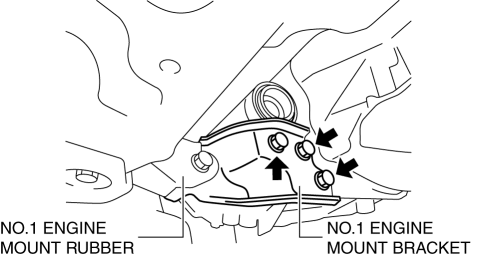
- Tightening torque
94—112 N·m {9.6—11 kgf·m, 70—82 ft·lbf}
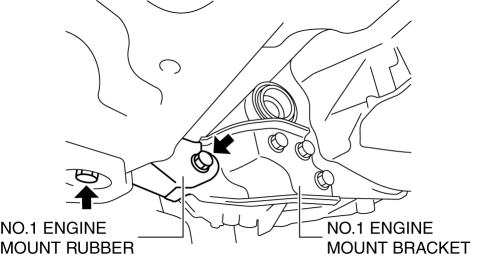
3. Temporarily tighten the bolts as shown in the figure.
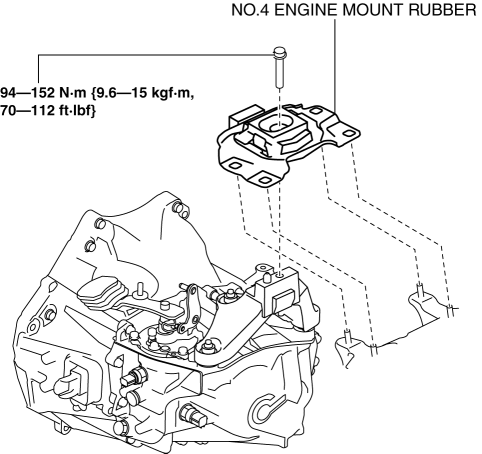
4. Place the No.4 engine mount rubber with the body stud bolts passing through the holes and tighten the bolt in the figure.
5. Fully tighten the bolts in the order shown in the figure and install the No.1 engine mount rubber.
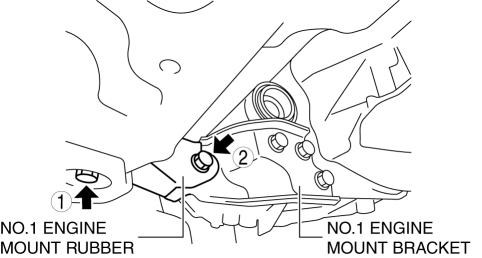
- Tightening torque
73—90 N·m {7.5—9.1 kgf·m, 54—66 ft·lbf}
6. Place the battery bracket on the No.4 Engine mount rubber with the body stud bolts passing through the holes and tighten bolts and nuts.
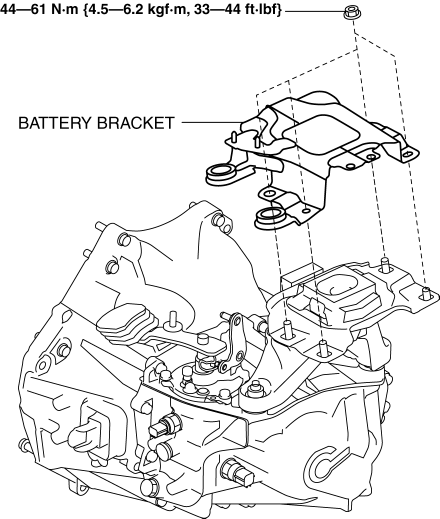
7. Remove the SST
(49 C017 5A0).
Test yourself
A quick Mazda 3 quiz: every answer comes with an explanation and a link to the manual page.