Wheel Hub, Steering Knuckle Disassembly/Assembly
1. Disassemble in the order indicated in the table.
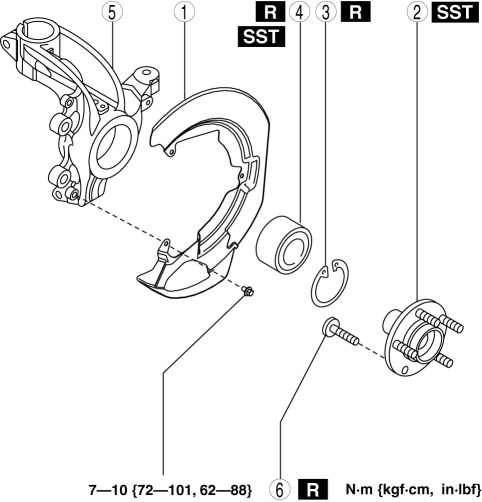
Dust Cover
Wheel hub component
.
Retaining clip
Wheel bearing
(See Wheel Bearing Removal Note.)
(See Wheel Bearing Installation Note.)
Steering knuckle
Hub bolt
(See Wheel Hub Bolt Removal Note.)
(See Wheel Hub Bolt Installation Note.)
2. Assemble in the reverse order of disassembly.
Wheel Hub Component Removal Note 1. Remove the wheel hub component using the SSTs.
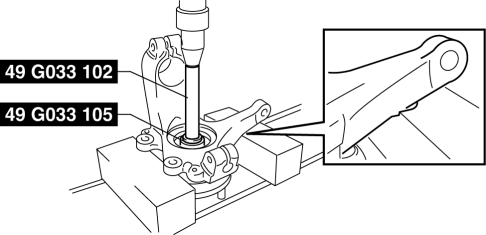
2. If the bearing inner race remains on the front wheel hub component, perform the following procedure:
Without using SST 1. Grind a section of the bearing inner race until approx. 0.5 mm {0.02 in}remains.
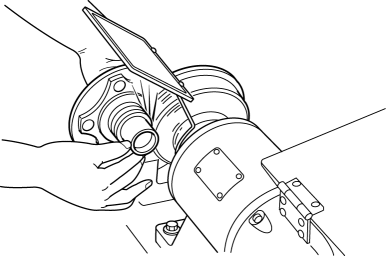
2. Remove the bearing inner race using a chisel.
With using SST1. Remove the part as shown in the figure.
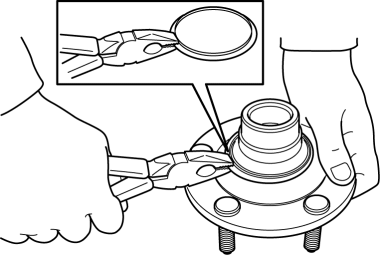
2. Position the SSTs
and a spare bolt (M10 length 90 mm {3.5 in} or less) as shown in the figure.
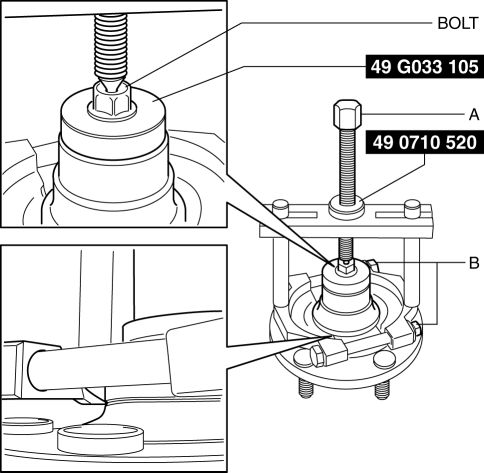
CAUTION:
When tightening section A, tighten section B securely because the engagement of the SST tab is shallow and it can come off easily.
.
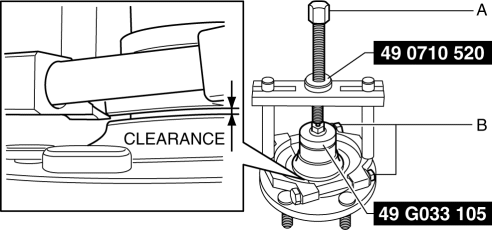
4. Temporarily loosen SST section A and position the SST
again.
5. Tighten SSTsection A and remove the bearing inner race.
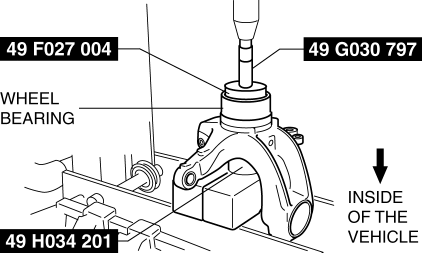
Wheel Bearing Removal Note 1. Remove the wheel bearing using the SSTs.
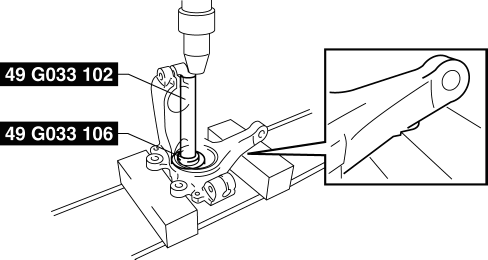
Wheel Hub Bolt Removal Note NOTE:
The hub bolts do not need to be removed unless they are being replaced.
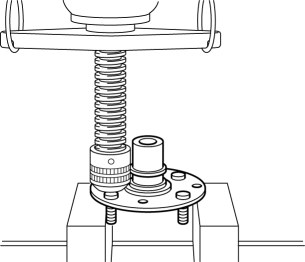
1. Remove the hub bolt using a press.
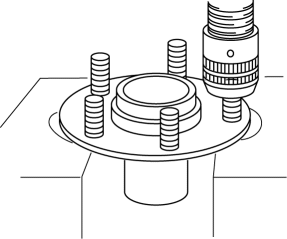
Wheel Hub Bolt Installation Note
1. Install the new hub bolt using a press.
Wheel Bearing Installation Note NOTE:
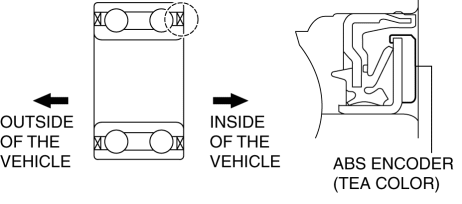
Install the wheel bearing with the ABS encoder (tea color) facing inside of the vehicle.
.
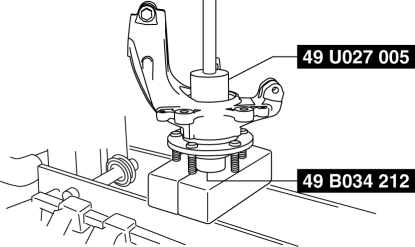
Wheel Hub Component Installation Note 1. Install the wheel hub component using the SSTs
.
Test yourself
A quick Mazda 3 quiz: every answer comes with an explanation and a link to the manual page.