Front Wheel Hub and Knuckle
Exploded View
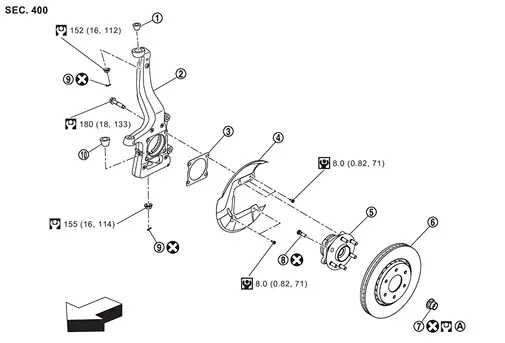
 |
Upper ball seat |  |
Steering knuckle |  |
Baffle |
 |
Splash guard |  |
Wheel hub and bearing assembly |  |
Disc rotor |
 |
Hub lock nut |  |
Hub bolt |  |
Cotter pin |
 |
Lower ball seat | ||||
 |
: Comply with the installation procedure when tightening. Refer to Removal and Installation. | ||||
 |
: vehicle front | ||||
 |
: N·m (kg-m, in-lb) | ||||
 |
: N·m (kg-m, ft-lb) | ||||
 |
: Always replace after every disassembly. | ||||
Removal and Installation
REMOVAL
Remove tires. Refer to ROAD WHEEL TIRE : Removal & Installation.
Remove brake hose bracket. Refer to Removal and Installation.
Remove brake caliper assembly. Hang brake caliper assembly in a place where it will not interfere with work. Refer to FRONT BRAKE CALIPER ASSEMBLY : Removal & Installation.
Remove disc rotor.
Remove wheel sensor harness. Refer to Removal and Installation.
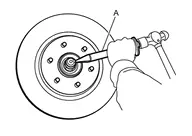
Using lock nut chisel [SST: KV40108800 (NI-52982)] (A), release stacked area of wheel hub lock nut.
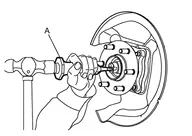
Loosen wheel hub lock nut, using a hub lock nut wrench [SST: KV40104001 (NI-53385)] (A).

Patch wheel hub lock nut with a piece of wood. Hammer the wood to disengage wheel hub from drive shaft.
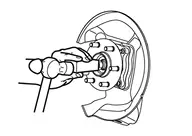
Remove wheel hub lock nut.
Remove steering outer socket. Refer to Removal and Installation.
Set suitable jack under lower link.
Remove wheel hub and bearing assembly, and then remove splash guard and baffle.
Separate upper link from steering knuckle.
Remove lower link from steering knuckle.
Remove steering knuckle.
Remove hub bolts  from wheel hub assembly, using the ball joint remover (commercial service tool) (A).

Perform inspection after removal. Refer to Inspection.
INSTALLATION
Note the following, and install in the reverse order of the removal.
Hub Bolts
Place a suitable washer as shown in the figure to install the hub bolts by using the tightening force of the nut  .
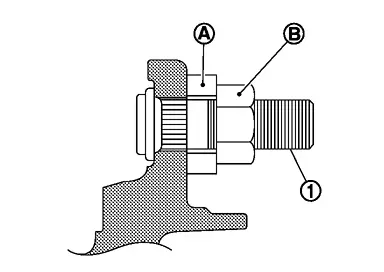
Drive shaft
Clean the matching surface of wheel hub lock nut and wheel hub.
Clean the matching surface of drive shaft, wheel hub, and wheel bearing. And then apply paste [service parts (440037S000)] to surface
of joint sub-assembly of drive shaft.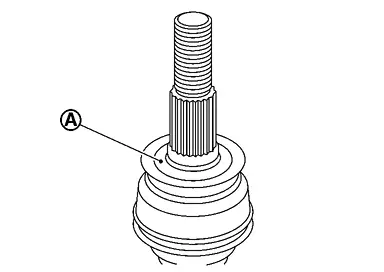
Amount paste 1.0 – 3.0 g (0.04 – 0.10 oz) When installing drive shaft to wheel hub.
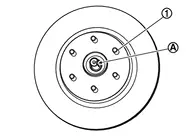
Use the following torque range for tightening the wheel hub lock nut.
: 218 - 223 N·m Using lock nut crimp punch [SST: KV40108700 ( − )] (A), stake wheel hub lock nut and drive shaft staked area.

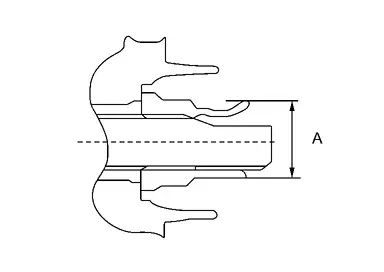
A : 6.2 mm (0.244 in) B : 29.4 - 30.8 mm (1.157 - 1.213 in)
Disc rotor
Inspection
INSPECTION AFTER REMOVAL
Check the following items, and replace the part if necessary.
Ball Joint Inspection
Check boots of upper link, lower link and steering outer socket ball joint for breakage, axial play, and swing torque:
Upper link: Refer to Inspection.
Lower link: Refer to Inspection.
Steering outer socket ball joint: Refer to Inspection.
INSPECTION AFTER INSTALLATION
Check runout of disc rotor, when replaced the disc rotor. Refer to Inspection and Adjustment.
Check wheel sensor harness for proper connection. Refer to Exploded View.
Check the wheel alignment. Refer to Inspection.
Adjust neutral position of steering angle sensor. Refer to Work Procedure.