Sonar Sensor (rear)
Exploded View
WITHOUT WELDING TYPE
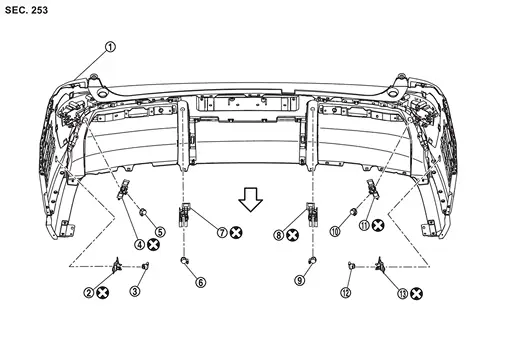
 |
Rear bumper fascia |  |
Side sensor rear RH holder |  |
Side sensor rear RH |
 |
Corner sensor rear RH holder |  |
Corner sensor rear RH |  |
Center sensor rear RH |
 |
Center sensor rear RH holder |  |
Center sensor rear LH holder |  |
Center sensor rear LH |
 |
Corner sensor rear LH |  |
Corner sensor rear LH holder |  |
Side sensor rear LH |
 |
Side sensor rear LH holder | ||||
 |
:Always replace after every disassembly. | ||||
| vehicle front | |||||
WITH WELDING TYPE
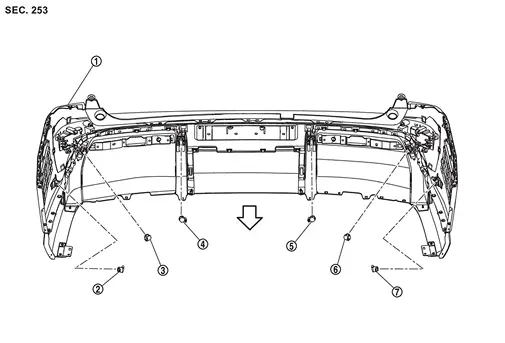
|
Rear bumper fascia | |
Side sensor rear RH | |
Corner sensor rear RH |
|
Center sensor rear RH | |
Center sensor rear LH | |
Corner sensor rear LH |
|
Side sensor rear LH | ||||
| vehicle front | |||||
Removal & Installation
REMOVAL
Center sensor
Disconnect sonar sensor harness connector , follow the procedure below.Slide the lock  of the connector toward the direction (1). Keep pushing (2) in the lock of connector and remove the harness connector
 to ward the direction (3).

Unhook the pawls in the direction ( ) and remove the sonar sensor from the sensor holder.

Remove the sensor holder from the rear bumper fascia. (Without welding type)
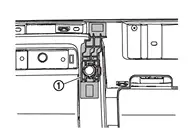
Corner sensor
Disconnect sonar sensor harness connector , follow the procedure below.Slide the lock of the connector toward the direction (1). Keep pushing (2) in the lock of connector and remove the harness connector to ward the direction (3).
Unhook the pawls in the direction () and remove the sonar sensor from the sensor holder.

Remove the sensor holder from the rear bumper fascia. (Without welding type)

Side sensor
Disconnect sonar sensor harness connector , follow the procedure below.Slide the lock of the connector toward the direction (1). Keep pushing (2) in the lock of connector and remove the harness connector to ward the direction (3).
Unhook the pawls in the direction () and remove the sonar sensor from the sensor holder.

Remove the sensor holder from the rear bumper fascia. (Without welding type)

INSTALLATION
Center sensor
Install in the reverse order of removal
Install in the reverse order of removal when install only the sensor.
Follow the procedure below when replace the sensor holder.
Hook the pawls
to install the sonar sensor to the sensor holder.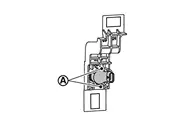
Degrease and clean the inner side of the bumper fascia base line
and then apply primer (3M K500,K520 or equivalent) on the sensor holder installing face , which is shown as on the figure.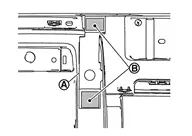
Dry the primer for more than 3 minutes and peel off the double sided tape releasing paper (film) and then taking precautions not to contact the bumper with the double sided tape (
on the figure), bend the sensor holder to the arrow direction as shown on the figure ().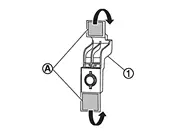
Match the sonar sensor
part shown on the figure, to the sensor installing hole of the bumper fascia.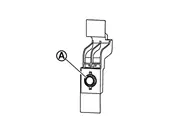
Remove the sensor from the sensor holder and press the adhesion face (
part on figure) throughout with your thumb for more than 2 seconds and pressure bond the sensor holder [Target pressure: 50 N (5.1kg, 11.3 lb)].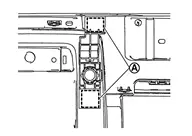
Hook the pawls
to install the sonar sensor to the sensor holder.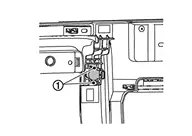
Shake the
part of the sensor holder shown on the figure up and down and then right and left to confirm that the holder has been installed (bonded) firmly.Connect connector to the sonar sensor.
Install the rear bumper. Refer to Removal and Installation.
Corner sensor
Install in the reverse order of removal
Install in the reverse order of removal when install only the sensor.
Follow the procedure below when replace the sensor holder.
Hook the pawls
to install the sonar sensor to the sensor holder.
Degrease and clean the inner side of the bumper fascia base line
and then apply primer (3M K500,K520 or equivalent) on the sensor holder installing face , which is shown as on the figure.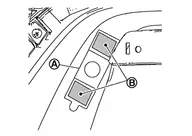
Dry the primer for more than 3 minutes and peel off the double sided tape releasing paper (film) and then taking precautions not to contact the bumper with the double sided tape (
on the figure), bend the sensor holder to the arrow direction as shown on the figure ().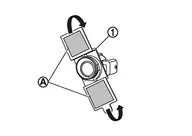
Match the sonar sensor
part shown on the figure, to the sensor installing hole of the bumper fascia.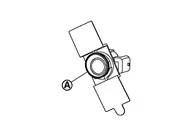
Remove the sensor from the sensor holder and press the adhesion face (
part on figure) throughout with your thumb for more than 2 seconds and pressure bond the sensor holder [Target pressure: 50 N (5.1kg, 11.3 lb)].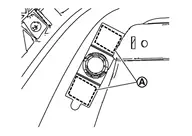
Hook the pawls
to install the sonar sensor to the sensor holder.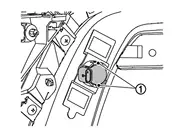
Shake the
part of the sensor holder shown on the figure up and down and then right and left to confirm that the holder has been installed (bonded) firmly.Connect connector to the sonar sensor.
Install the rear bumper. Refer to Removal and Installation.
Side sensor
WITH WELDING TYPE
Install in the reverse order of removal
WITHOUT WELDING TYPE
Install in the reverse order of removal when install only the sensor.
Follow the procedure below when replace the sensor holder.
Hook the pawls
to install the sonar sensor to the sensor holder.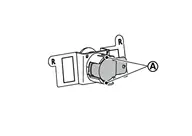
Degrease and clean the inner side of the bumper fascia base line
and then apply primer (3M K500,K520 or equivalent) on the sensor holder installing face , which is shown as on the figure.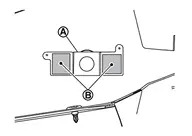
Dry the primer for more than 3 minutes and peel off the double sided tape releasing paper (film) and then taking precautions not to contact the bumper with the double sided tape (
on the figure), bend the sensor holder to the arrow direction as shown on the figure ().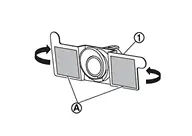
Match the sonar sensor
part shown on the figure, to the sensor installing hole of the bumper fascia.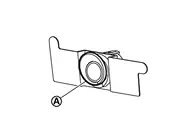
Remove the sensor from the sensor holder and press the adhesion face (
part on figure) throughout with your thumb for more than 2 seconds and pressure bond the sensor holder [Target pressure: 50 N (5.1kg, 11.3 lb)].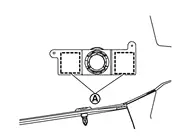
Hook the pawls
to install the sonar sensor to the sensor holder.
Shake the
part of the sensor holder shown on the figure up and down and then right and left to confirm that the holder has been installed (bonded) firmly.Connect connector to the sonar sensor.
Install the rear bumper. Refer to Removal and Installation.