Side oil seal
Exploded View
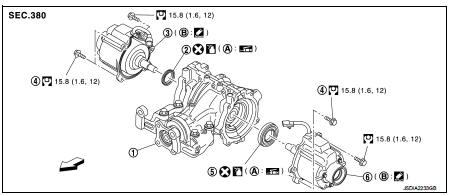
1. Rear final drive assembly 2. Side oil seal (right) 3. Electric controlled coupling (right) 4. Reamer bolt
5. Side oil seal (left) 6. Electric controlled coupling (left)
A. Oil seal lip B. Gear carrier mouting face
 : Vehicle front
 : N·m (kg-m, ft-lb)
 : Always replace after every
disassembly.
 : Apply multi purpose grease
 : Apply gear oil.
 : Apply Genuine Liquid Gasket 1217
or equivalent.
Removal and Installation
REMOVAL
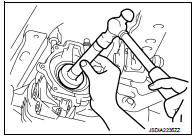
1. Remove electric controlled couplings. Refer to DLN-139, "Removal and Installation".2. Remove side oil seals with a suitable tool.
CAUTION:Never damage gear carrier and rear cover.

INSTALLATION
1. Install side oil seal (right side) until it becomes flush with the carrier end, using the drift (A) (SST: KV38100200).
CAUTION:• Never reuse oil seals. • When installing, never incline oil seals.
• Apply multi-purpose grease onto oil seal lips, and gear oil onto the circumference of oil seal
.
2. Install side oil seal (left side) until it becomes flush with the carrier end, using the drift (A) (SST: KV38100500).
CAUTION:• Never reuse oil seals. • When installing, never incline oil seals.
• Apply multi-purpose grease onto oil seal lips, and gear oil onto the circumference of oil seal.
3. Install electric controlled couplings. Refer to DLN-139, "Removal and Installation".4. When oil leaks while removing, check oil level after the installation.
Refer to DLN-132, "Inspection".
