Brake Pedal
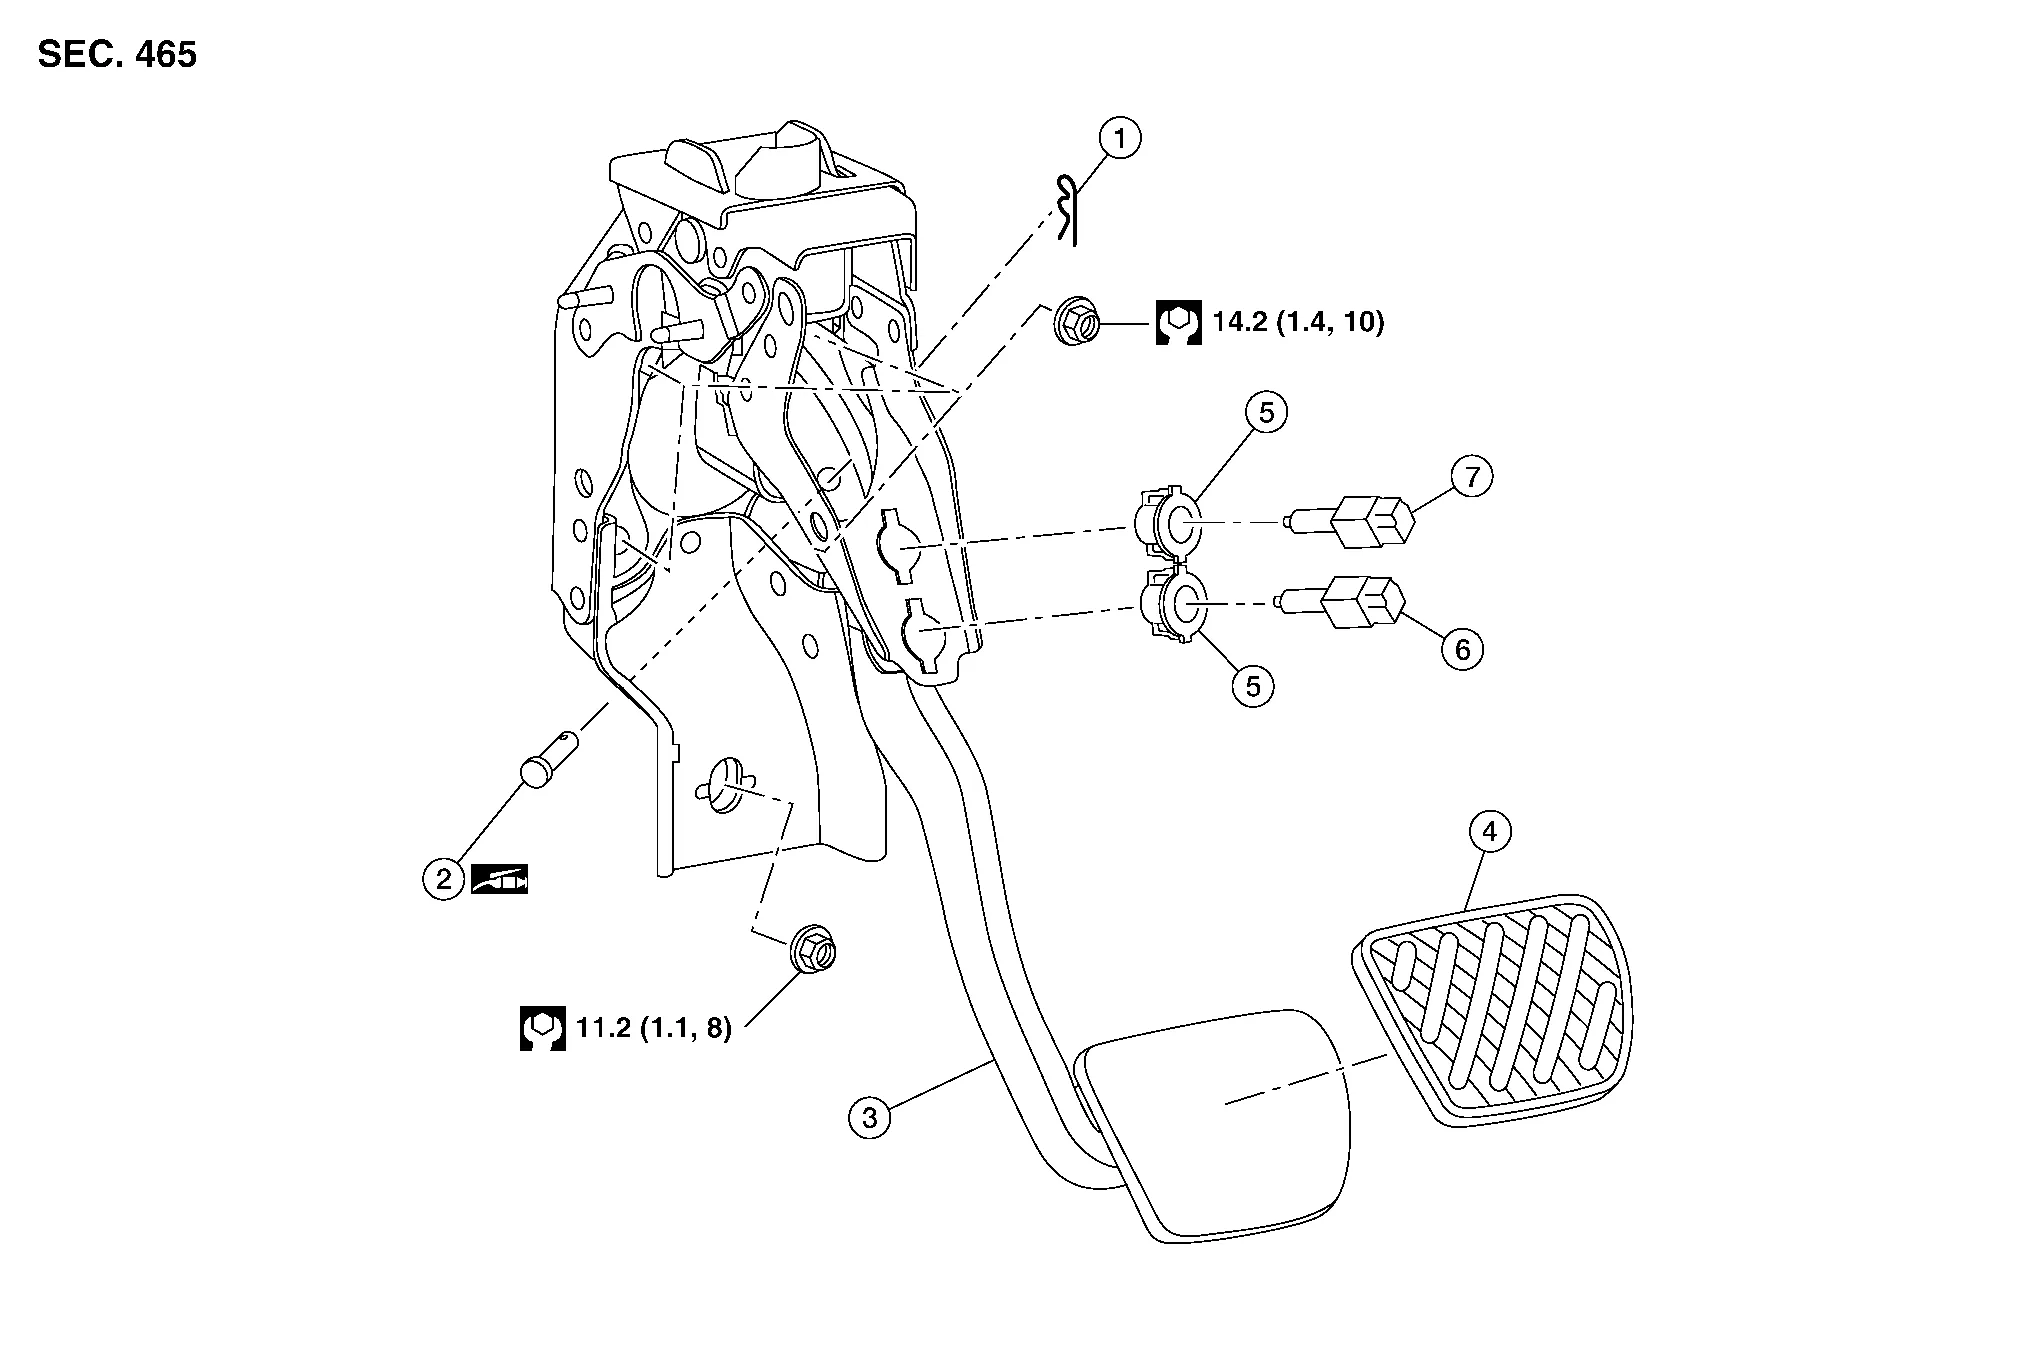
| 1. | Snap pin | 2. | Clevis pin | 3. | Brake pedal assembly |
| 4. | Brake pedal pad | 5. | Clip | 6. | Stop lamp switch |
| 7. | Brake pedal position switch |
REMOVAL
Remove instrument lower panel LH. Refer to Removal and Installation.
Remove the lower nut from the brake pedal assembly.
Disconnect the harness connectors from the stop lamp switch and brake pedal position switch.
Remove wire harness clips from brake pedal assembly.
Remove snap pin (1) and clevis pin (2) from the brake pedal assembly.

Remove the remaining nuts from the brake pedal and remove the brake pedal.
INSPECTION AFTER REMOVAL
Check the following items and replace the brake pedal assembly if necessary.
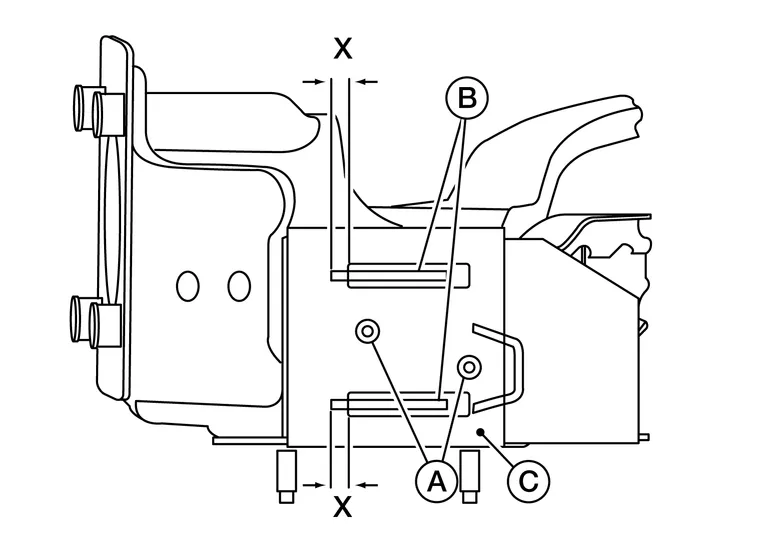
Check the brake pedal upper rivets (made of aluminum) (A) for deformation.
Check the brake pedal for bend, damage, and cracks on the welded parts.
Check the overlap distance (X) between sub-bracket (B) and slide plate (C).
Overlap distance (X) between sub-bracket (B) and slide plate (C). : Refer to Brake Pedal.
INSTALLATION
Installation is in the reverse order of removal.
Inspect the brake pedal height after installing the brake pedal to the vehicle. Adjust if necessary refer to Inspection.