Fuel Tank. Fwd
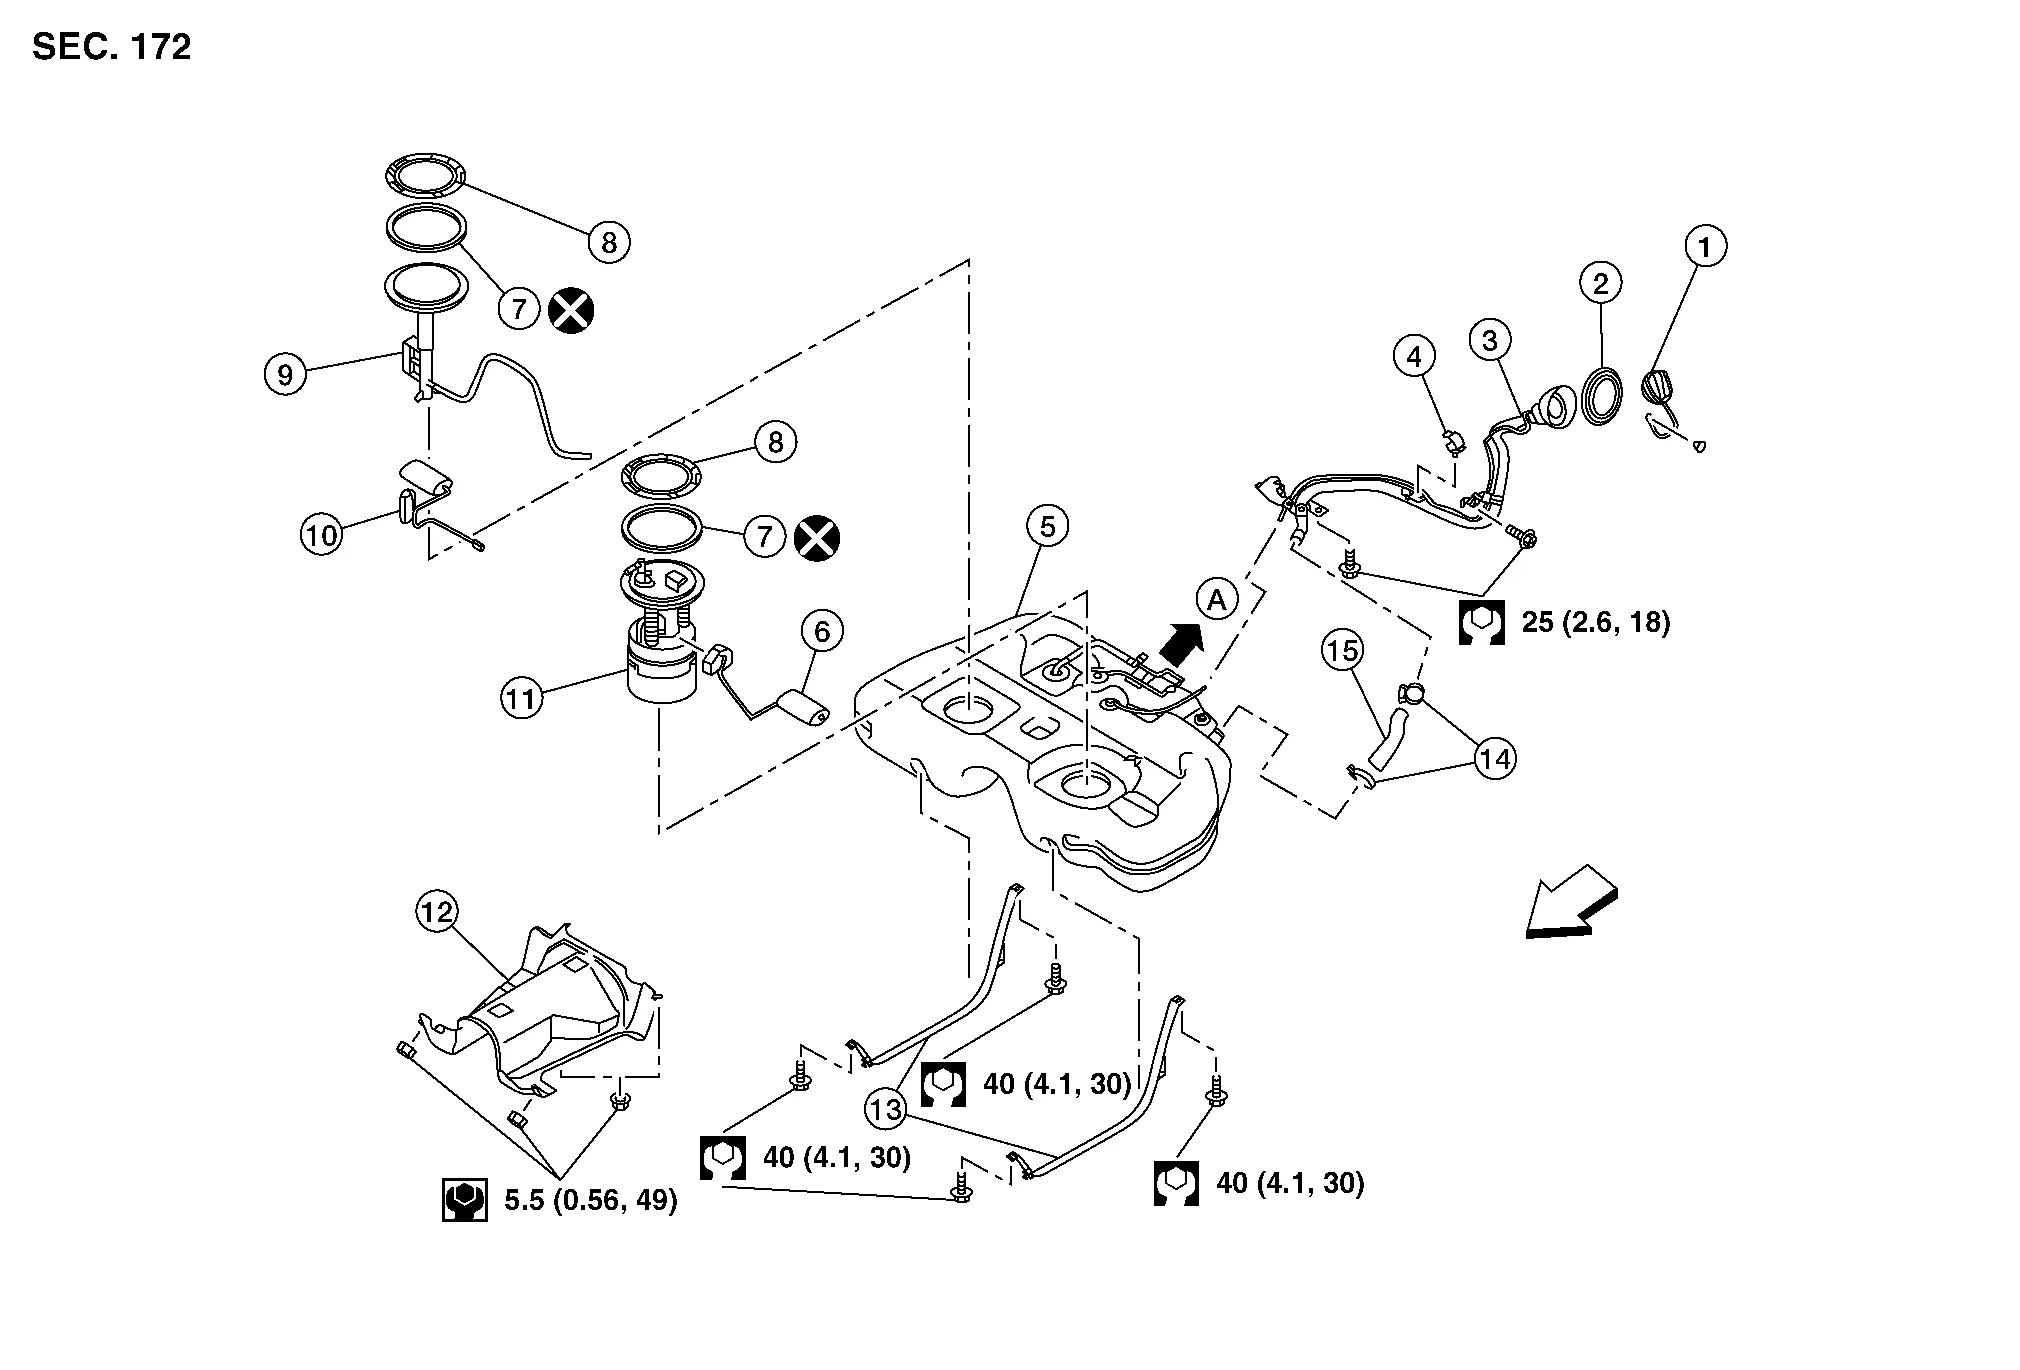
| 1. | Fuel filler cap | 2. | Grommet | 3. | Fuel filler tube |
| 4. | Clip | 5. | Fuel tank | 6. | Fuel level sensor |
| 7. | O-ring | 8. | Lock ring | 9. | Sub fuel level assembly |
| 10. | Sub fuel level sensor | 11. | Fuel level sensor unit, fuel filter and fuel pump assembly | 12. | Fuel tank protector |
| 13. | Fuel tank strap | 14. | Clamp | 15. | Fuel filler hose |
| A. | To EVAP canister. Refer to Exploded View. |  |
Front |
REMOVAL
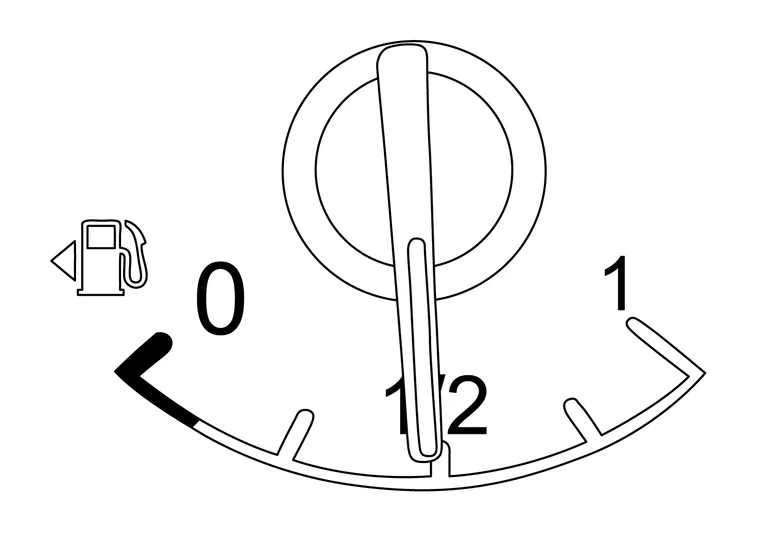
Check the fuel level with the vehicle on a level surface. If the fuel gauge indicates more than the level as shown (1/2 full), drain the fuel from the fuel tank until the fuel gauge indicates a level at or below as shown (1/2 full).
In case the fuel pump does not operate, use the following procedure:
As a guide, the fuel level reaches or is less than the level on the fuel gauge as shown when approximately 27.5
 (7-1/4 US gal, 6 Imp gal) of fuel are drained from a full fuel tank.
Release fuel pressure from fuel lines. Refer to Work Procedure.
Disconnect negative battery terminal. Refer to Removal and Installation.
Unscrew fuel filler cap to release the pressure inside the fuel tank.
Remove second row seat (LH\RH). Refer to Removal and Installation.
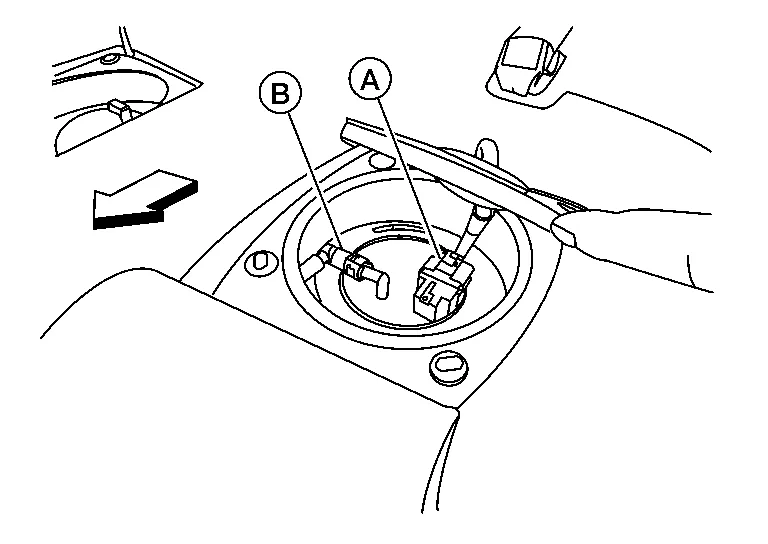
Turn the four retainers 90 degrees to disengage the clips and remove the fuel pump inspection hole cover.
Disconnect harness connector (A) and quick connector (B).
|
: Front |
Disconnect quick connector as follows:
Hold the sides of connector, press tabs and pull out fuel feed tube.
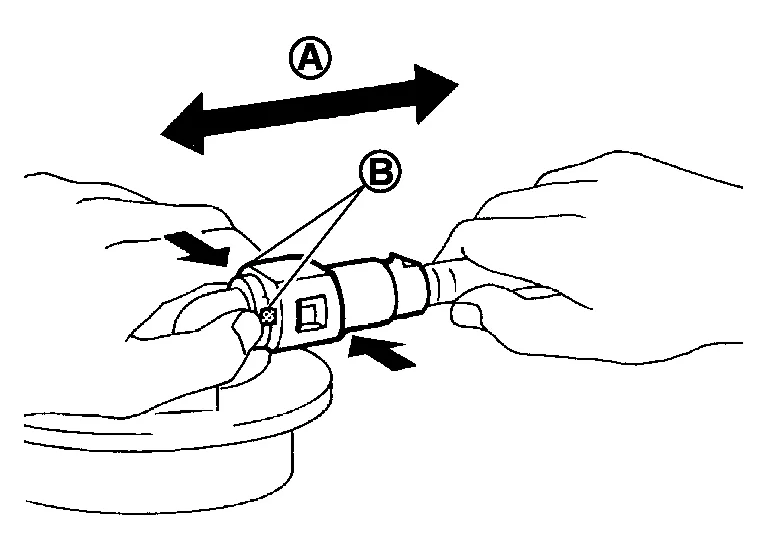
(A) : Pull (B) : Push in tabs If quick connector sticks to tube of main fuel level sensor unit, push and pull quick connectors several times until they start to move. Then disconnect them by pulling.
Turn the four retainers 90 degrees to disengage the clips and remove the sub fuel sender inspection hole cover.
Disconnect the harness connector from the sub fuel level sensor assembly.
Remove floor undercover (LH\RH). Refer to Removal and Installation.
Remove center exhaust tube. Refer to Exploded View.
Loosen front parking brake cable and remove from equalizer. Refer to Exploded View.
Remove rear parking brake cable brackets. Refer to Exploded View.
Remove fuel tank protector.
Remove rear undercover (LH/RH). Refer to Removal and Installation.
Remove rear stabilizer bar clamp and position rear stabilizer bar aside. Refer to Exploded View.
Remove vent hose at rear side of fuel tank.
Disconnect EVAP tube at rear side of fuel tank. Refer to Exploded View.
Remove fuel filler hose at fuel filler tube side.
Support center of fuel tank (1) with suitable jack (A).
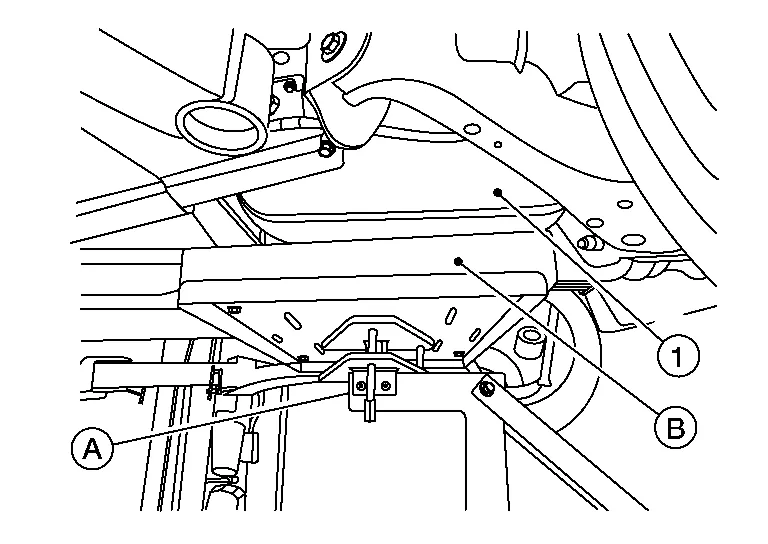
Remove fuel tank bands.
Lower suitable jack carefully to remove fuel tank while holding it by hand.
If replacing the fuel tank, remove sub fuel level sensor assembly, fuel level sensor unit, fuel filter and fuel pump assembly to transfer to the new fuel tank. Remove and discard O-ring. Refer to Removal and Installation.
INSTALLATION
Installation is in the reverse order of removal.
Fuel Filler Hose
Insert fuel filler hose to the length below:
Length : 35 mm (1.38 in)
Be sure hose clamp is not placed on swelled area of fuel filler tube.
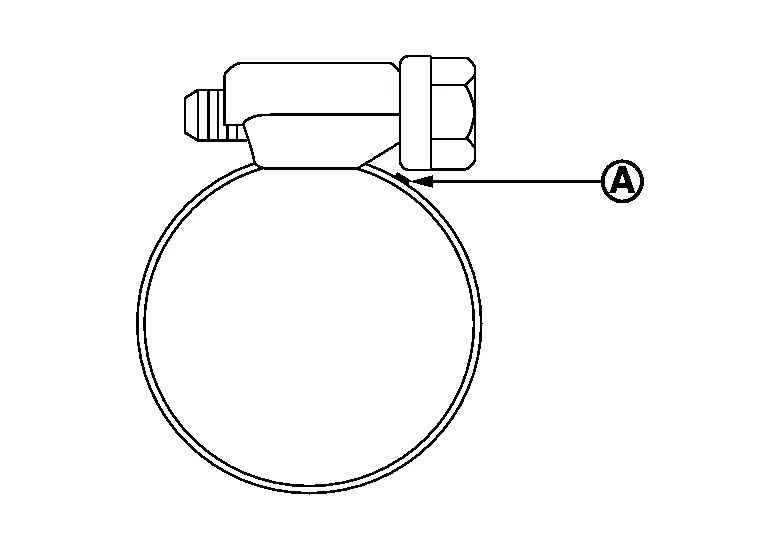
Tighten the clamp hand with the top mark (A) until the mark is on the bolt head flange.
Use the following procedure to check for fuel leaks:
Place the ignition in "ON" position (without starting the engine). Then check the connections for fuel leaks by applying fuel pressure to the fuel piping.
Start engine, raise idle and verify there are no leaks at the fuel system connections.