Hood Assembly
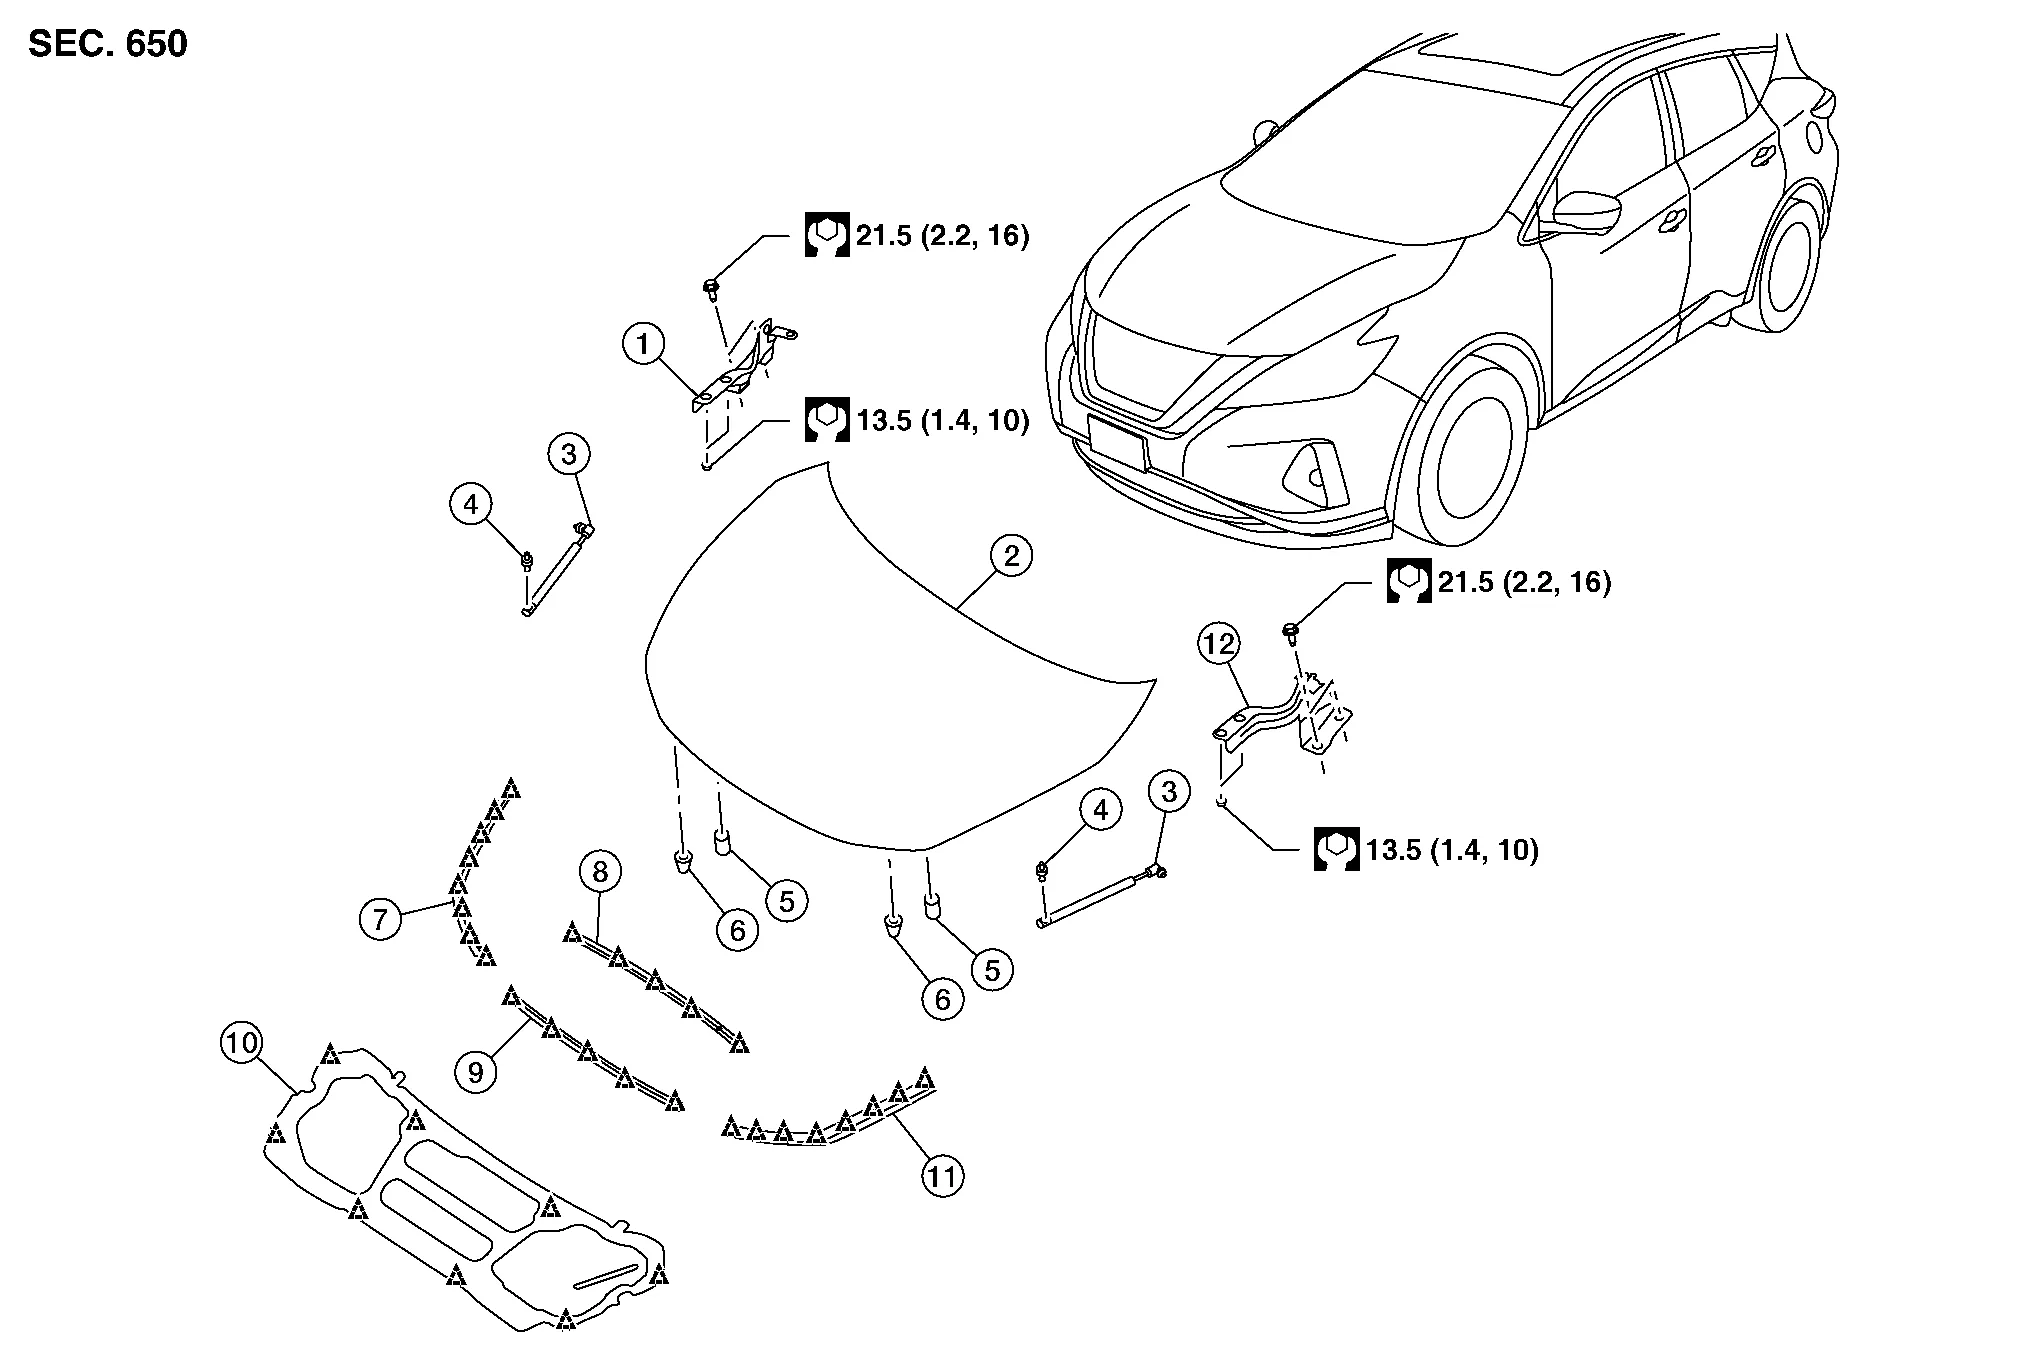
| 1. | Hood hinge (RH) | 2. | Hood | 3. | Hood stay (RH/LH) |
| 4. | Hood stay stud ball (LH/RH) | 5. | Bumper rubber (LH/RH) | 6. | Grommet |
| 7. | Hood side seal (RH) | 8. | Hood rear seal | 9. | Hood front seal |
| 10. | Hood insulator | 11. | Hood side seal (LH) | 12. | Hood hinge (LH) |
 |
Clip |
REMOVAL
Support hood assembly using a suitable tool.
Release clips using a suitable tool and remove hood insulator. Refer to Exploded View.
Disconnect front washer tube. Refer to Exploded View.
Release clip (LH/RH) using a suitable tool and remove hood stay from hood side.
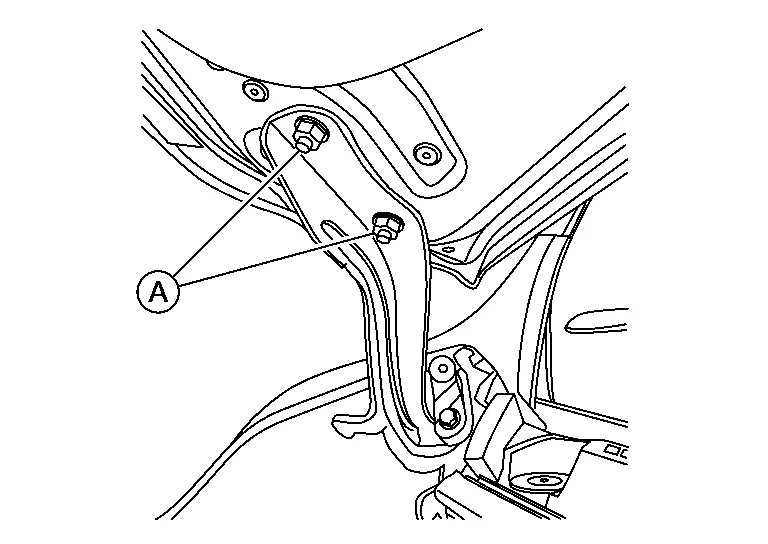
Remove hood hinge to hood nuts (A) (LH/RH) and hood assembly.
INSTALLATION
Installation is in the reverse order of removal.

| 1. | Hood assembly | 2. | Front fender | 3. | Front combination lamp |
| 4. | Front grille | 5. | Bumper rubber | 6. | Hood hinge |
| 7. | Hood lock |
Check clearance and surface height between hood and each part by visual inspection and tactile feel.
If clearance and surface height are out of specification, adjust them according to adjustment procedures.
Unit: mm (in)
| Portion | Section | Item | Measurement | Standard | Parallelism |
|---|---|---|---|---|---|
| Hood - Fender | A - A | D | Surface height | 0.0 ± 1.0 (0.0 ± 0.04) | 1.5 (0.06) |
| E | Clearance | 3.5 ± 1.0 (0.14 ± 0.04) | 1.5 (0.06) | ||
| Fender - Front combination lamp | B - B | F | Clearance | 4.5 ± 2.0 (0.18 ± 0.08) | 1.99 (0.08) |
| G | Surface Height | Blend ± 2.0 (Blend ± 0.08) | 1.99 (0.08) | ||
| Hood - Front combination lamp | C - C | H | Clearance | 5.5 ± 2.0 (0.22 ± 0.08) | 1.99 (0.08) |
HEIGHT ADJUSTMENT
Loosen hood lock assembly bolts.
Adjust surface height of hood assembly to front grille and front fender according to specified values by rotating hood bumper rubber.
Temporarily tighten hood lock assembly bolts.
Adjust (A) and (B) as shown to the following values with hood's own weight by dropping it from approximately 200 mm (7.87 in) height or by pressing hood lightly [approximately 29 N (3.0 kg, 6.5 lb)].
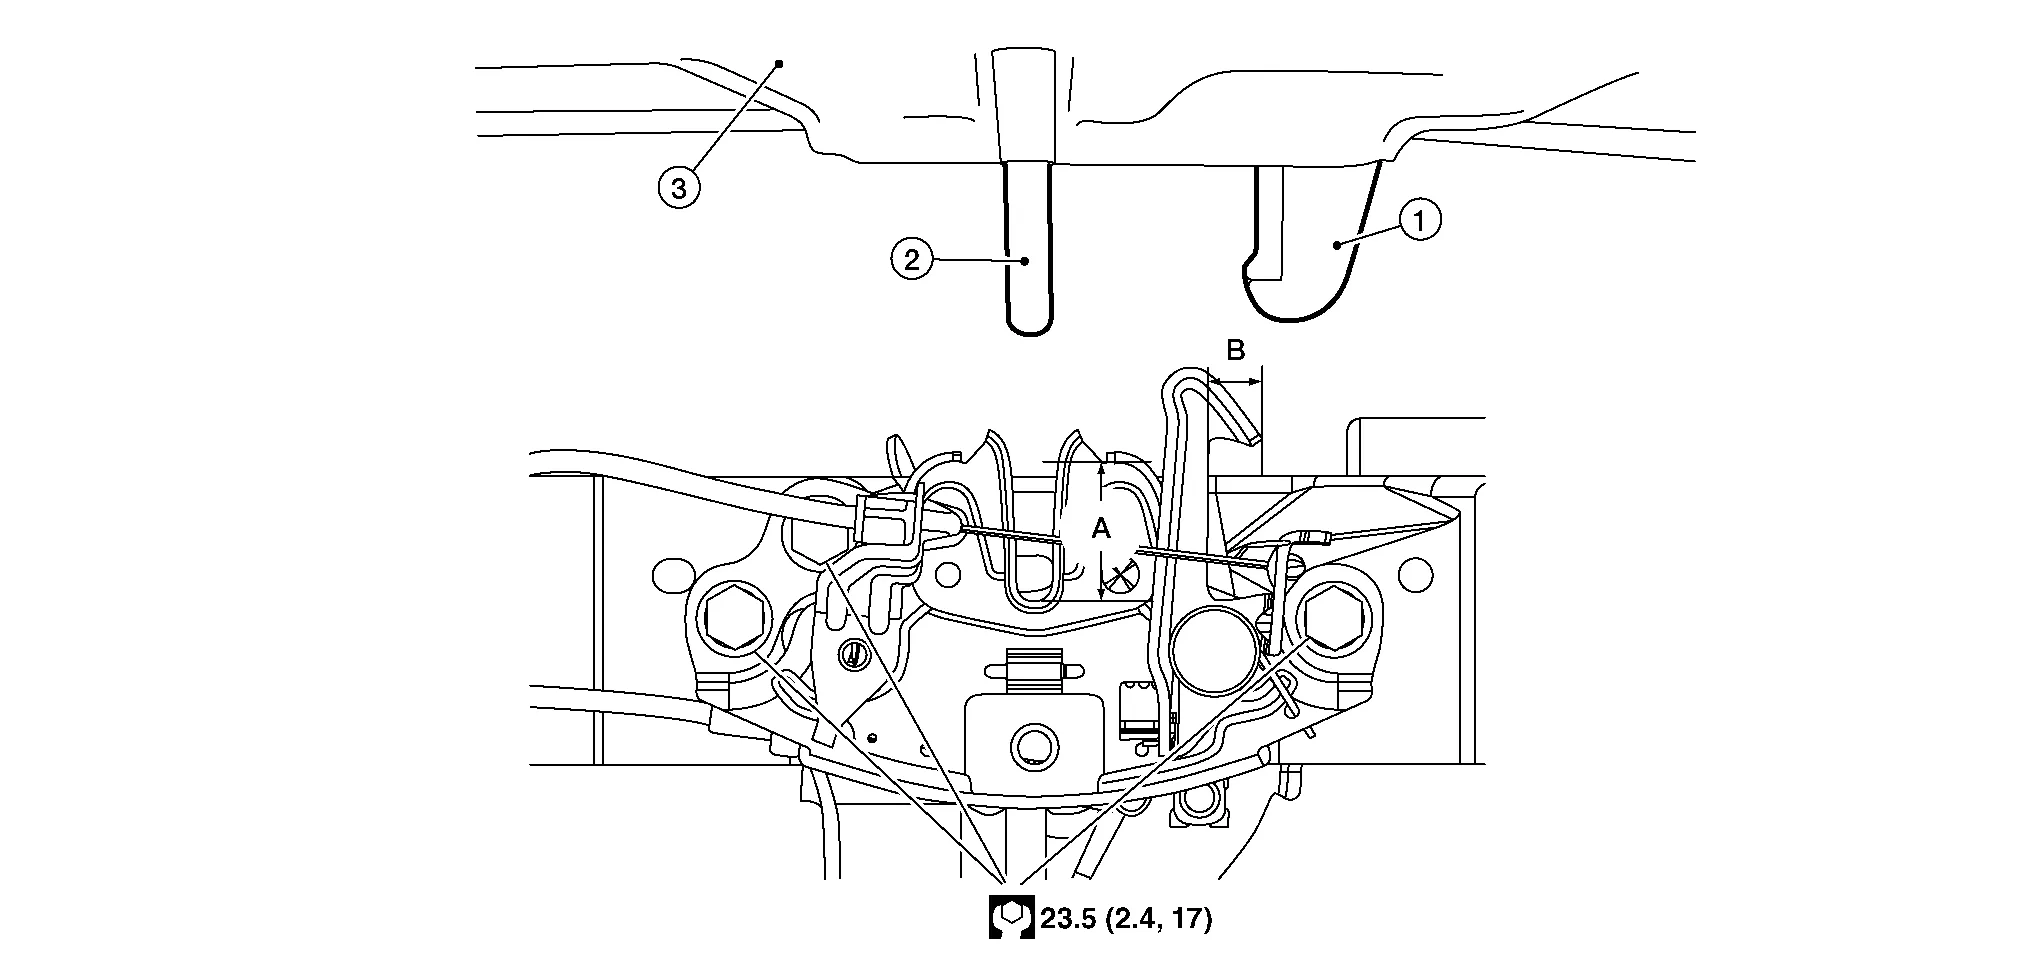
| 1. | Secondary striker | 2. | Primary striker | 3. | Hood assembly |
| A. | 20 mm (0.79 in) | B. | 6.8 mm (0.27 in) |
After adjustment, tighten hood hinge nuts and bolts to specified torque.
CLEARANCE ADJUSTMENT
Loosen hood hinge nuts and bolts.
Loosen hood lock assembly bolts.
Adjust hood assembly so clearance measurements are within specifications.
Tighten hood hinge nuts and bolts to specified torque.
Tighten hood lock assembly bolts to specified torque.