Oil Cooler
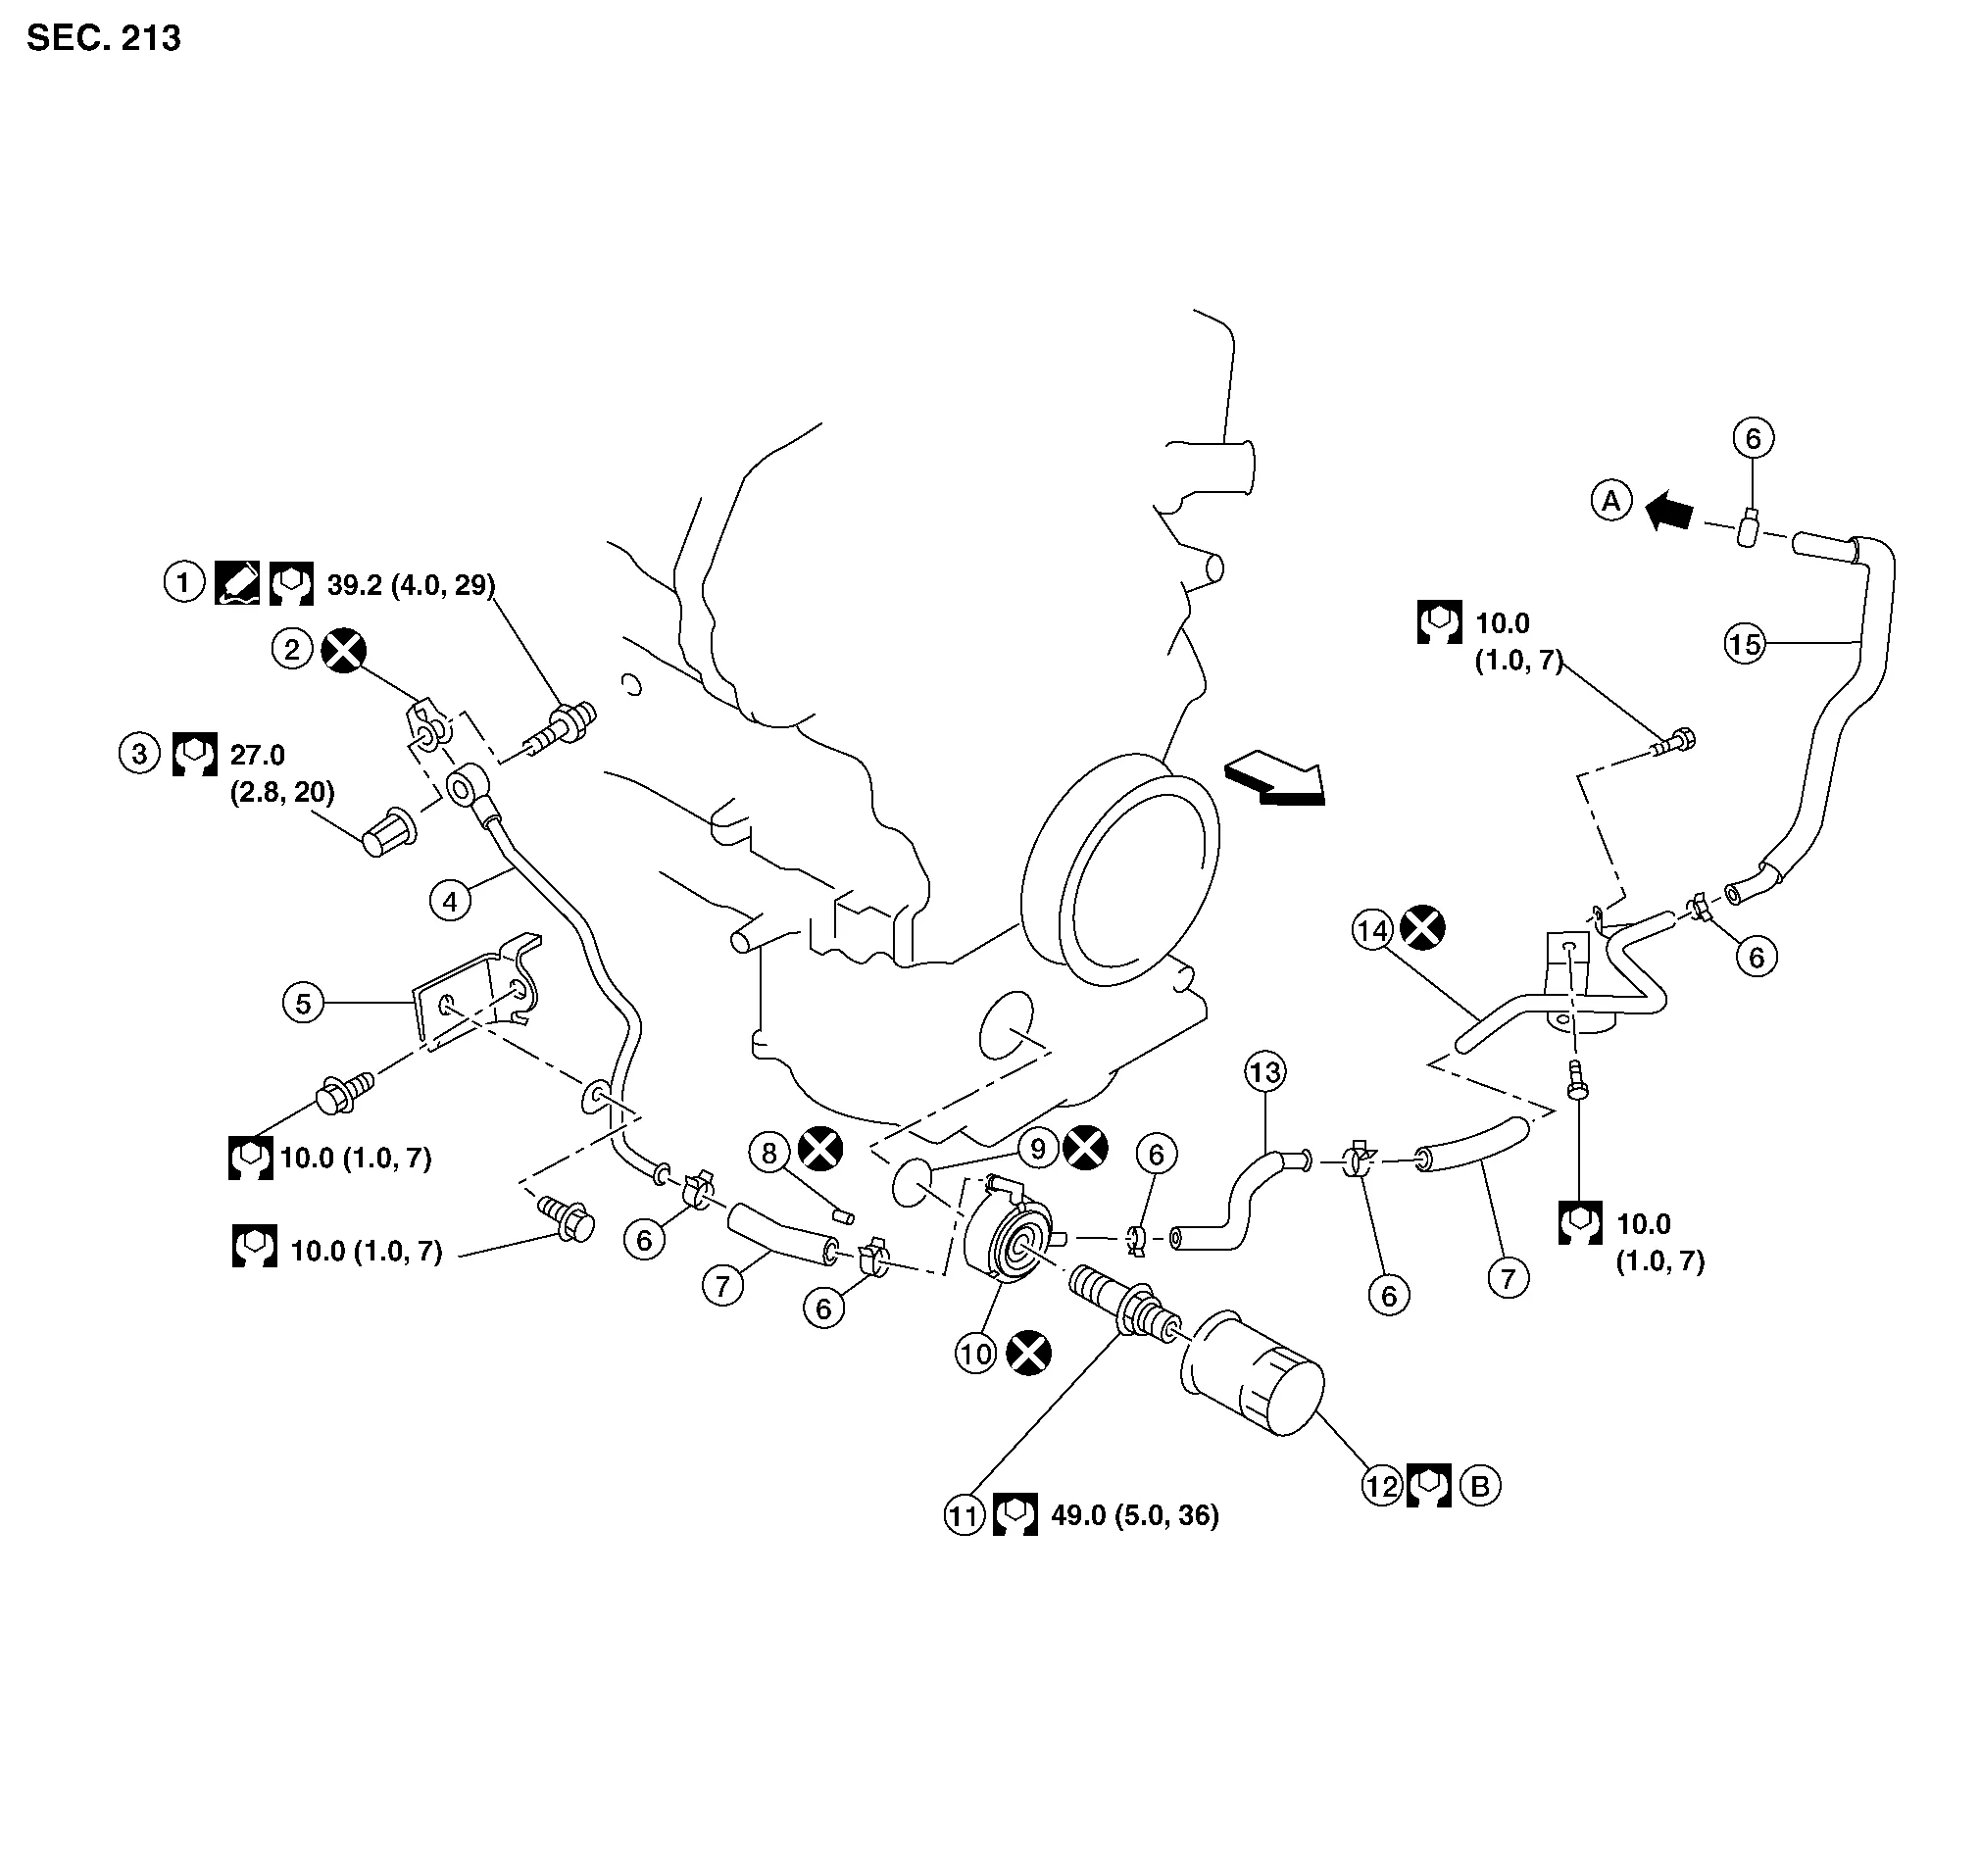
| 1. | Connector bolt | 2. | Copper gasket | 3. | Water drain plug |
| 4. | Water pipe | 5. | Bracket | 6. | Clamp |
| 7. | Water hose | 8. | Relief valve | 9. | Oil cooler O-ring |
| 10. | Oil cooler | 11. | Connector bolt | 12. | Oil filter |
| 13. | Water hose | 14. | Water pipe | 15. | Water hose |
| A. | To water connector. Refer to Exploded View. | B. | Refer to Removal and Installation. |  |
Engine front |
REMOVAL
Remove the front under cover. Refer to Removal and Installation.
Remove front wheel and tire (RH) using power tool. Refer to Removal and Installation.
Remove the front fender protector side cover (RH). Refer to Exploded View.
Drain engine coolant. Refer to Changing Engine Coolant.
Disconnect water hoses from oil cooler.
Remove the oil filter. Refer to Removal and Installation.
Remove oil cooler.
INSPECTION AFTER REMOVAL
Check oil cooler for cracks.
Check oil cooler for clogging by blowing through coolant inlet. If necessary, replace oil cooler.
Oil Pressure Relief Valve
Inspect oil pressure relief valve for movement, cracks and breaks by pushing the ball. If replacement is necessary, remove valve by prying it out with a suitable tool. Install a new valve in place by tapping it.
INSTALLATION
Installation is in the reverse order of removal.
INSPECTION AFTER INSTALLATION
Check the engine oil level and the engine coolant level and add engine oil and engine coolant. Refer to Inspection (Engine oil) and System Inspection (Engine Coolant).
Start the engine, and check that there are no leaks of engine oil or engine coolant.
Stop the engine and wait for 10 minutes.
Check the engine oil level and the engine coolant level again. Refer to Inspection and Changing Engine Coolant.