Dashboard
Essential special tools |
|
| Ms. 1373 | Philips radio removal tool |
| Ms. 1639 | Radio removal tool - CD changer |
| Car. 1597 | Trim clip removal lever for the rear cornering grab handle |
Essential equipment |
| diagnostic tool |
Tightening torques |
|
| steering wheel screw | 4.4 daN.m |
| screw | 2 N.m |

REMOVAL
IMPORTANTNever handle pyrotechnic systems (pretensioner or airbag) near a heat source or open flame; there is a risk of deployment.
WARNINGThe airbag control unit must be locked before starting removal. Locking the airbag control unit also unlocks the electric steering column lock.
- Disconnect the battery.
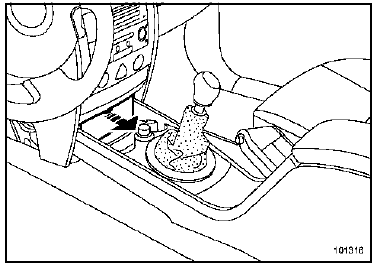
- Remove the cover over the diagnostic socket.
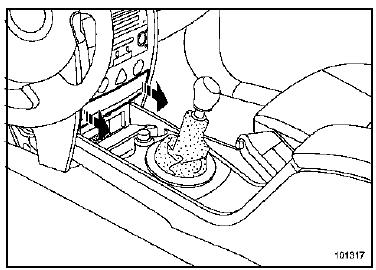
- Unclip the access cover for the badge holder.
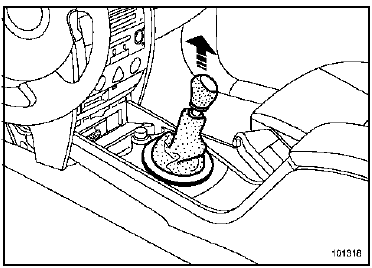
- Unclip:
- the gear lever boot,
- the gear knob.
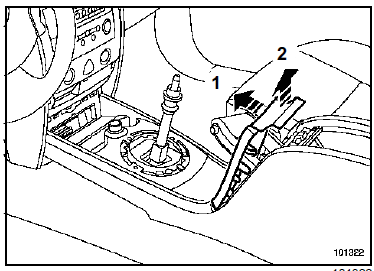
- Open the storage tray.
- Unclip the handbrake surround trim by following movements (1) and (2) in sequence.
- Disconnect the heated seat connectors (if fitted).
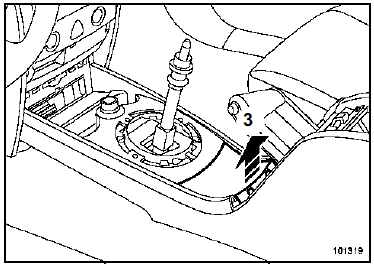
- Unclip the lower cover (3).
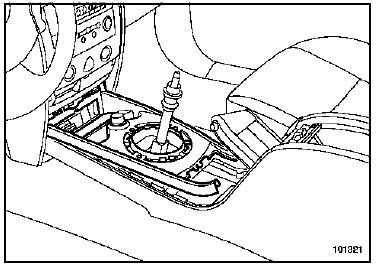
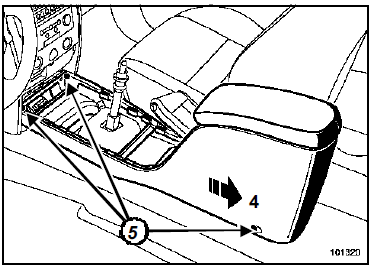
- Move the front seats forward.
- Remove the screws (5).
- Release:
- slightly lift the console following movement (4),
- the gear lever console.
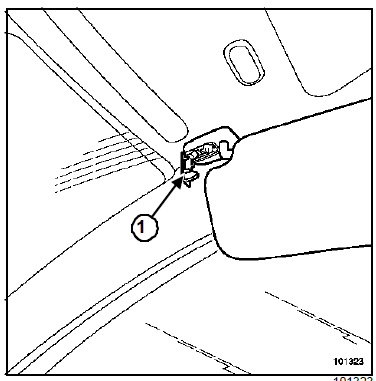
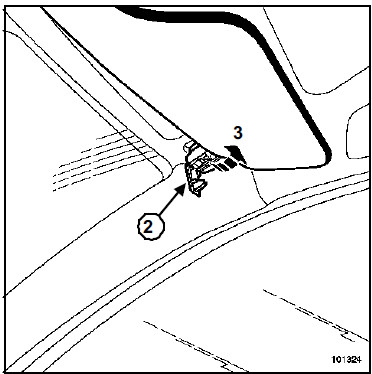
- Unclip fixing clip (1).
- Release:
- the clip (2),
- the sun visor (3).
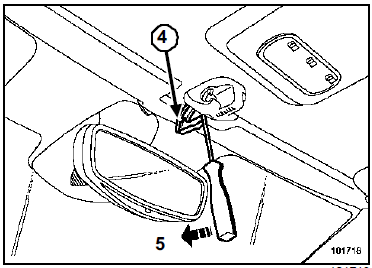
- Unclip fixing clip (4).
- Apply pressure with the screwdriver (5).
- Unclip the clip.
- Remove the assembly.
- Disconnect the various connectors (depending on equipment level).
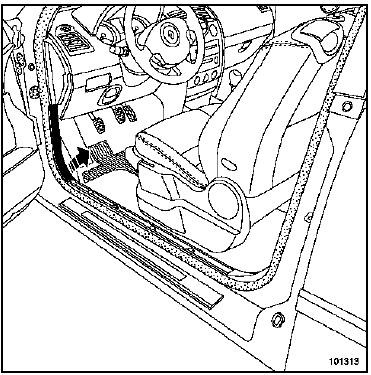
- Remove the front sill trims.
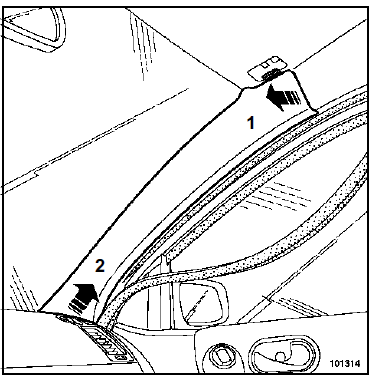
- Unclip the windshield pillar trims (1) and (2).
- Remove:
- the tweeter grilles,
- the tweeters.
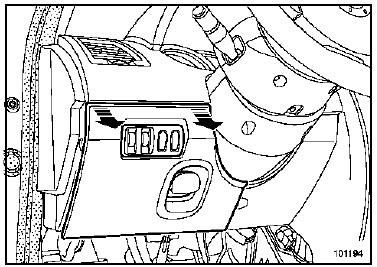
- Unclip the access hatch to the lower housing.
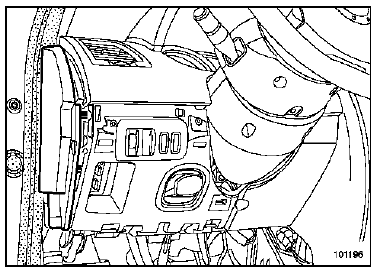
- Unclip the side cheek panel.
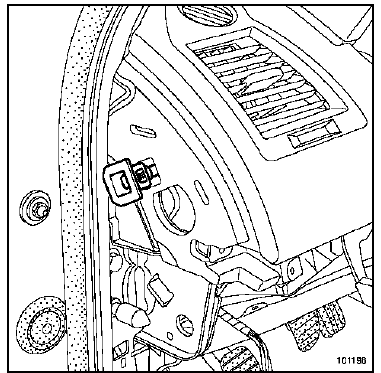
- Unclip the anti-rotation clip.
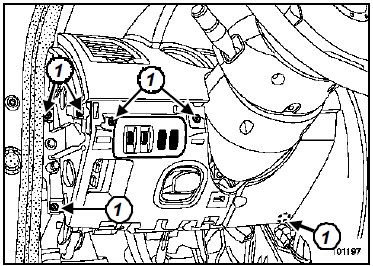
- Unclip the headlamp aiming control and dimmer rheostat.
- Remove the screws (1).
- Remove the driver airbag (see Airbag and pretensioners chapter, Driver front airbag, page 88C- 28).
- Remove the steering wheel (see Steering wheel).
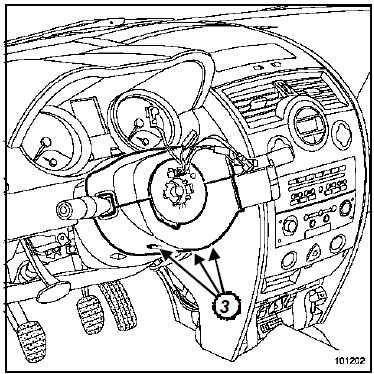
- Remove:
- the three lower screws,
- the upper and lower shrouds.
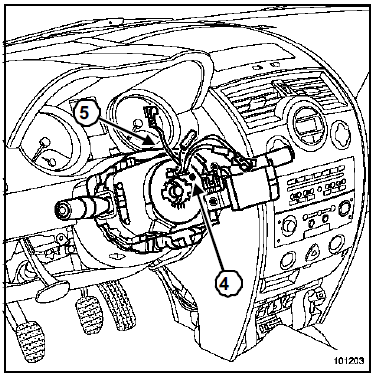
- Mark the position of the under-steering-wheel control assembly.
- Check that the "0" mark on the clockspring (4) is aligned with the index.
- Remove the under-steering-wheel control assembly.
- Loosen screw (5).
- Unclip the complete steering column assembly.
- Disconnect:
- the various connectors (wiper, radio control and lighting),
- the clockspring connector.
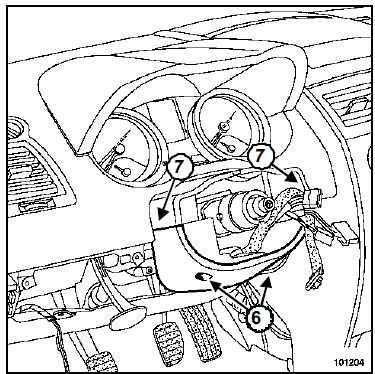
- Remove the two screws (6).
- Unclip the two upper clips (7).
- Remove the second lower shell.
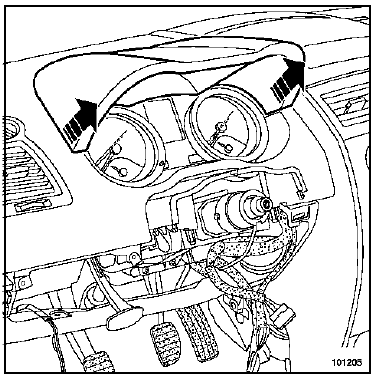
- Partially unclip the top of the instrument panel.
- Disconnect the speaker connector from the Carminat system.
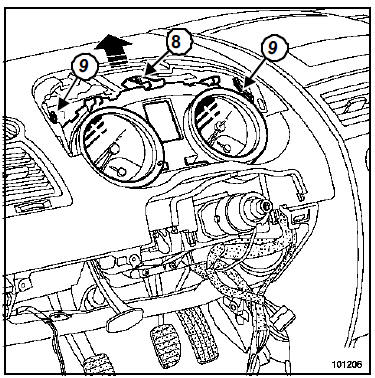
- Remove the upper screw (8).
- Press the two clips (9).
- Remove the dashboard.
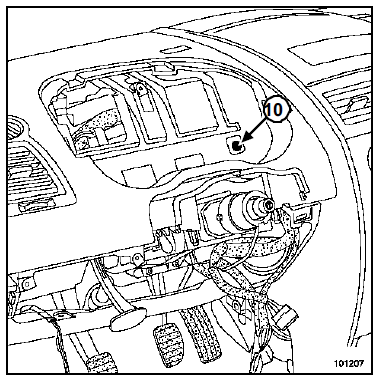
- Dashboard
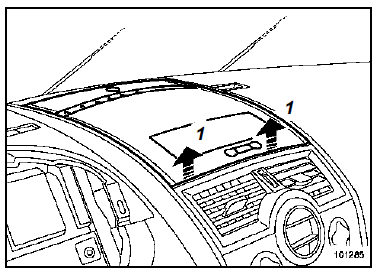
- Unclip the upper cover (1) or the display holder (basic version).
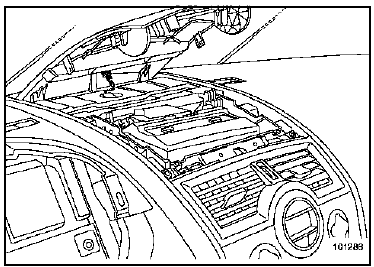
- Disconnect the solar sensor.
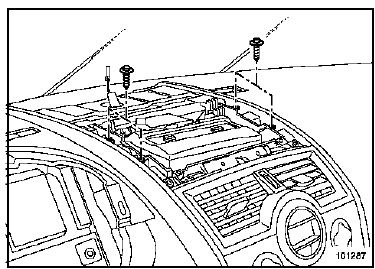
- Remove the screws and the Carminat screen (if fitted).
- Disconnect the connector.
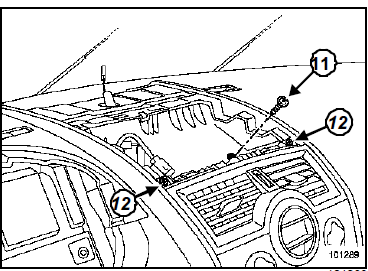
- Remove:
- screw (11),
- screws (12).
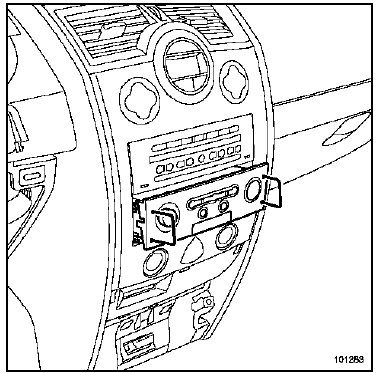
- Remove the Carminat control (if fitted), using tool (Ms. 1373).
- Disconnect the various connectors.
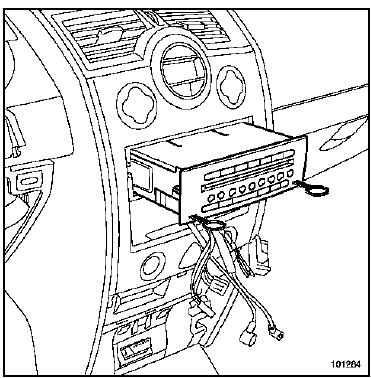
- Remove the radio using tool (Ms. 1639).
- Disconnect the various connectors.
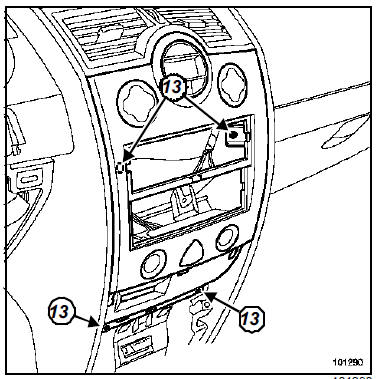
- Remove the screws (13).
- Unclip the card reader holder using tool (Car. 1597).
- Disconnect the various connectors.
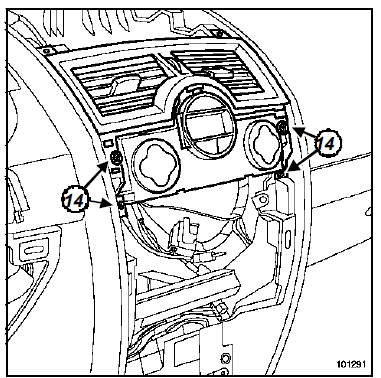
- Remove the screws (14).
- Remove the "central vent - air conditioning control" assembly.
For vehicles not fitted with automatic climate control:
- remove the screws (14),
- separate the central vent from the air conditioning or heating control,
- remove the vent.
- Position the air conditioning control so that it does not obstruct removal of the dashboard.
- Disconnect the various connectors.
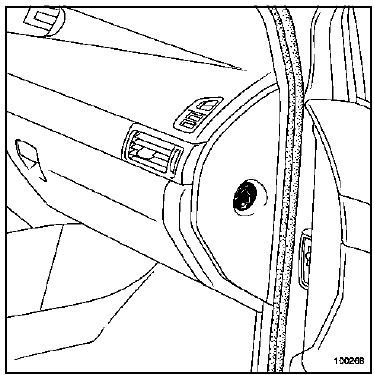
- Open the storage tray.
- Unclip the side cheek panel.
- Disconnect the front passenger airbag deactivation switch.
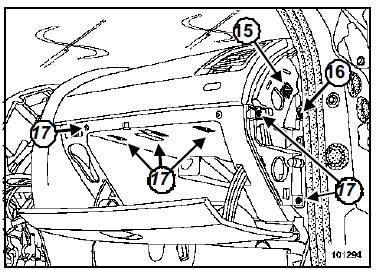
- Unclip the anti-rotation clip (15).
Both anti-rotation clips must be replaced after each removal.
- Remove:
- screw (16),
- screws (17).
- Remove the glovebox.
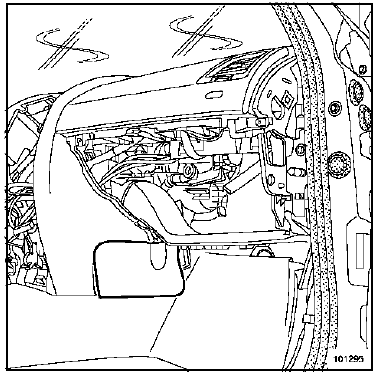
- Unclip the two lower covers.
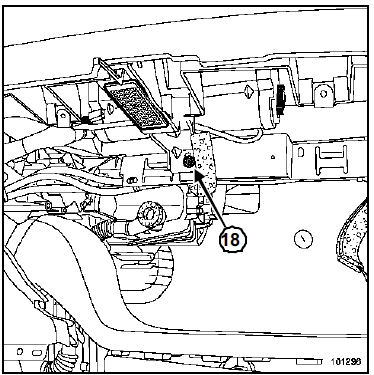
- Unclip the glovebox light.
- Disconnect the glovebox light.
- Remove the screw (18).
- Disconnect the two passenger airbag connectors.
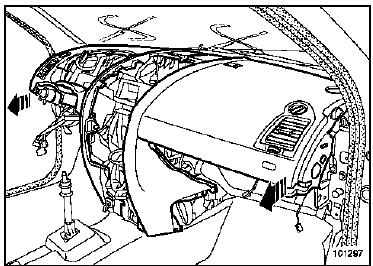
Before removing the dashboard, take care to protect the wiring harness. When removing the dashboard, the gear lever holds the lower part of the dashboard in place.
- Remove the dashboard. This operation requires two technicians.
- Remove the passenger airbag (Airbag and pretensioners chapter, Passenger airbag, page 88C-30).
INSTALLATION
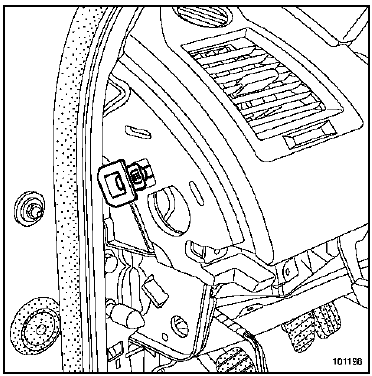
- Refit the two anti-rotation clips.
The two anti-rotation clips (part number 82 00 155 867) must always be replaced after each removal.
I - STEERING WHEEL-MOUNTED CONTROL SPECIFICS
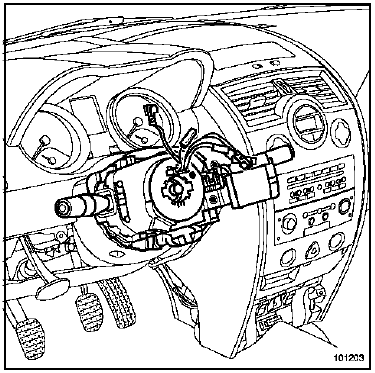
- Before refitting, make sure:
- that the wheels are straight,
- that the steering wheel-mounted control is aligned with the "0" mark.
II - STEERING WHEEL SPECIFICS
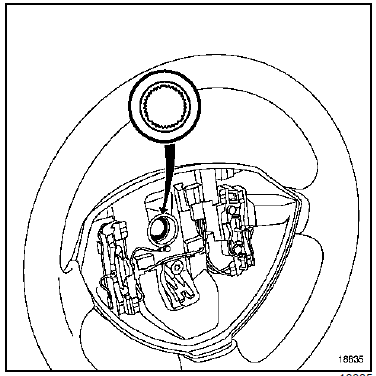
- The steering wheel must slide freely onto the splines (the splines have keying features).
- Do not damage the keyed splines.
- Always replace the steering wheel bolt after each removal.
- Tighten the steering wheel bolt to torque (4.4 daN.m).
III - AIRBAG SPECIFICS
- Unlock the ECU if everything is correct, otherwise refer to MR-366 Diagnosis.
- Check the airbag ECU using the diagnostic tool.
- Failure to comply with these instructions may cause the systems to stop working normally, or even cause the airbags to deploy unintentionally.
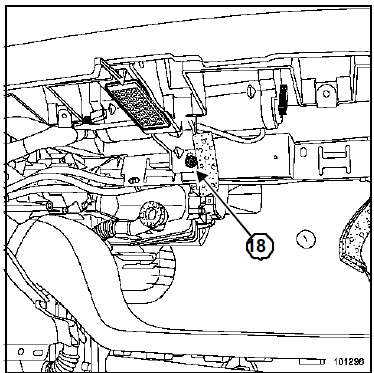
- Tighten screw (18) to torque (2 N.m).
Connect the battery; carry out the necessary relearn procedures (Chapter Battery).
Test yourself
A quick Renault Megane quiz: every answer comes with an explanation and a link to the manual page.