Front Stabilizer Bar(w/o Kdss)
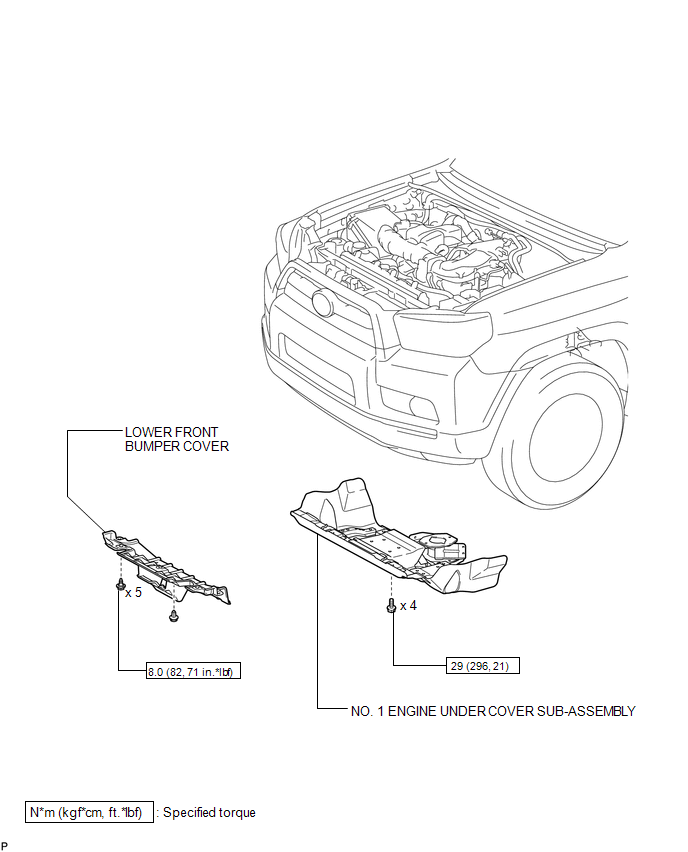
ILLUSTRATION
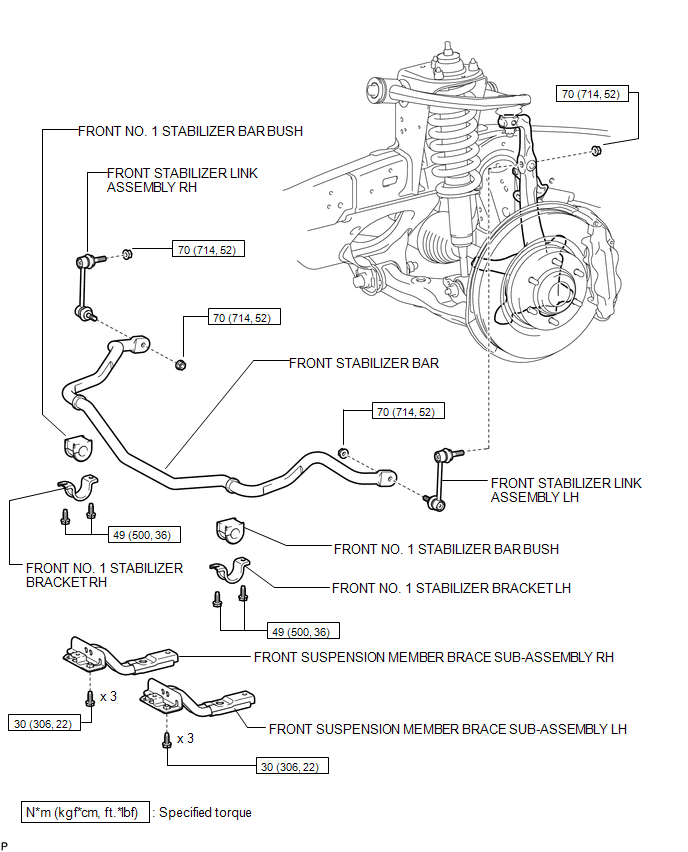
Inspection INSPECTION PROCEDURE
1. INSPECT FRONT STABILIZER LINK ASSEMBLY LH
(a) As shown in the illustration, flip the ball joint stud back and forth 5 times. |
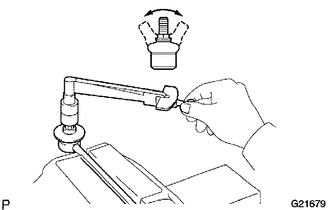 |
(b) Using a torque wrench, turn the nut continuously at a rate of 3 to 5 seconds per turn and take a torque reading on the 5th turn.
Standard turning torque:
0.05 to 1.96 N*m (0.51 to 20 kgf*cm, 0.44 to 17.3 in.*lbf) or less
(c) Check for cracks and grease leaks on the ball joint dust cover.
Removal REMOVAL PROCEDURE1. REMOVE FRONT WHEEL
2. REMOVE LOWER FRONT BUMPER COVER

3. REMOVE NO. 1 ENGINE UNDER COVER SUB-ASSEMBLY
4. REMOVE FRONT SUSPENSION MEMBER BRACE SUB-ASSEMBLY
5. REMOVE FRONT STABILIZER LINK ASSEMBLY LH
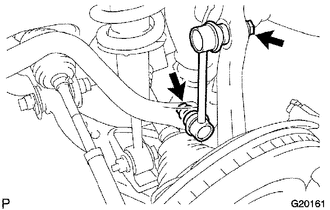
(a) Remove the 2 nuts and front stabilizer link assembly LH. HINT: If the ball joint turns together with the nut, use a 6 mm hexagon wrench to hold the stud. |
 |
6. REMOVE FRONT STABILIZER LINK ASSEMBLY RH
HINT:
Use the same procedure described for the LH side.
7. REMOVE FRONT NO. 1 STABILIZER BRACKET LH
(a) Remove the 2 bolts and front No. 1 stabilizer bracket LH. |
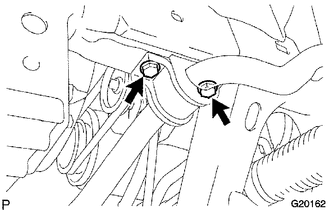 |
8. REMOVE FRONT NO. 1 STABILIZER BRACKET RH
HINT:
Use the same procedure described for the LH side.
9. REMOVE FRONT NO. 1 STABILIZER BAR BUSH
(a) Remove the 2 front No. 1 stabilizer bar bushes.
10. REMOVE FRONT STABILIZER BAR
Installation INSTALLATION PROCEDURE1. INSTALL FRONT STABILIZER BAR
2. INSTALL FRONT NO. 1 STABILIZER BAR BUSH
(a) Install the 2 front No. 1 stabilizer bar bushes.
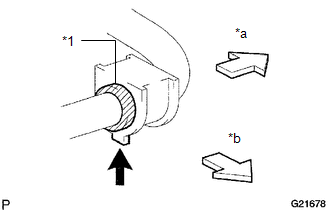
HINT:
- Install the bush to the inner side of the bushing stopper on the stabilizer bar.
- Install the No. 1 stabilizer bush with the protrusion facing inward.
*1 |
Bushing Stopper |
*a |
Vehicle Outer Side |
*b |
Vehicle Front Side |
 | Protrusion |
3. INSTALL FRONT NO. 1 STABILIZER BRACKET LH
(a) Install the front No. 1 stabilizer bracket LH with the 2 bolts.
Torque:
49 N·m {500 kgf·cm, 36 ft·lbf}
4. INSTALL FRONT NO. 1 STABILIZER BRACKET RH
HINT:
Use the same procedure described for the LH side.
5. INSTALL FRONT STABILIZER LINK ASSEMBLY LH
(a) Install the front stabilizer link assembly LH with the 2 nuts.
Torque:
70 N·m {714 kgf·cm, 52 ft·lbf}
HINT:
If the ball joint turns together with the nut, use a 6 mm hexagon wrench to hold the stud.
6. INSTALL FRONT STABILIZER LINK ASSEMBLY RH
HINT:
Use the same procedure described for the LH side.
7. INSTALL FRONT SUSPENSION MEMBER BRACE SUB-ASSEMBLY

8. INSTALL NO. 1 ENGINE UNDER COVER SUB-ASSEMBLY
9. INSTALL LOWER FRONT BUMPER COVER
10. INSTALL FRONT WHEEL
Torque:
for aluminum wheel :
103 N·m {1050 kgf·cm, 76 ft·lbf}
for steel wheel :
112 N·m {1142 kgf·cm, 83 ft·lbf}
Test yourself
A quick Toyota 4Runner quiz: every answer comes with an explanation and a link to the manual page.