Installation
CAUTION:
Wear protective gloves. Sharp areas on the parts may injure your hands.
HINT:
- Use the same procedure for the RH and LH sides.
- The procedure listed below is for the LH side.
1. INSTALL REAR NO. 2 SEAT ASSEMBLY LH
(a) Place the rear No. 2 seat assembly in the cabin.
NOTICE:
Be careful not to damage the vehicle body.
HINT:
If installing the seat on the RH side with the LH side installed, install it with the rear seat leg cover LH raised.
(b) Temporarily install the 4 bolts.
(c) Tighten the 4 bolts.
Torque:
37 N·m {377 kgf·cm, 27 ft·lbf}
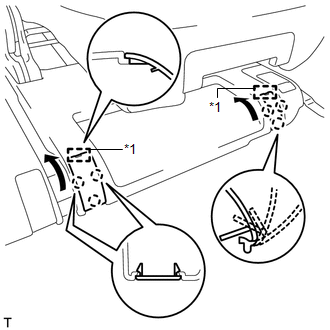
(d) Attach the 6 claws and 2 guides to close the 2 covers. Text in Illustration
|
 |
2. INSTALL NO. 1 DECK BOARD BRACKET LH
(a) Install the bracket with the 2 bolts.
3. INSTALL DECK BOARD BRACKET REINFORCEMENT
(a) Attach the 2 hooks to install the reinforcement.
(b) Install the 2 bolts.
4. INSTALL REAR NO. 3 FLOOR BOARD
(a) Attach the 2 guides and 4 claws. Text in Illustration
|
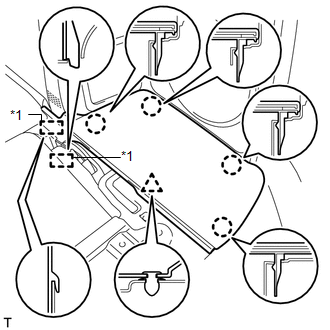 |
(b) Attach the clip to install the board.
5. INSTALL REAR NO. 4 FLOOR BOARD
(a) Attach the 2 guides and 4 claws. Text in Illustration
|
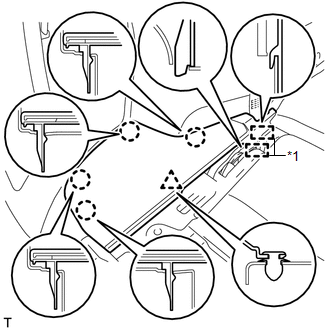 |
(b) Attach the clip to install the board.
6. INSTALL REAR FLOOR MAT SUPPORT PLATE
(a) Attach the 5 clips and 2 guides.
(b) Attach the 4 claws to install the plate.
(c) Install the 3 bolts.
7. INSTALL DECK BOARD ASSEMBLY
(a) Attach the 4 clips to install the board.
(b) Install the 2 bolts.
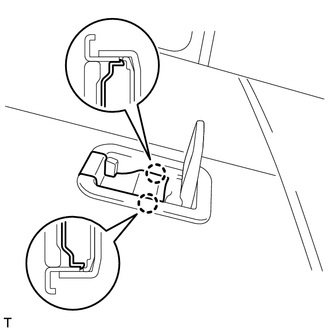
(c) Attach the 2 claws to close the cover. HINT: Use the same procedure to close the cover on the other side. |
 |
Test yourself
A quick Toyota 4Runner quiz: every answer comes with an explanation and a link to the manual page.