Removal
CAUTION:
Wear protective gloves. Sharp areas on the parts may injure your hands.
HINT:
- Use the same procedure for the RH and LH sides.
- The procedure listed below is for the LH side.
1. REMOVE DECK BOARD ASSEMBLY
(a) Pull the 2 rear seat lock release straps and fold down the 2 headrests.
(b) Operate the 2 rear seat lock release levers and fold down the 2 seatbacks.
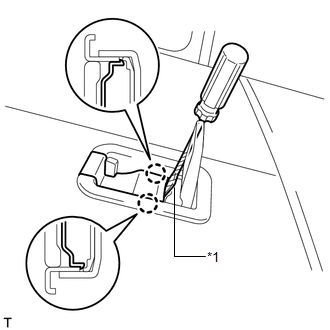
(c) Using a screwdriver, detach the 2 claws and open the cover. Text in Illustration
HINT:
|
 |
(d) Remove the 2 bolts. |
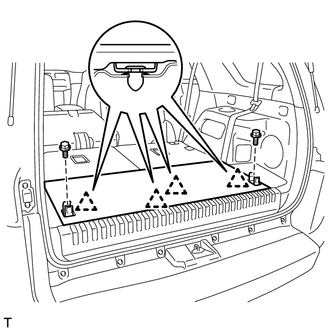 |
(e) Detach the 4 clips and remove the deck board.
2. REMOVE REAR FLOOR MAT SUPPORT PLATE
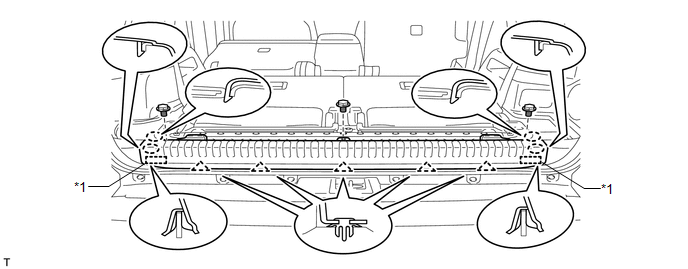
(a) Remove the 3 bolts.
 Text in Illustration
*1 |
Guide |
- |
- |
(b) Detach the 4 claws and 2 guides.
(c) Detach the 5 clips and remove the support plate.
3. REMOVE REAR NO. 4 FLOOR BOARD
(a) Using a moulding remover, detach the clip and 4 claws. Text in Illustration
|
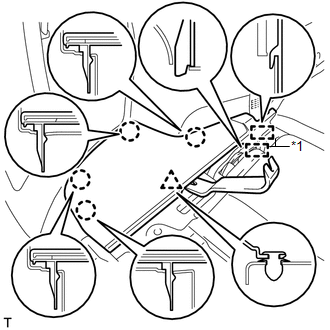 |
(b) Detach the 2 guides and remove the floor board.
4. REMOVE REAR NO. 3 FLOOR BOARD
(a) Using a moulding remover, detach the clip and 4 claws. Text in Illustration
|
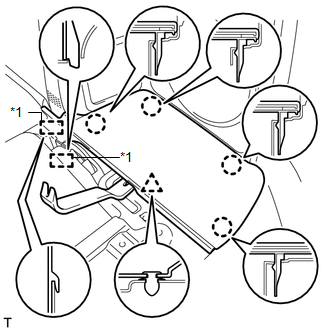 |
(b) Detach the 2 guides and remove the floor board.
5. REMOVE DECK BOARD BRACKET REINFORCEMENT
(a) Remove the 2 bolts. Text in Illustration
|
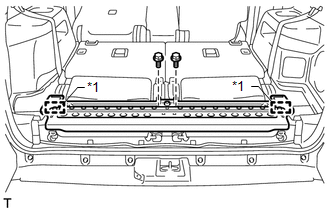 |
(b) Detach the 2 hooks and remove the reinforcement.
6. REMOVE NO. 1 DECK BOARD BRACKET LH
(a) Remove the 2 bolts and bracket. |
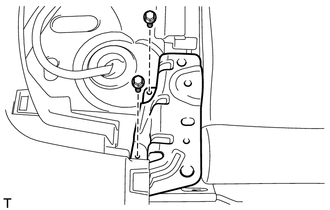 |
7. REMOVE REAR NO. 2 SEAT ASSEMBLY LH
(a) Operate the seat cushion lock release lever and raise the seatback.
(b) Pull out the seat cushion.
(c) Remove the 2 bolts. |
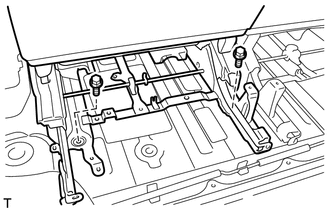 |
(d) Using a screwdriver, detach the 2 guides and 6 claws and open the 2 covers. Text in Illustration
HINT: Tape the screwdriver tip before use. |
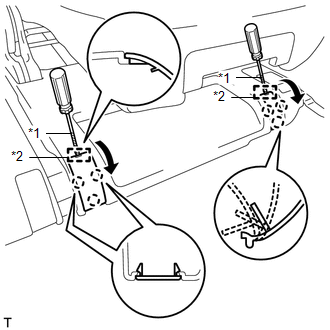 |
(e) Remove the 2 bolts. |
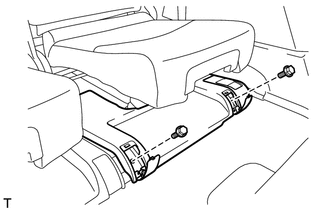 |
(f) Remove the rear No. 2 seat assembly from the vehicle. NOTICE: Be careful not to damage the vehicle body. HINT: If removing the seat on the RH side with the LH side installed, remove it with the No. 3 rear seat leg cover LH raised as shown in the illustration. |
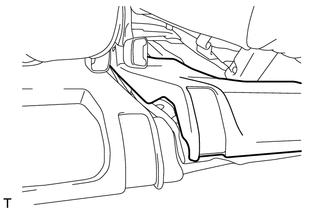 |
Test yourself
A quick Toyota 4Runner quiz: every answer comes with an explanation and a link to the manual page.