Vehicle Interior
Inverter Main Switch
In this manual: Vehicle Interior
~1min read
Components COMPONENTS ILLUSTRATION 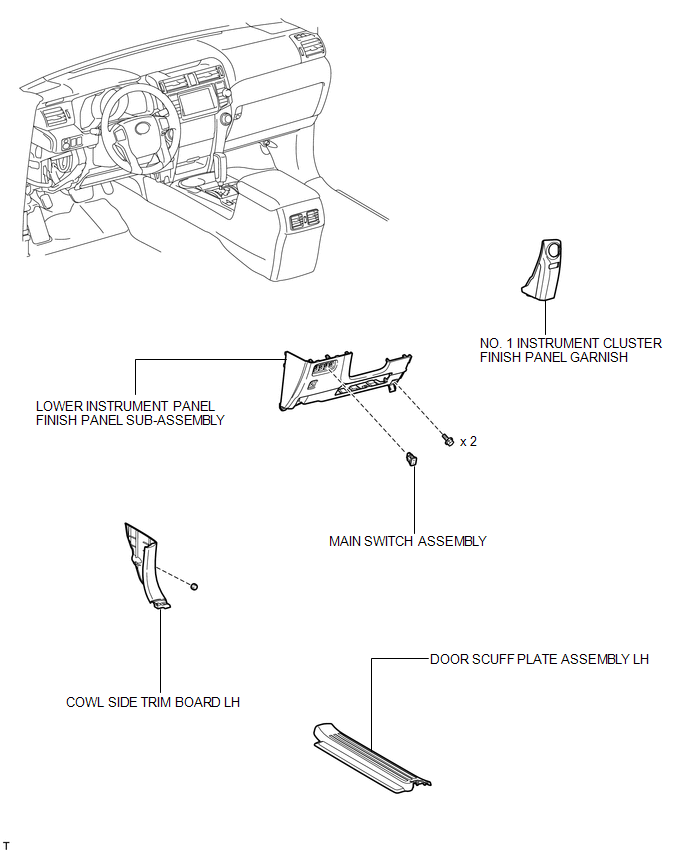
Installation INSTALLATION PROCEDURE
Removal REMOVAL PROCEDURE
Installation INSTALLATION PROCEDURE
1. INSTALL MAIN SWITCH ASSEMBLY
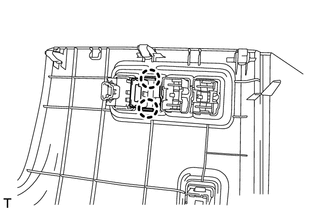
(a) Attach the 2 claws to install the main switch.
2. INSTALL LOWER INSTRUMENT PANEL FINISH PANEL SUB-ASSEMBLY
3. INSTALL COWL SIDE TRIM BOARD LH
4. INSTALL DOOR SCUFF PLATE ASSEMBLY LH
5. INSTALL NO. 1 INSTRUMENT CLUSTER FINISH PANEL GARNISH
Removal REMOVAL PROCEDURE
1. REMOVE NO. 1 INSTRUMENT CLUSTER FINISH PANEL GARNISH
2. REMOVE DOOR SCUFF PLATE ASSEMBLY LH
3. REMOVE COWL SIDE TRIM BOARD LH
4. REMOVE LOWER INSTRUMENT PANEL FINISH PANEL SUB-ASSEMBLY
5. REMOVE MAIN SWITCH ASSEMBLY
(a) Detach the 2 claws and remove the main switch. |
 |
Test yourself
A quick Toyota 4Runner quiz: every answer comes with an explanation and a link to the manual page.
Was this page helpful?