Removal
HINT:
- Use the same procedure for the RH and LH sides.
- The procedure listed below is for the LH side.
1. REMOVE FRONT WHEEL
2. REMOVE LOWER FRONT BUMPER COVER (w/ KDSS)

3. REMOVE NO. 1 ENGINE UNDER COVER SUB-ASSEMBLY (w/ KDSS)
4. REMOVE FRONT SUSPENSION MEMBER BRACE SUB-ASSEMBLY (w/ KDSS)
5. REMOVE FRONT STABILIZER END BRACKET (w/ KDSS)
6. REMOVE FRONT STABILIZER BAR (w/ KDSS)
7. DISCONNECT FRONT SHOCK ABSORBER WITH COIL SPRING
(a) Remove the bolt, nut and washer. |
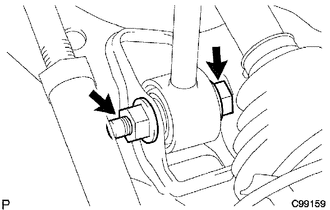 |
(b) Disconnect the front shock absorber with coil spring from the suspension lower arm.
8. REMOVE FRONT NO. 1 SUSPENSION LOWER ARM SUB-ASSEMBLY LH
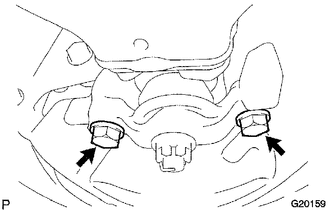
(a) Remove the 2 bolts and disconnect the front lower ball joint attachment LH from the steering knuckle. |
 |
(b) Place matchmarks on the No. 2 camber adjust cam and toe adjust cam sub-assembly. Text in Illustration
|
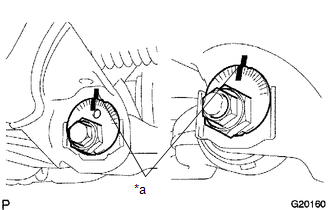 |
(c) Remove the nut, No. 2 camber adjust cam, camber adjust cam assembly, bolt, toe adjust cam sub-assembly, No. 2 toe adjust plate and front No. 1 suspension lower arm sub-assembly LH.
(d) Remove the cotter pin and nut.
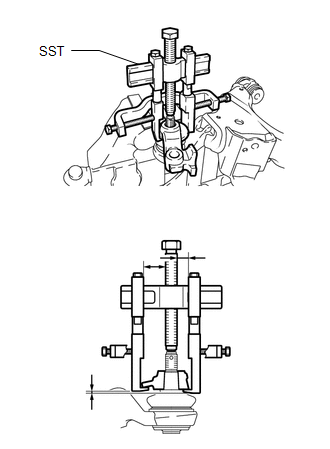
(e) Using SST, remove the front lower ball joint attachment LH. SST: 09950-40011 09951-04010 09954-04010 09955-04031 09955-04061 09958-04011 09952-04010 |
 |
Test yourself
A quick Toyota 4Runner quiz: every answer comes with an explanation and a link to the manual page.