Removal
1. REMOVE NO. 1 INSTRUMENT CLUSTER FINISH PANEL GARNISH
(a) Put protective tape around the No. 1 instrument cluster finish panel garnish.
(b) Grip the No. 1 instrument cluster finish panel garnish and pull it diagonally upward toward the rear to detach the 5 clips and remove the No. 1 instrument cluster finish panel garnish.
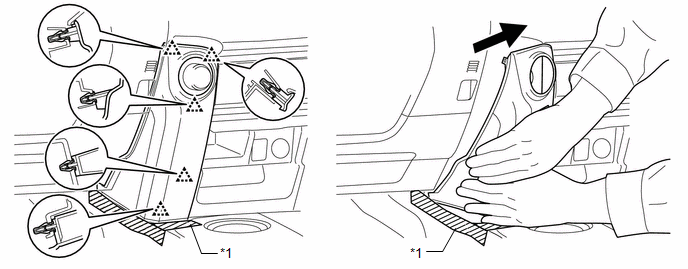 Text in Illustration
*1 |
Protective Tape |
- |
- |
2. REMOVE NO. 2 INSTRUMENT CLUSTER FINISH PANEL GARNISH

3. REMOVE FRONT NO. 1 CONSOLE BOX INSERT
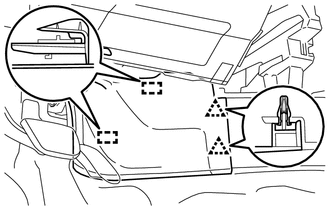
(a) Detach the 2 clips and 2 guides to remove the front No. 1 console box insert. |
 |
4. REMOVE FRONT NO. 2 CONSOLE BOX INSERT
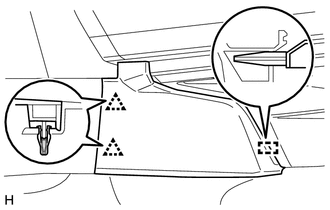
(a) Detach the 2 clips and guide to remove the front No. 2 console box insert. |
 |
5. REMOVE SHIFT LEVER KNOB SUB-ASSEMBLY
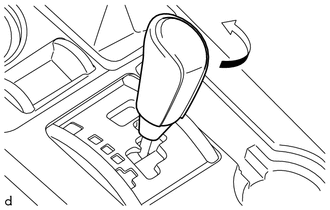
(a) Turn the shift lever knob sub-assembly in the direction indicated by the arrow and remove it. |
 |
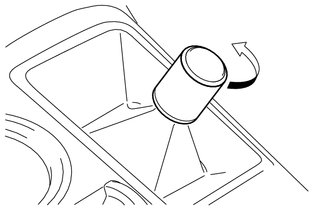
6. REMOVE SHIFT LEVER KNOB SUB-ASSEMBLY (for VF2A)
(a) Turn the shift lever knob sub-assembly in the direction indicated by the arrow and remove it. |
 |
7. REMOVE UPPER CONSOLE PANEL SUB-ASSEMBLY
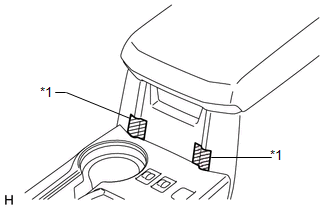
(a) Put protective tape around the upper console panel sub-assembly. Text in Illustration
|
 |
(b) Using a moulding remover, detach the 10 clips.
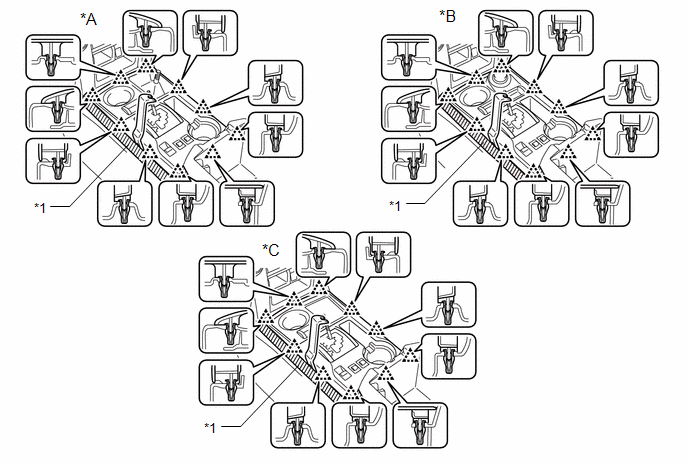 Text in Illustration
*A |
for VF2A |
*B |
for VF2BM, VF4BM |
*C |
for 2WD |
- |
- |
*1 |
Protective Tape |
- |
- |
(c) Disconnect each connector and remove the upper console panel sub-assembly.
8. REMOVE NO. 2 CONSOLE BOX RETAINER
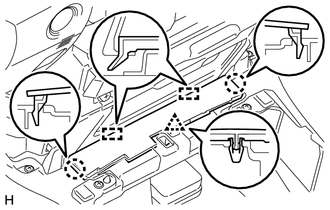
(a) Detach the clip, 2 claws and 2 guides to remove the No. 2 console box retainer. |
 |
9. REMOVE REAR CONSOLE BOX ASSEMBLY
(a) Remove the 4 bolts and 2 screws. |
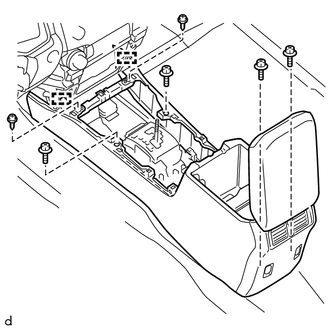 |
(b) Detach the 2 guides.
(c) Disconnect each connector and remove the rear console box assembly.
Test yourself
A quick Toyota 4Runner quiz: every answer comes with an explanation and a link to the manual page.