Security Horn Assembly
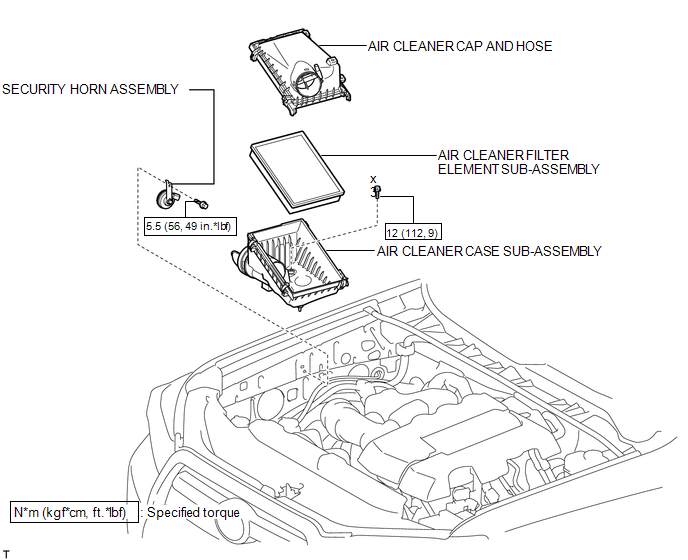
Removal REMOVAL PROCEDURE
1. REMOVE AIR CLEANER CAP AND HOSE

2. REMOVE AIR CLEANER CASE SUB-ASSEMBLY
3. REMOVE SECURITY HORN ASSEMBLY
(a) Disconnect the connector. |
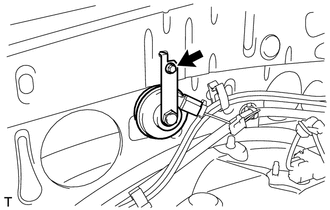 |
(b) Remove the bolt and horn.
Inspection INSPECTION PROCEDURE1. INSPECT SECURITY HORN ASSEMBLY
(a) Apply battery voltage to the horn connector and check the operation of the horn.
OK:
Measurement Condition | Specified Condition |
|---|---|
Battery positive (+) → Terminal 1 Battery negative (-) → Horn bracket |
Horn sounds |
If the result is not as specified, replace the security horn assembly.
Installation INSTALLATION PROCEDURE1. INSTALL SECURITY HORN ASSEMBLY
(a) Install the horn with the bolt.
Torque:
5,5 N·m {56 kgf·cm, 49 in·lbf}
(b) Connect the connector.
2. INSTALL AIR CLEANER CASE SUB-ASSEMBLY

3. INSTALL AIR CLEANER CAP AND HOSE
Test yourself
A quick Toyota 4Runner quiz: every answer comes with an explanation and a link to the manual page.