Security Indicator Light Assembly
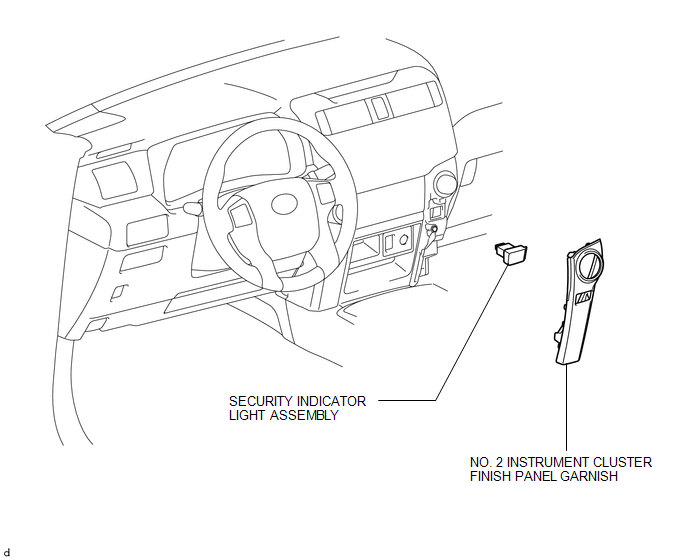
Removal REMOVAL PROCEDURE
1. REMOVE NO. 2 INSTRUMENT CLUSTER FINISH PANEL GARNISH

2. REMOVE SECURITY INDICATOR LIGHT ASSEMBLY
(a) Pull the security indicator light assembly to detach the 4 claws on the backside of the security indicator light assembly. |
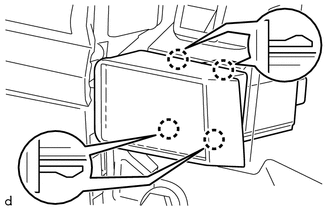 |
(b) Disconnect the connector to remove the security indicator light assembly.
Inspection INSPECTION PROCEDURE1. INSPECT SECURITY INDICATOR LIGHT ASSEMBLY
(a) Apply battery voltage between the terminals of the security indicator light assembly, and check that the security indicator light illuminates. OK:
If the result is not as specified, replace the security indicator light assembly. |
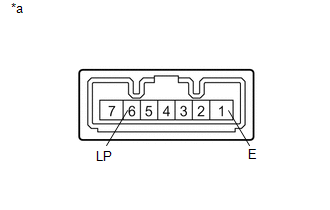 |
Test yourself
A quick Toyota 4Runner quiz: every answer comes with an explanation and a link to the manual page.