Removal
REMOVAL
PRECAUTION / NOTICE / HINT
The procedures required after removing and installing or replacing parts during removal/installation of the Front Suspension Lower Arm Sub-assembly No. 1 LH are listed below.
Procedures Required After Replacement / Removal / Installation of PartsReplaced Part or Performed Procedure | Required Procedure | Effect/Inoperative Function When Required Procedure Is Not Performed | Link |
|---|---|---|---|
Front wheel alignment adjustment |
|
|
 |
Suspension, tires, etc. (Vehicle height changes after replacing the suspension or tires) |
Initialize Left Headlight ECU Sub-assembly No. 1 |
Automatic Headlight Leveling System |
|
HINT:
- Repeat the same procedure for the right side and the left side.
- The following procedure applies to the left side.
PROCEDURE
1. REMOVE FRONT WHEEL
Click here
2. REMOVE ENGINE UNDER COVER NO. 1
Click here
3. REMOVE ENGINE UNDER COVER REAR LH
Click here
4. REMOVE FRONT SUSPENSION LOWER ARM SUB-ASSEMBLY NO. 1
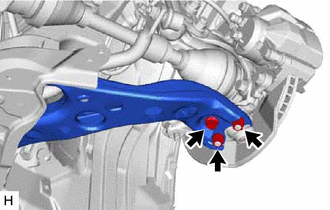
(a) Remove the bolt and 2 nuts, then disconnect the front suspension lower arm sub-assembly No. 1 from the front lower ball joint assembly. |
 |
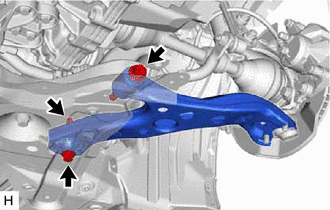
(b) Remove the 2 bolts, nut and front suspension lower arm sub-assembly No. 1 from the front suspension crossmember sub-assembly. NOTICE: Do not turn the nut as it has a stopper. Loosen the bolt with the nut in place. |
 |