Reassembly
REASSEMBLY
PROCEDURE
1. INSTALL ROOF HEADLINER LIGHT BOX
(a) Align the marks on the roof headliner with the roof headliner light box and install them using hot melt adhesive.
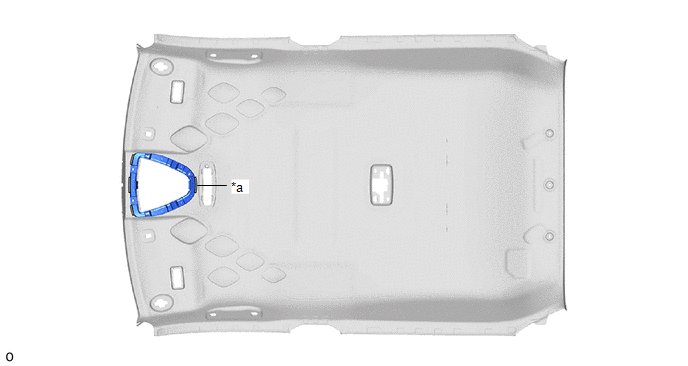
*a |
Marker |
- |
- |
2. INSTALL ANTENNA CABLE SUB-ASSEMBLY NO. 2
Click here
3. INSTALL NO. 1 ROOF WIRE
(a) with courtesy light:
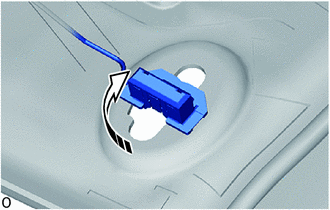
 |
Install in this direction |
(1) Turn the sun visor connectors approximately 90° clockwise to connect the sun visor connector as shown in the illustration.
HINT:
Perform the same procedure on the opposite side.
(b) Apply double-sided adhesive tape as shown in the illustration.
NOTICE:
Apply even pressure to the brackets without exceeding the roof headliner marks.
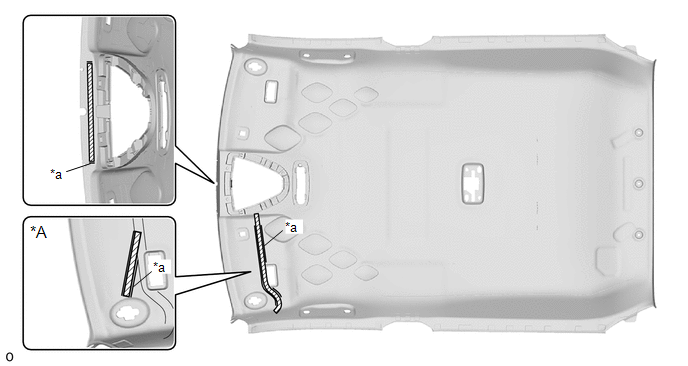
*A |
with courtesy light |
- |
- |
*a |
Marker |
- |
- |
 |
Double-sided adhesive tape |
- |
- |
(c) Align the No. 1 roof wire positioning adhesive tape with the roof headliner marks.
(d) Align the new adhesive tape pieces from each tape with the roof headliner marks and install them.
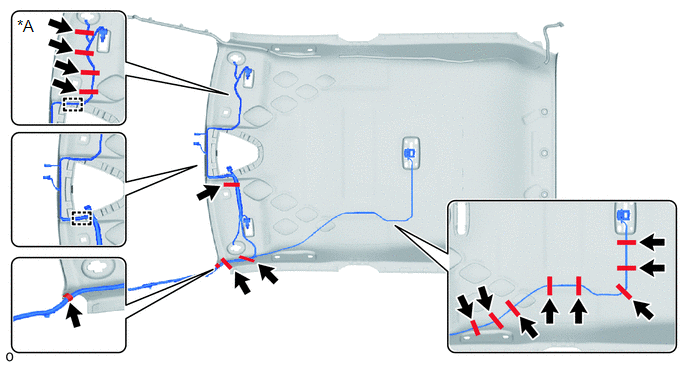
*A |
with courtesy light |
- |
- |
(e) Engage each guide.
4. INSTALL LH REAR ROOF SIDE RAIL BRACE (for vehicles for cold regions)
(a) Align the roof headliner marks with the 4 LH rear roof side rail braces and install them using hot melt adhesive.
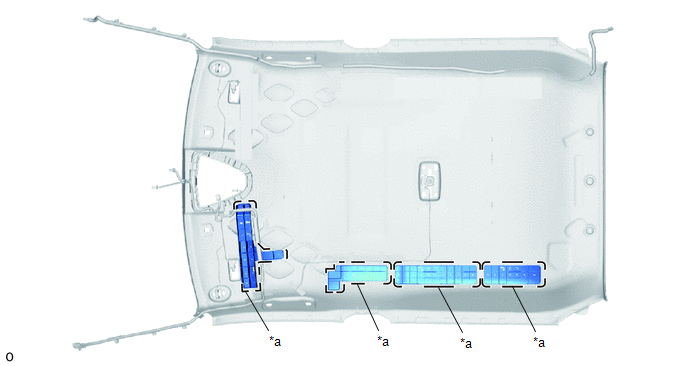
*a |
Marker |
- |
- |
5. INSTALL RH REAR ROOF SIDE RAIL BRACE (for vehicles for cold regions)
(a) Align the roof headliner marks with the 4 RH rear roof side rail braces and install them using hot melt adhesive.
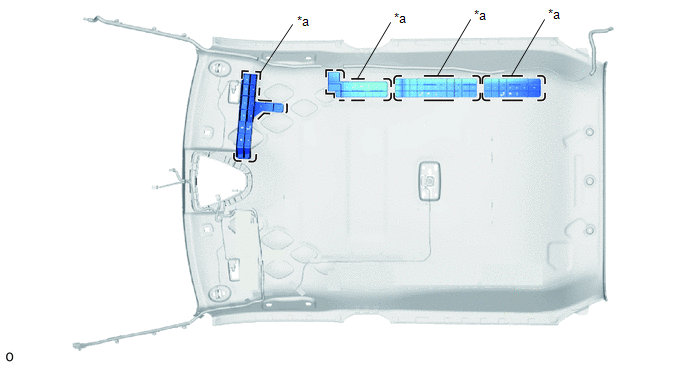
*a |
Marker |
- |
- |
6. INSTALL NO. 2 ROOF HEADLINER PAD (for cold regions)
(a) Align the roof headliner marks with the No. 2 roof headliner pad and install it using hot melt adhesive.
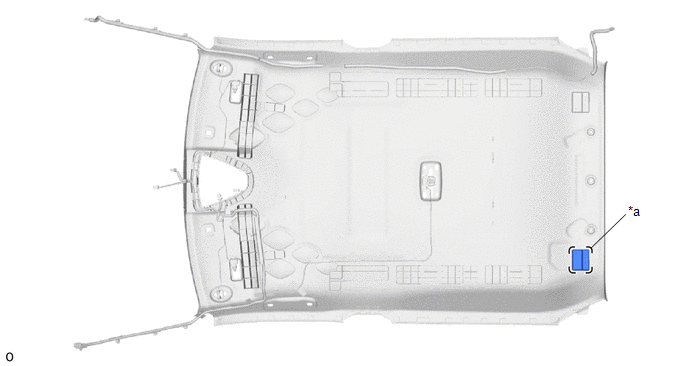
*a |
Marker |
- |
- |
7. INSTALL ROOF HEADLINER PAD (for cold regions)
(a) Align the roof headliner marks with the roof headliner pad and install it using hot melt adhesive.
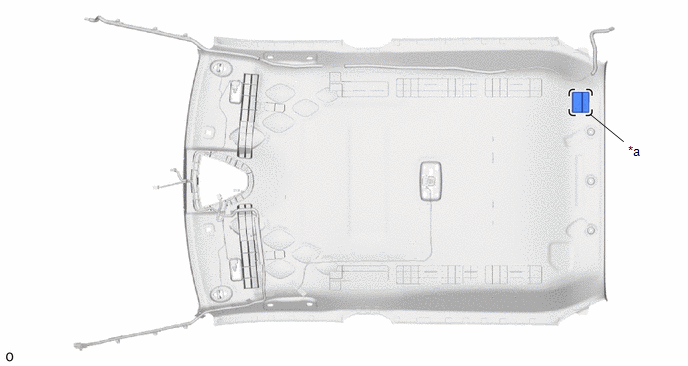
*a |
Marker |
- |
- |
8. INSTALL LH ROOF HEADLINER PAD (for cold regions)
(a) Align the roof headliner marks with the LH roof headliner pad and install it using hot melt adhesive.
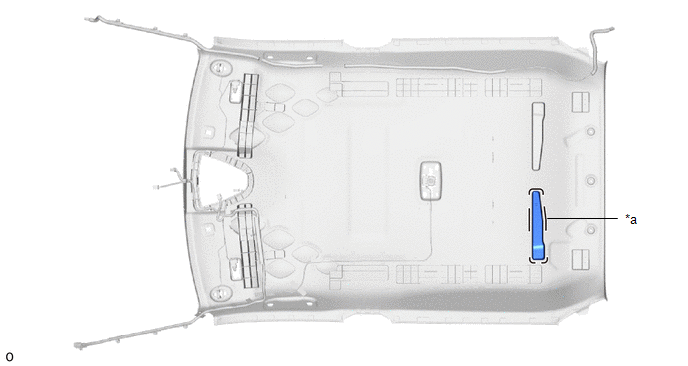
*a |
Marker |
- |
- |
9. INSTALL RH ROOF HEADLINER PAD (for cold regions)
(a) Align the roof headliner marks with the RH roof headliner pad and install it using hot melt adhesive.
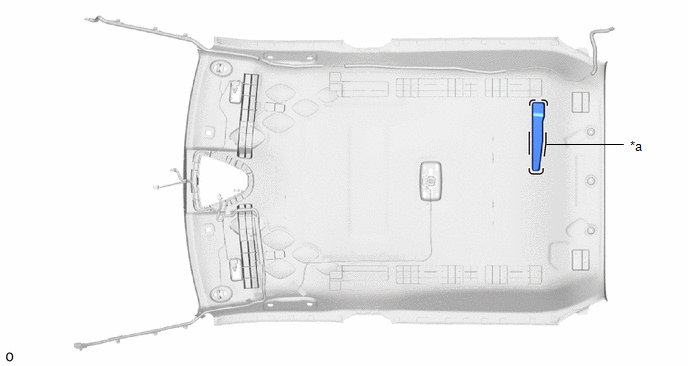
*a |
Marker |
- |
- |
10. INSTALL NO. 3 ROOF INSULATOR PAD (for cold regions)
(a) Align a new No. 3 roof insulator pad with the silencer marks on the roof headliner and install the No. 3 roof insulator pad using double-sided adhesive tape.
HINT:
Remove the protective paper from the double-sided adhesive tape before installing the No. 3 roof insulator pad.
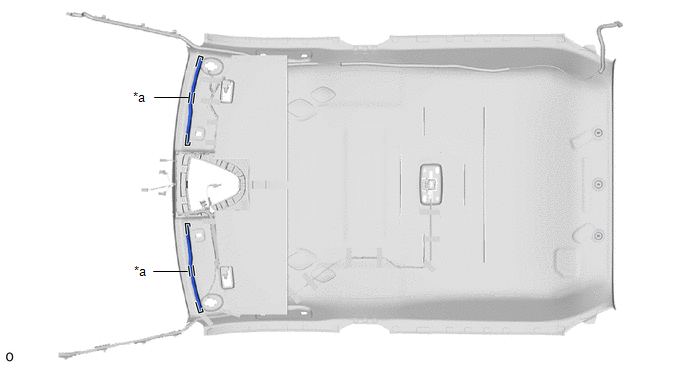
*a |
Marker |
- |
- |
11. INSTALL ROOF INSULATOR PAD
(a) Align the roof headliner marks with the 2 roof insulator pads and install them using hot melt adhesive.
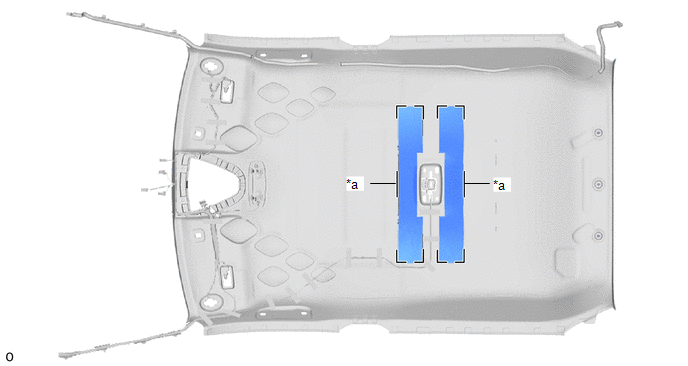
*a |
Marker |
- |
- |
12. INSTALL NO. 2 ROOF INSULATOR PAD
(a) Align the roof headliner marks with the 2 No. 2 roof insulator pads and install them using hot melt adhesive.
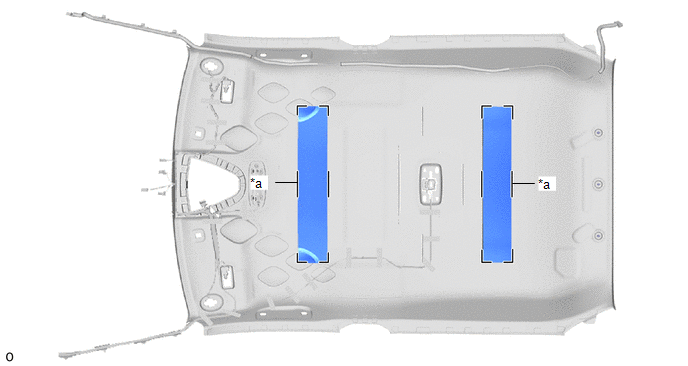
*a |
Marker |
- |
- |
13. INSTALL NO. 1 ROOF INSULATOR PAD
(a) Align the roof headliner marks with the No. 1 roof insulator pad and install it using hot melt adhesive.
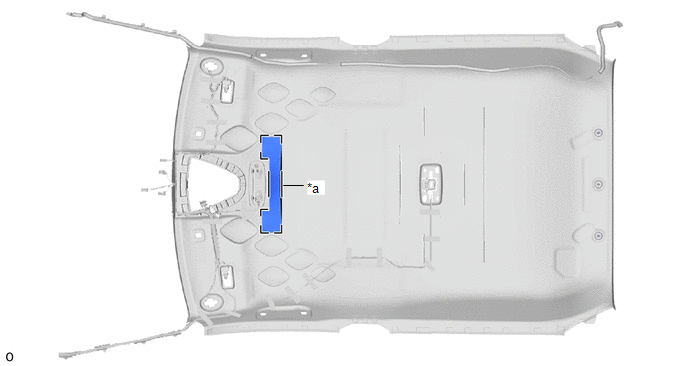
*a |
Marker |
- |
- |
14. INSTALL ROOF HEADLINER PAD (except for vehicles for cold regions)
(a) Align the roof headliner marks with the 2 roof headliner pads and install them using hot melt adhesive.
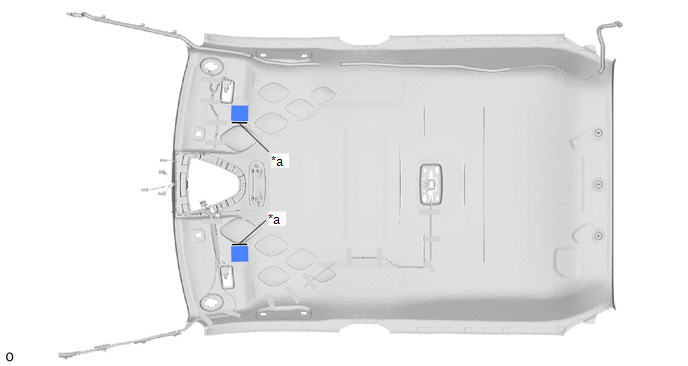
*a |
Marker |
- |
- |