Installation
INSTALLATION
PROCEDURE
1. INSTALL ELECTRIC POWER STEERING MOTOR SHAFT DAMPER
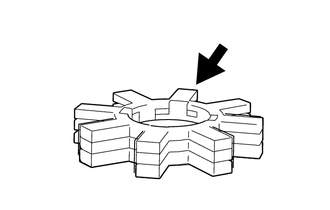
 |
Grease |
(a) Apply grease to a new electric power steering motor shaft damper.
NOTICE:
First wipe off the grease from the serrated portion, then apply the supplied grease to the new power steering ECU assembly or electric power steering column sub-assembly.
(b) Install the power steering motor shaft damper onto the electric power steering column sub-assembly.
2. INSTALL POWER STEERING ECU ASSEMBLY
NOTICE:
- Do not drop the power steering ECU assembly, strike it with tools or subject it to impact.
- If the power steering ECU assembly is subjected to impact, replace it with a new one.
- Do not pull on the wire harness when moving the electric power steering column sub-assembly.
- Keep moisture away from the power steering ECU assembly.
- Do not loosen bolts that are not specified in the procedure.
- Do not allow foreign matter to contaminate the power steering ECU assembly.
(a) for Type A:
(1) Using a "TORX" T40 socket wrench, temporarily install the power steering ECU assembly onto the electric power steering column sub-assembly using the 2 screws.
NOTICE:
When temporarily installing the 2 screws onto the power steering ECU assembly, do not fully tighten them.
(b) for Type B:
(1) Temporarily install the power steering ECU assembly onto the electric power steering column sub-assembly using the 2 bolts.
NOTICE:
When temporarily installing the 2 bolts onto the power steering ECU assembly, do not fully tighten them.
(c) Install the 2 maintenance nuts onto the main steering shaft. Recommended lock nut: Thread diameter 12.0 mm (0.472 in.) Thread pitch 1.25 mm (0.0492 in.) |
|
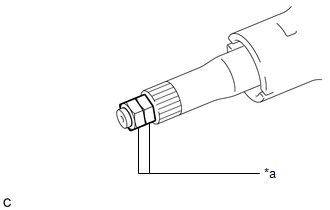
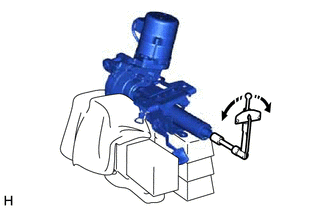
(d) Turn the maintenance nut installed first counterclockwise while turning the maintenance nut installed afterward on the lock assembly clockwise.
NOTICE:
Do not apply excessive torque to the lock nuts using a tool such as an impact wrench.
HINT:
The lock nuts are used to rotate the steering main shaft during the steering main shaft rotating torque check.
Remove the lock nuts after performing this check.
(e) Secure the steering column assembly in a vise between aluminum plates, rags and wooden blocks. NOTICE:
|
|
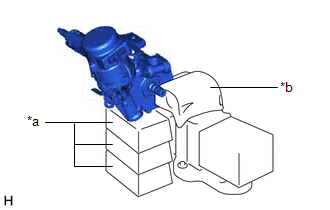
(f) Turn the main steering shaft 180 degrees counterclockwise, then 180 degrees clockwise at a speed of 60 rpm, and repeat 2 to 3 times to center the axis of the power steering ECU assembly. [*1] |
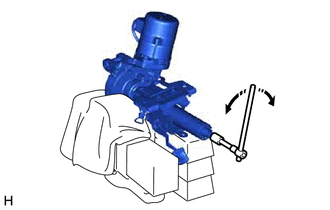 |
(g) for Type A:
(1) Using a "TORX" T40 socket wrench, tighten the 2 screws. [*2]
Torque:
18.5 N·m {189 kgf·cm, 14 ft·lbf}
(h) for Type B:
(1) Tighten the 2 bolts. [*2]
Torque:
18.5 N·m {189 kgf·cm, 14 ft·lbf}
(i) Using a torque wrench, measure the rotation torque of the main steering shaft. Preload: 1.2 to 2.4 N*m (13 to 24 kgf*cm, 11 to 21 lbf*in.) NOTICE: Make sure there is no abnormal resistance during rotation. If the rotation torque is not within specification, remove the 2 bolts and repeat steps [*1] and [*2] to recenter the axis of the power steering ECU assembly. |
 |
(j) Remove the 2 maintenance nuts.
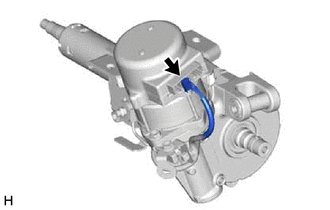
(k) Connect the connector. |
 |
3. INSTALL THE STEERING COLUMN ASSEMBLY
Click here
4. CALIBRATE THE TORQUE SENSOR ZERO POINT
Click here
5. WRITE THE ASSIST MAP
Click here