Installation
INSTALLATION
PROCEDURE
1. INSTALL REAR CONSOLE BOX ASSEMBLY
(a) Engage the guides to install the rear console box assembly, as shown in the illustration.
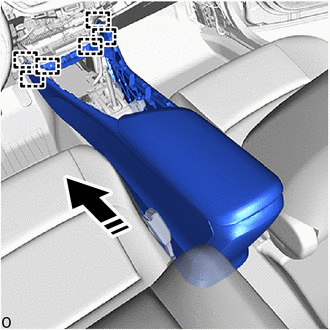
 |
Install in this direction |
(b) Connect the connector.
(c) Install the 4 bolts.
(d) Install the 4 screws.
2. INSTALL CONSOLE BOX MAT
(a) Install the console box mat.
3. INSTALL CONSOLE BOX CUP HOLDER NO. 2
(a) with light:
(1) Connect the connector.
(b) Engage the claws to install the No. 2 console box cup holder, as shown in the illustration.
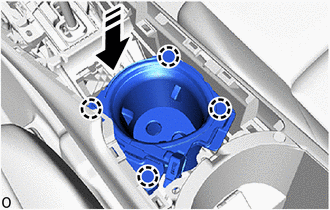
|
Install in this direction |
4. INSTALL CONSOLE BOX CUP HOLDER
(a) with light:
(1) Connect the connector.
(b) Engage the claws to install the console box cup holder, as shown in the illustration.
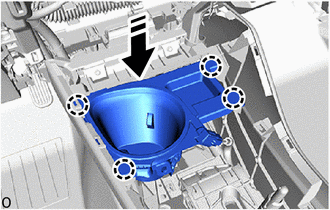
|
Install in this direction |
5. INSTALL CONSOLE UPPER PANEL SUB-ASSEMBLY
(a) Connect each connector.
(b) Engage the clips to install the console upper panel sub-assembly, as shown in the illustration.
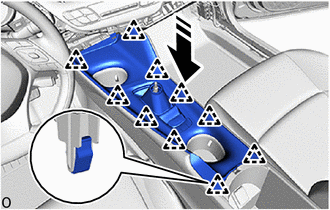
|
Install in this direction |
6. INSTALL SHIFT LEVER KNOB SUB-ASSEMBLY
Click here
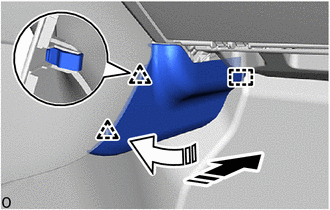
7. INSTALL NO. 2 FRONT CONSOLE BOX INSERT
(a) Engage the guide and clips to install the No. 2 front console box insert, as shown in the illustration.
|
Install in this direction (1) |
 |
Install in this direction (2) |
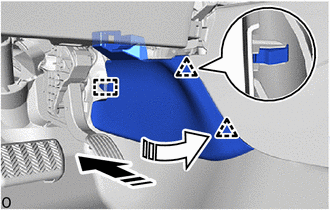
8. INSTALL CONSOLE BOX INSERT
(a) Engage the guide and claws to install the console box insert, as shown in the illustration.
|
Install in this direction (1) |
|
Install in this direction (2) |
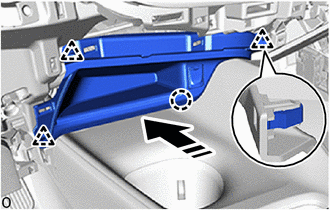
9. INSTALL INSTRUMENT PANEL BOX ASSEMBLY
(a) with stereo plug adapter:
(1) Connect the connector.
(b) Engage the claw and clips to install the instrument panel box assembly, as shown in the illustration.
|
Install in this direction |
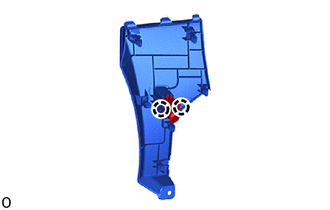
10. INSTALL LOWER CENTER INSTRUMENT PANEL FINISH PANEL
(a) Engage the claws to connect the cooler thermistor. |
 |
(b) Engage the clips to install the lower center instrument panel finish panel, as shown in the illustration.
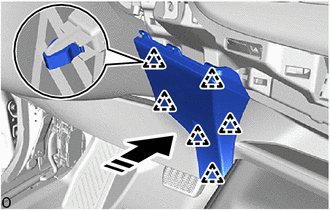
|
Install in this direction |
11. INSTALL INSTRUMENT CLUSTER FINISH PANEL GARNISH SUB-ASSEMBLY
(a) Engage the clips to install the instrument cluster finish panel trim assembly, as shown in the illustration.
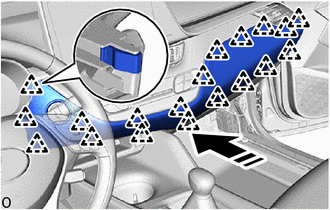
|
Install in this direction |
12. INSTALL NO. 1 INSTRUMENT PANEL LOWER COVER SUB-ASSEMBLY
(a) Engage the guide and claws to install the No. 1 instrument panel lower cover sub-assembly, as shown in the illustration.
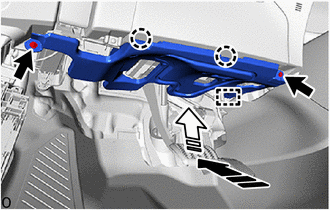
|
Install in this direction (1) |
|
Install in this direction (2) |
(b) Reinstall the 2 screws.
13. INSTALL LH SUN VISOR SIDE TRIM PANEL
(a) Engage the clips to install the LH sun visor side trim panel, as shown in the illustration.
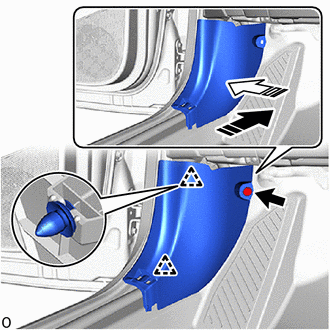
|
Install in this direction (1) |
|
Install in this direction (2) |
(b) Install the clip.
14. INSTALL FRONT DOOR SILL PLATE LH
(a) Engage the claws and guides to install the front door sill plate LH, as shown in the illustration.
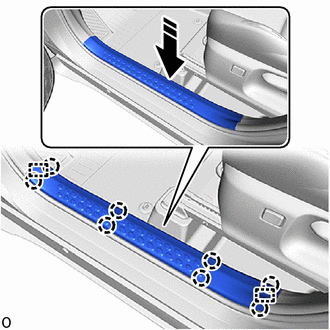
|
Install in this direction |