Lighting
Headlamp assy LH
In this manual: Lighting
16steps
~96min
4/5difficulty
Done 0 of 16
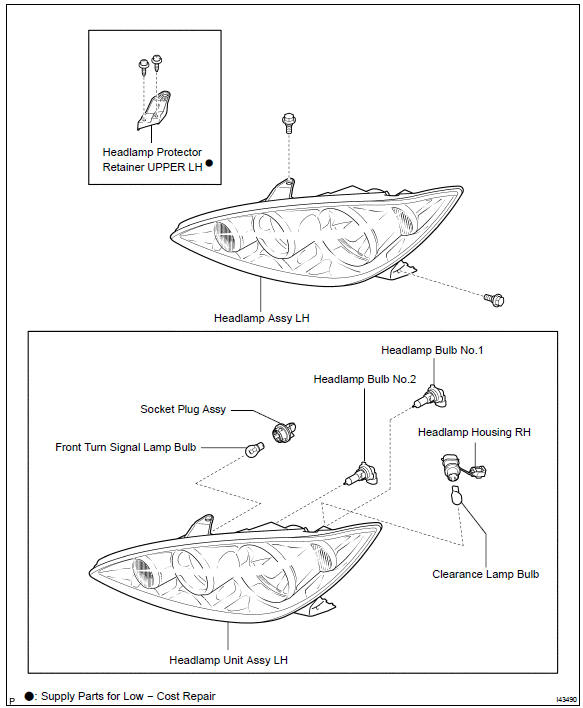
COMPONENTS
 Remove headlamp assy LH 3. REMOVE HEADLAMP, No.2 BULB
 Remove headlamp, No.2 Bulb 4. REMOVE HEADLAMP, No.1 BULB
 Remove headlamp, No.1 Bulb 5. REMOVE FRONT TURN SIGNAL LAMP BULB
 Remove clearance lamp bulb
HINT:
- COMPONENTS:
- Use the same procedures for the RH side and LH side.
- The procedures listed below are for the LH side.
- Installation is in the reverse order of removal.
- REMOVE FRONT BUMPER ASSY
- REMOVE HEADLAMP ASSY LH
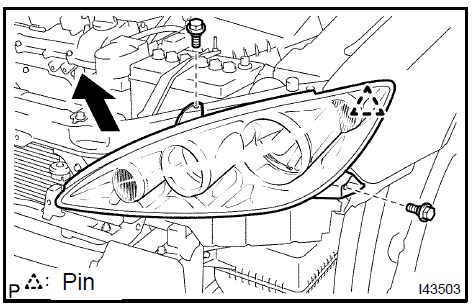
- Remove the 2 bolts and disengage the pin.
- Pull the headlamp assy LH in the direction indicated by the arrow and remove the headlamp assy LH.
Remove headlamp assy LH 3. REMOVE HEADLAMP, No.2 BULB
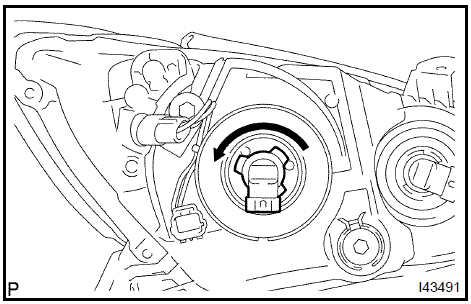
a. Turn in the direction indicated by the arrow and remove the headlamp, No.2 bulb.
Remove headlamp, No.2 Bulb 4. REMOVE HEADLAMP, No.1 BULB
a. Turn in the direction indicated by the arrow and remove the headlamp, No.1 bulb.
Remove headlamp, No.1 Bulb 5. REMOVE FRONT TURN SIGNAL LAMP BULB
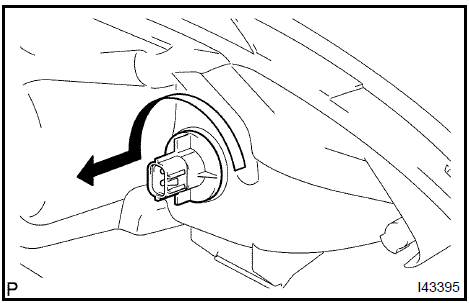
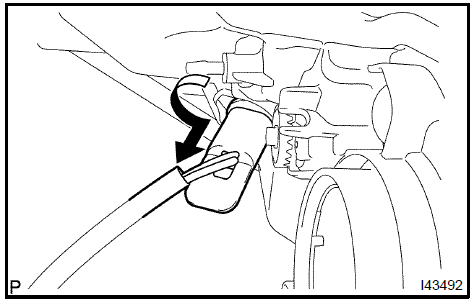
a. Turn in the direction indicated by the arrow and remove the socket plug assy and the front turn signal lamp bulb as a unit.
- Turn in the direction indicated by the arrow and remove the front turn signal lamp bulb.
- Remove the socket plug assy.
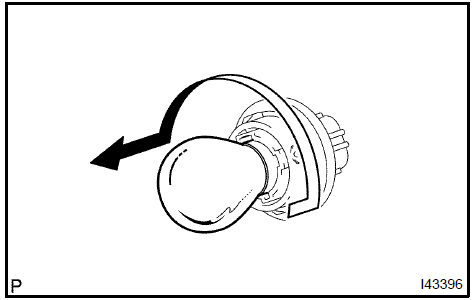
- Turn in the direction indicated by the arrow and remove the headlamp housing RH and the clearance lamp bulb as a unit.
- Remove the clearance lamp bulb from the headlamp housing RH.
Remove clearance lamp bulb
- VEHICLE PREPARATION FOR HEADLAMP AIM ADJUSTMENT
- PREPARATION FOR HEADLAMP AIMING (Using a screen)
- HEADLAMP AIMING INSPECTION
- HEADLAMP AIMING ADJUSTMENT
- VEHICLE PREPARATION FOR FOG LAMP AIM ADJUSTMENT
- PREPARATION FOR FOG LAMP AIMING
- FOG LAMP AIMING INSPECTION
- FOG LAMP AIMING ADJUSTMENT
Test yourself
A quick Toyota Camry quiz: every answer comes with an explanation and a link to the manual page.
Was this page helpful?