Fuel Pump Replacement
· Remove the rear seat cushion.
· Remove the screws and slide the fuel pump cover aside.
· Disconnect the wiring from the pump and the fuel level sender at the top of the pump assembly and secure the wiring to the body with adhesive tape.
· Relieve the fuel system pressure.
· Disconnect the negative battery cable.
· To prevent fuel from leaking out of the supply line, remove the filter cover located in the engine compartment.
· Loosen the connecting bolt and disconnect the outlet line from the fuel pump (Fig. 4.3.1.). When unscrewing the bolt, hold the pump assembly with a second wrench. Plug or cover the end of the line.
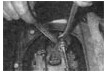
Fig. 4.3.1. Removing the outlet line from the fuel pump
· Using pliers, loosen the clamp and disconnect the return hose at the top of the fuel pump.
· Remove the screws securing the pump to the fuel tank.
· Carefully pull the pump assembly with the level sender out of the tank, taking care not to damage the float and arm.
· Remove the gasket from the top of the fuel tank.
· Remove the fuel level sender, then loosen the clamps securing the short hose to the fuel pump.
· Remove the pump from the bracket base by sliding it sideways, then pull it off the hose. Remove the hose and remove the seat from the bracket. If necessary, remove the clip and the filter.
Installation Installation of the pump is performed in the reverse order of removal. Before tightening the clamps, make sure the pump is securely installed in the bracket. Replace the gasket. Before installing the cover, switch on the ignition and check the supply and return lines for leaks.
Test yourself
A quick Toyota Carina quiz: every answer comes with an explanation and a link to the manual page.