Rear Differential Side Gear Shaft Oil Seal
Components
COMPONENTS
ILLUSTRATION
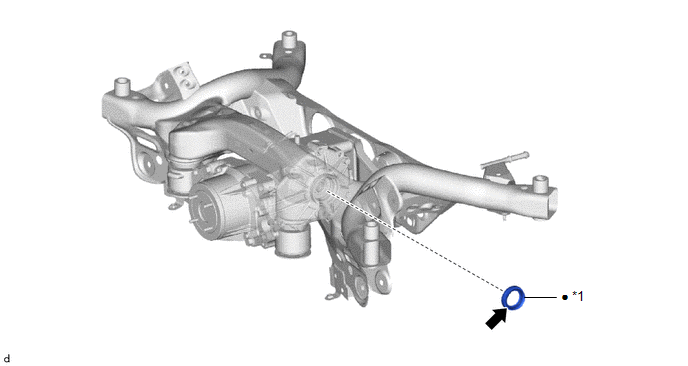
*1 |
REAR DRIVE SHAFT OIL SEAL |
- |
- |
● |
Non-reusable part |
 |
MP grease |
Replacement
REPLACEMENT
The necessary procedures (adjustment, calibration, initialization, or registration) that must be performed after parts are removed and installed, or replaced during the rear drive shaft oil seal removal/installation are shown below.
Necessary Procedures After Parts Removed/Installed/ReplacedReplacement Part or Procedure | Necessary Procedures | Effect/Inoperative Function When Necessary Procedures are not Performed | Link |
|---|---|---|---|
Rear wheel alignment adjustment |
|
|
 |
Reset memory |
Dynamic torque control AWD system |
|
|
Suspension, tires, etc. |
Rear television camera assembly optical axis (Back camera position setting) |
Parking assist monitor system |
|
Initialize headlight ECU sub-assembly LH |
Automatic headlight beam level control system |
|
HINT:
- Use the same procedure for the RH side and LH side.
- The following procedure is for the LH side.
PROCEDURE
1. REMOVE REAR DRIVE SHAFT ASSEMBLY
Click here
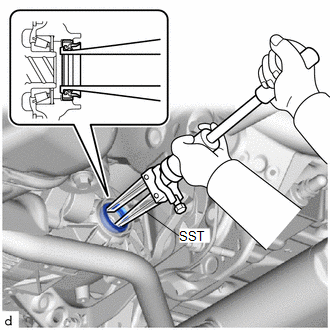
2. REMOVE REAR DRIVE SHAFT OIL SEAL
(a) Using SST, remove the rear drive shaft oil seal from the rear differential carrier assembly. SST: 09308-00010 NOTICE: Be careful not to damage the rear differential carrier assembly. |
 |
3. INSTALL REAR DRIVE SHAFT OIL SEAL
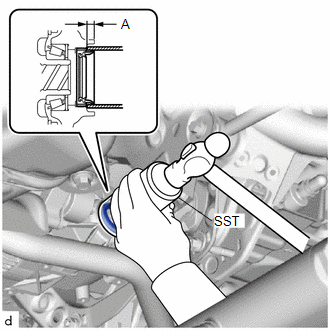
(a) Coat the lip of a new rear drive shaft oil seal with MP grease.
(b) Using SST and a hammer, tap the rear drive shaft oil seal into the rear differential carrier assembly until it reaches the standard value. SST: 09223-00010 Standard depth (A): 6.7 to 7.7 mm (0.264 to 0.303 in.) (from the edge of the rear differential carrier assembly) NOTICE:
|
 |
4. INSTALL REAR DRIVE SHAFT ASSEMBLY
Click here