Transfer unit
COMPONENTS
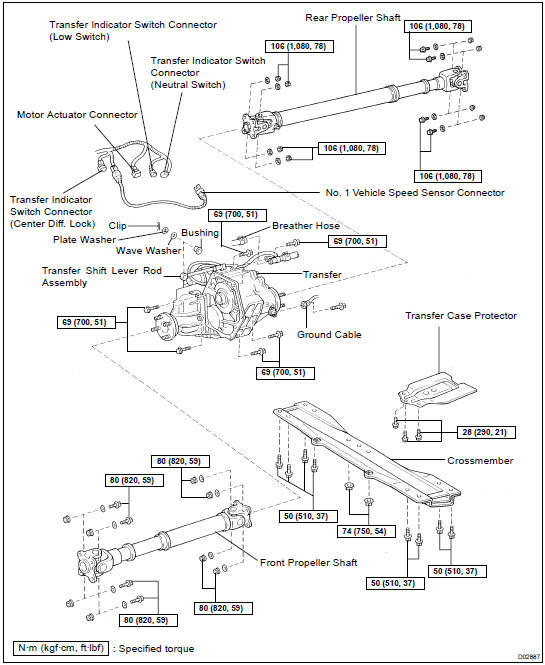
INSTALLATION
Installation is in the reverse order of removal ( TR-4 ).
HINT:
- Apply MP grease to the transfer adaptor oil seal.
- After install, do the road test.
REMOVAL
1. RAISE VEHICLE
NOTICE: Make sure that the vehicle is securely supported.
2. REMOVE TRANSFER CASE PROTECTOR

Remove the 3 bolts and transfer case protector.
Torque: 28 N·m
3. DRAIN TRANSFER OIL
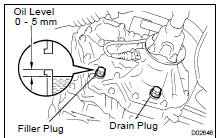
Oil grade: API GL-4 or GL-5 Viscosity: SAE 75 W-90
Capacity: 1.3 liters (1.4 US qts, 1.1 lmp. qts) Torque: 37 N·m
4. REMOVE FRONT AND REAR PROPELLER SHAFTS ( PR-4 )
5. DISCONNECT TRANSFER SHIFT LEVER ROD ASSEMBLY
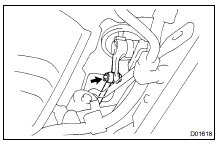
Remove the clip, plate washer, wave washer and bushing, and disconnect the transfer shift lever rod assembly.
6. DISCONNECT GROUND CABLE
Remove the bolt and disconnect the ground cable from the transfer
7. REMOVE CROSSMEMBER
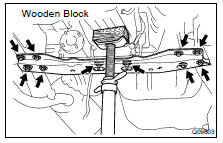
(a) Support the transmission, as shown.
NOTICE: Use a wooden block so not to damage the transmission oil pan.
(b) Remove the 8 bolts, 2 nuts and crossmember.
Torque:
Bolt: 50 N·m Nut: 74 N·m
8. DISCONNECT BREATHER HOSE
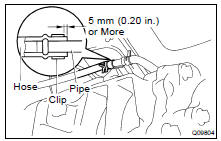
HINT: At the time of installation, assemble the clip to the position shown in the illustration.
9. DISCONNECT NO. 1 VEHICLE SPEED SENSOR, 3 TRANSFER INDICATOR SWITCH AND MOTOR ACTUATOR CONNECTORS
10. JACK UP TRANSFER SLIGHTLY
Using a transmission jack, support the transfer.
11. REMOVE TRANSFER FROM TRANSMISSION

(b) Remove the 6 transfer adaptor rear mounting bolts.
Torque: 69 N·m
(c) Pull out the transfer down and toward the rear.
Test yourself
A quick Toyota Land Cruiser quiz: every answer comes with an explanation and a link to the manual page.